Lease Abstraction Data Entry
This guide saves time and prevents errors by walking you through every data-entry field and where to link source documents so leases are captured accurately and auditable. It highlights critical distinctions (e.g., lease vs rent commencement), when to record amendments instead of overwriting, and what items must be documented (deposits, insurance, escalations, charges, provisions). Follow it to ensure complete, consistent abstracts and smooth downstream billing/reporting.
Alert: BEFORE YOU BEGIN:
Confirm the property has been created with the appropriate property information.
Property Name — Matches the property name stated in the lease; includes the store number when applicable.
Legal Name — Matches the landlord’s legal name.
Property Address — Matches the lease.
Type of Opportunity/Zoning — Confirm the appropriate property type (e.g., Commercial).
GLA (SF) — Matches the property square footage stated in the lease. Do not estimate missing square footage.
Suites/Units — Confirm all applicable spaces are established with the correct suite/unit name and leaseable SF. Do not name spaces after tenants.
Landlord Contacts — Confirm the applicable landlord contact(s) are associated with the property.
Need to add a property and/or space/unit? See How to Add and Edit a Property andHow to Add and Edit Spaces.
A tenant record must be generated to access the lease abstraction pages.
Need to add a tenant? See How to Add and Edit a Tenant.
How to Navigate to the Tenant for Data Entry
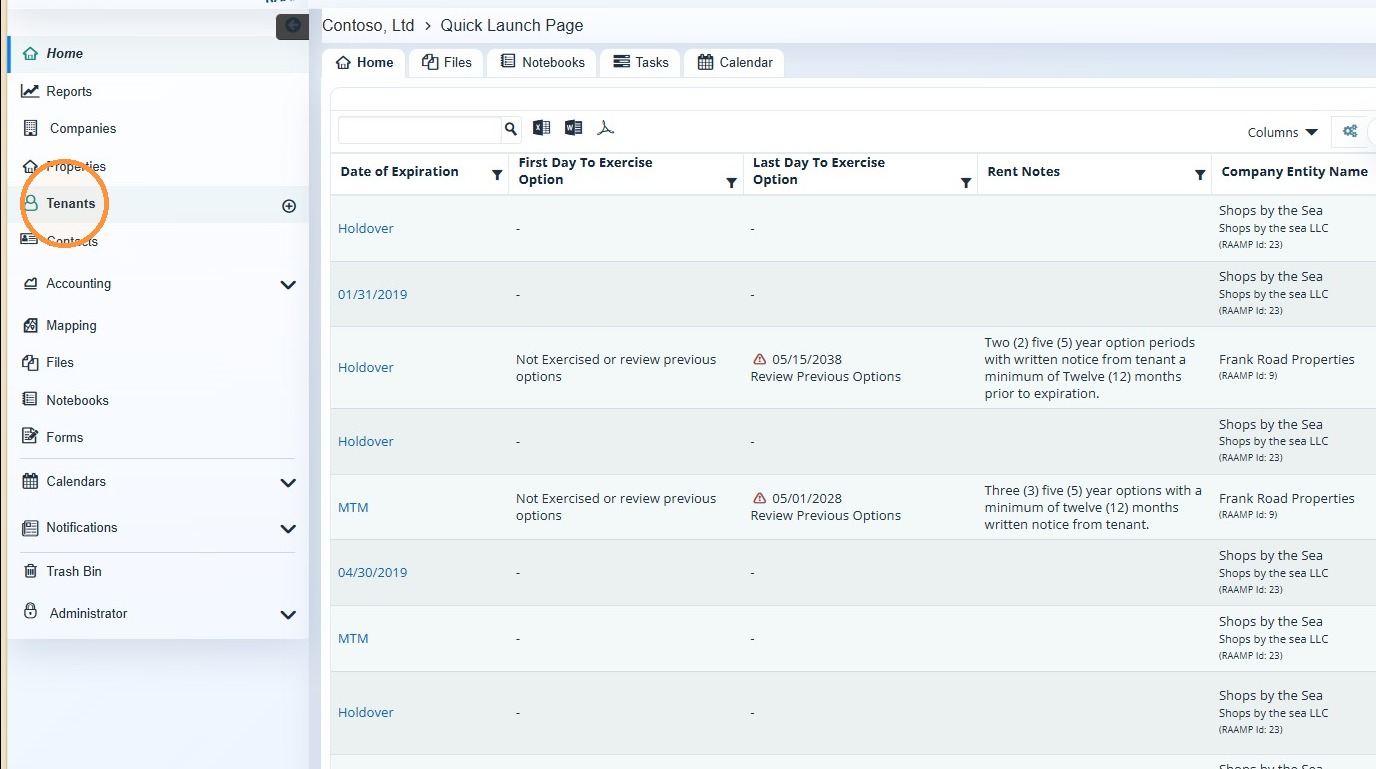
1. From the navigation menu, select Tenants.
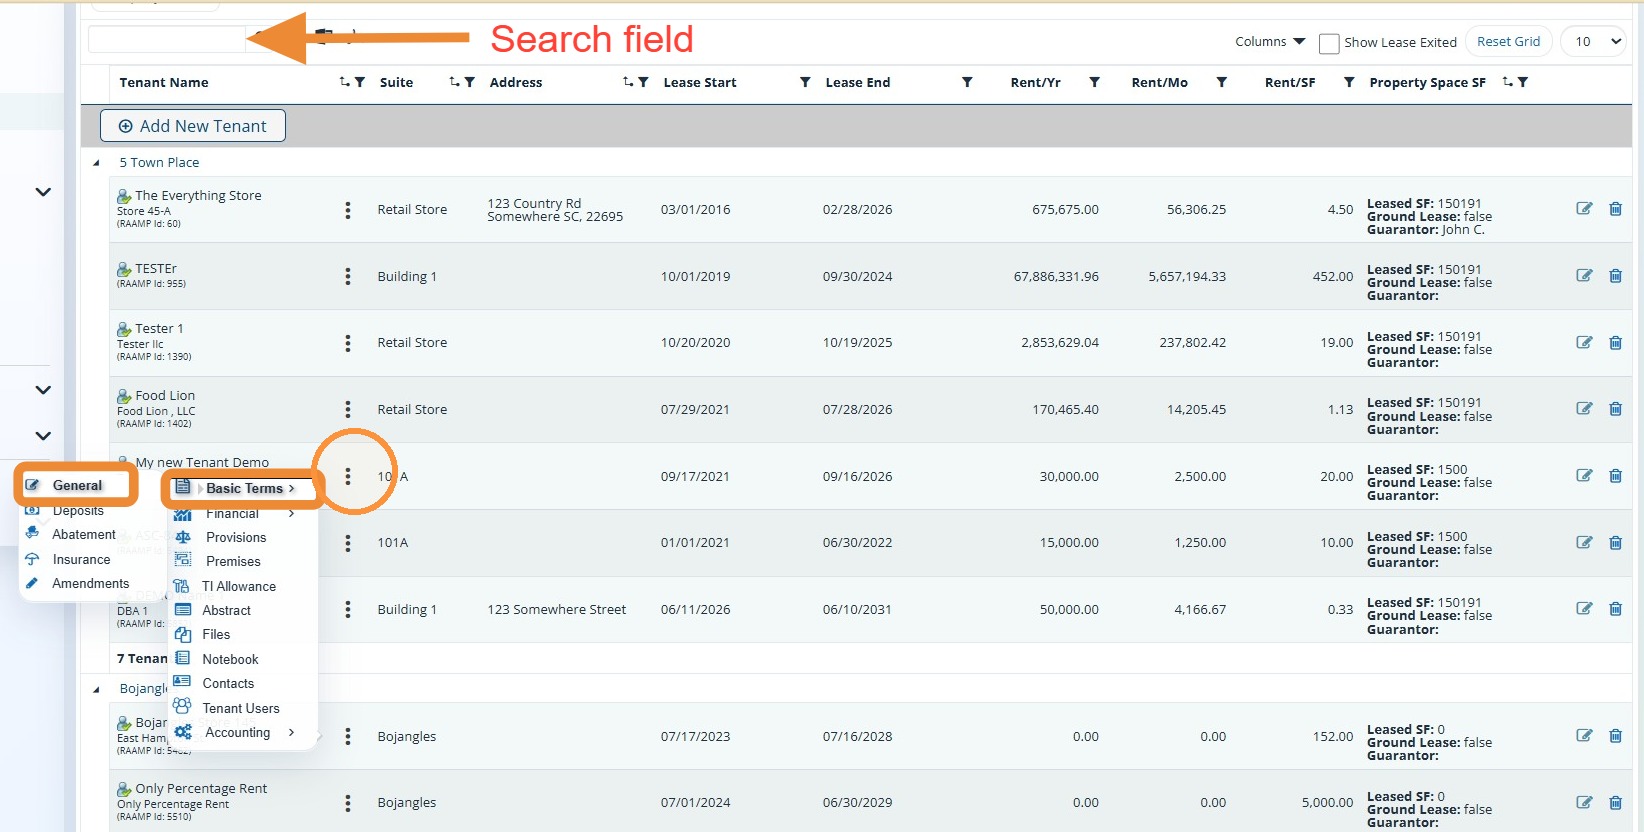
2. Locate the Tenant > Select the tenant's three-dot menu > Select Basic Terms > Select General.
NOTE: You can locate the tenant quickly by searching for it.
Tip: Have the lease available and uploaded to the tenant's files tab. See How to Upload Files and Extend Files Access for Tenants.
General Information
Tip: Purpose: Store the primary lease information that drives the remainder of the abstraction.
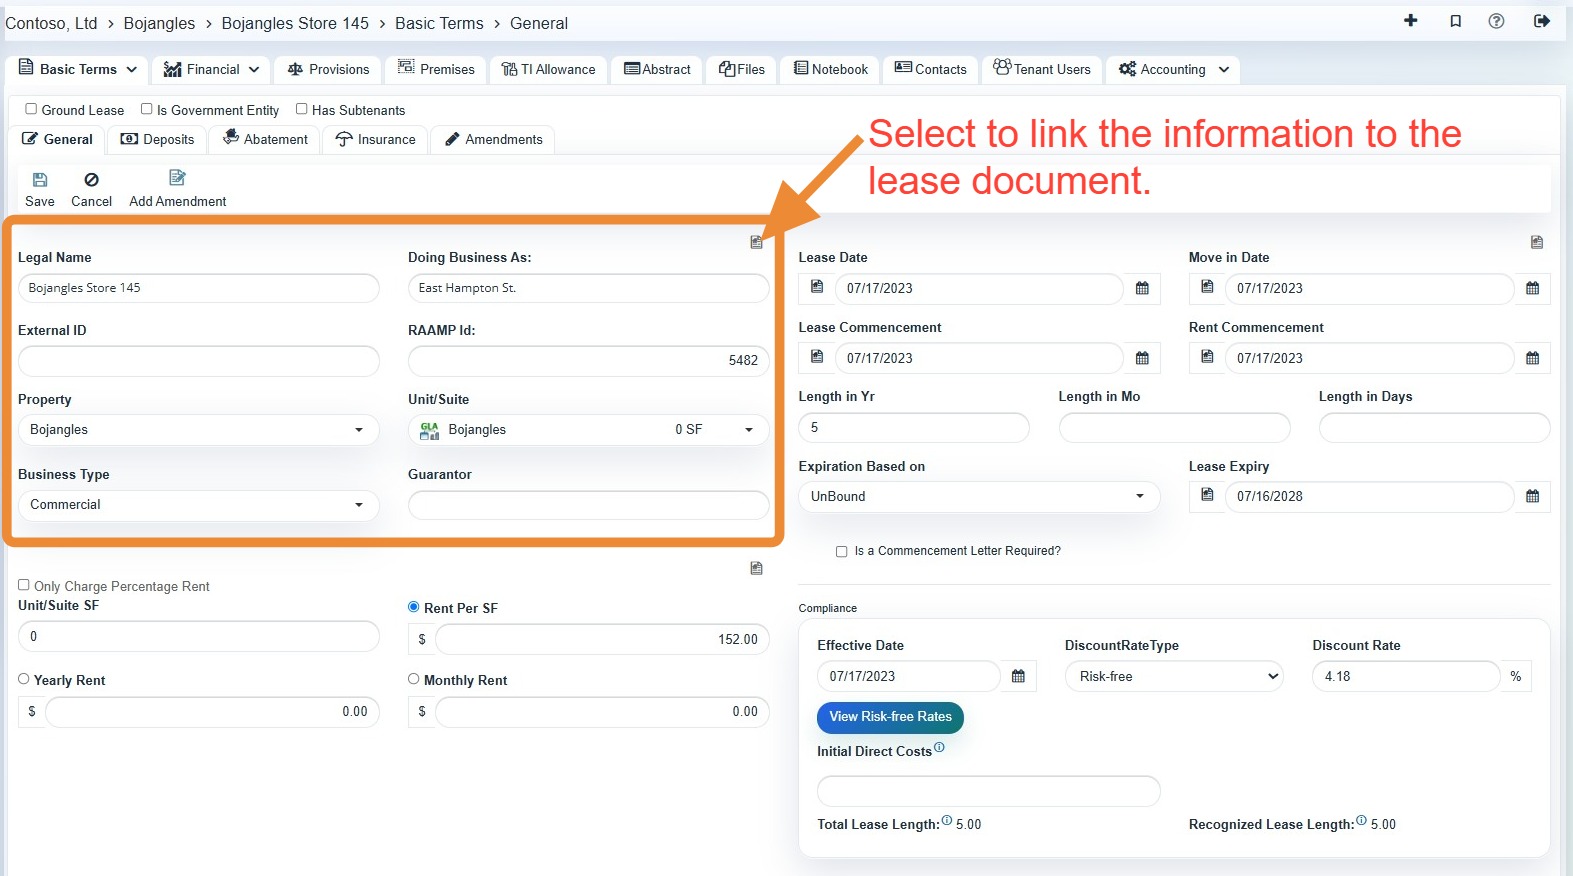
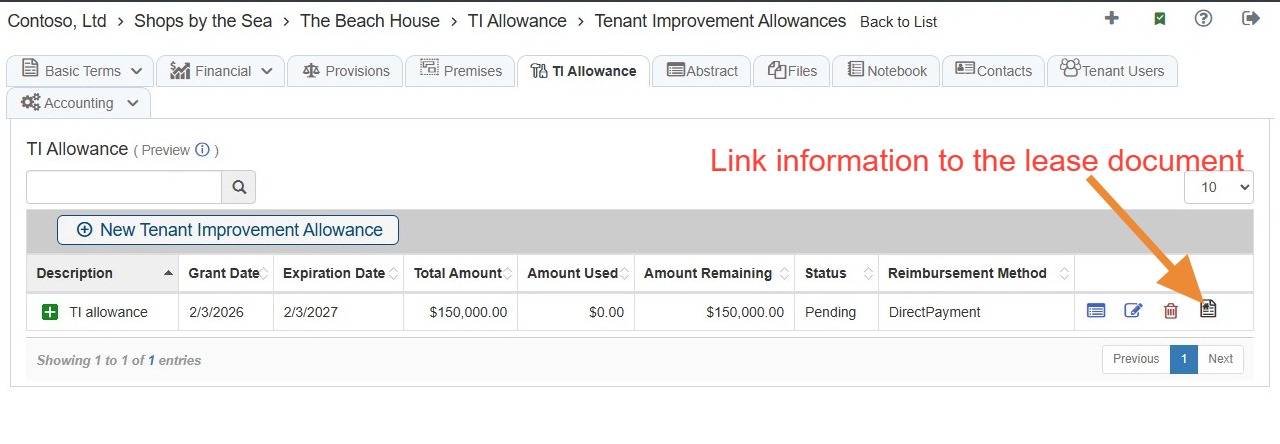
3. Complete the tenant information > Link tenant information to the lease document.
- Doing Business As (DBA), only if stated in the lease
- Guarantor, when provided
Best practice: Do not assume or add information that is not written in the lease. For example, leave the DBA blank when the lease does not provide one.
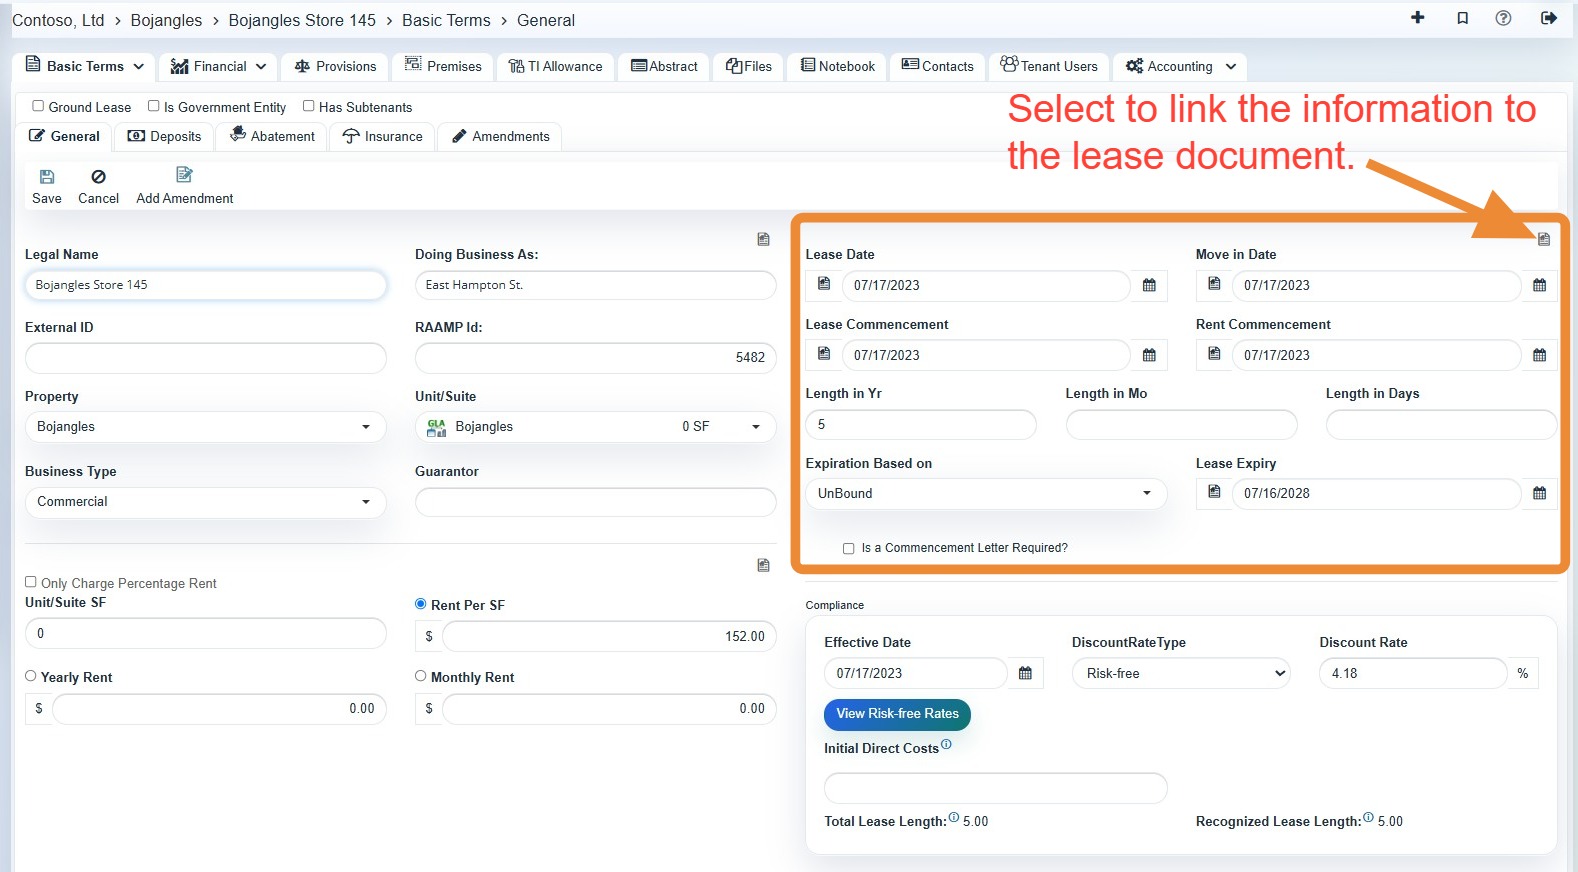
4. Complete the lease information > Link the lease information to the lease document.
Key distinction: Lease commencement and rent commencement are not always the same. Double-check both dates because they affect expiration, billing, and charge start dates.
5. Complete the rent information > Link the rent information to the lease document.
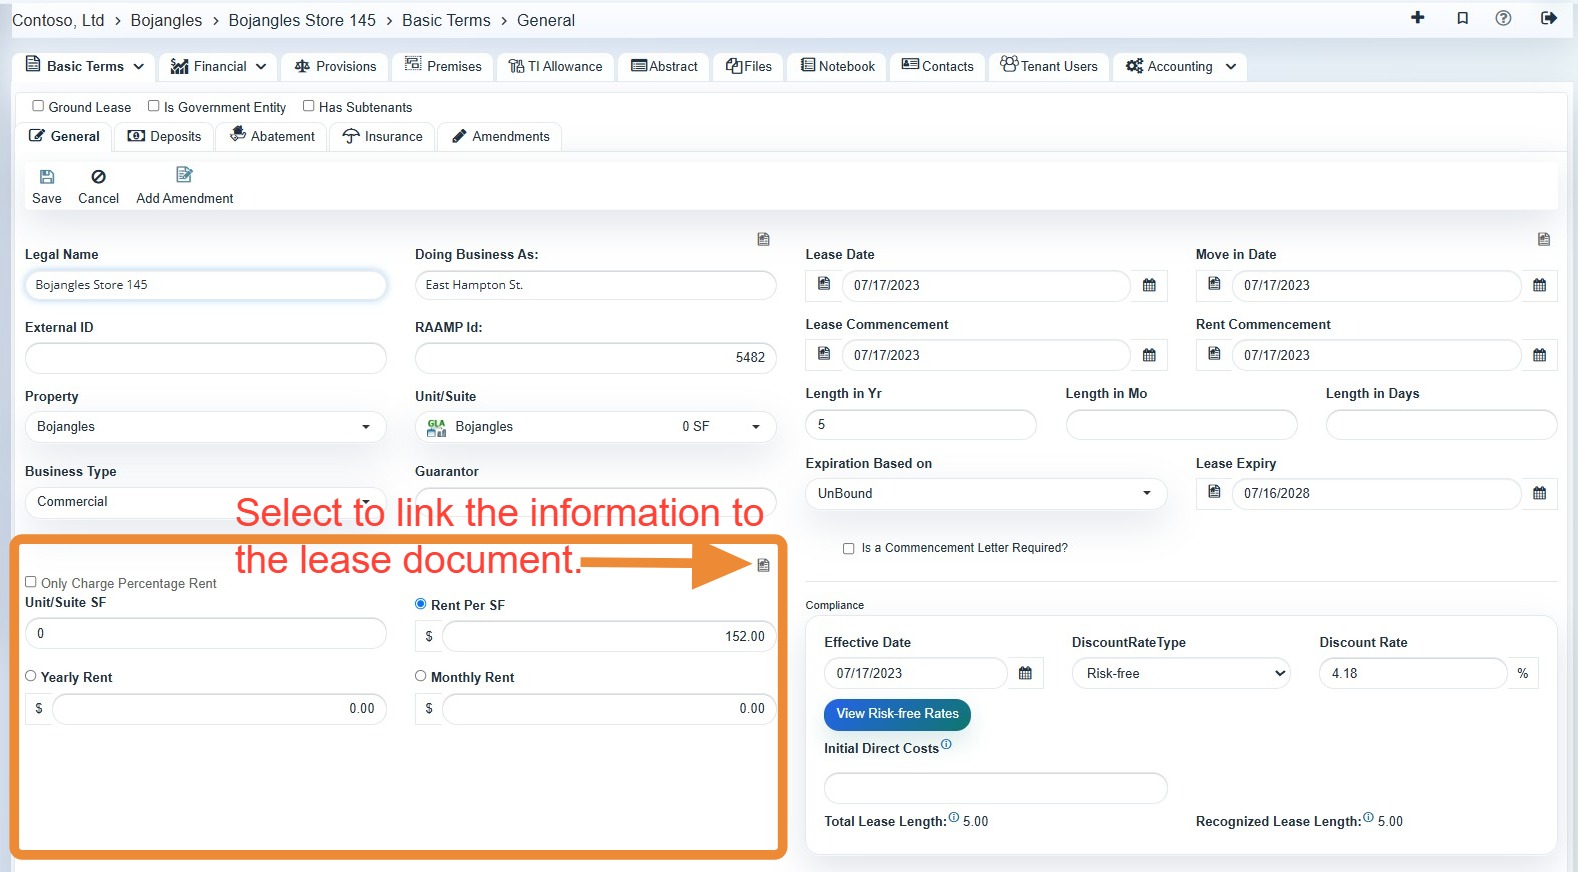
6. If the Ground Lease checkbox is selected, the Rent Per SF box/option will not appear.
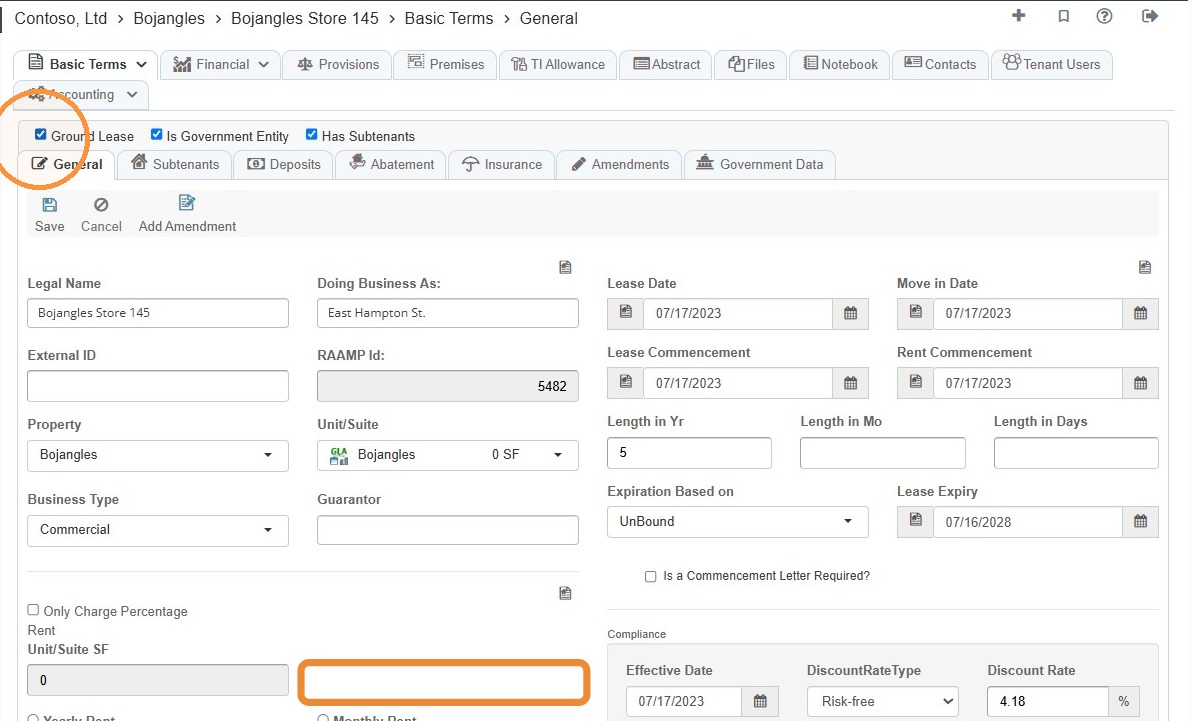
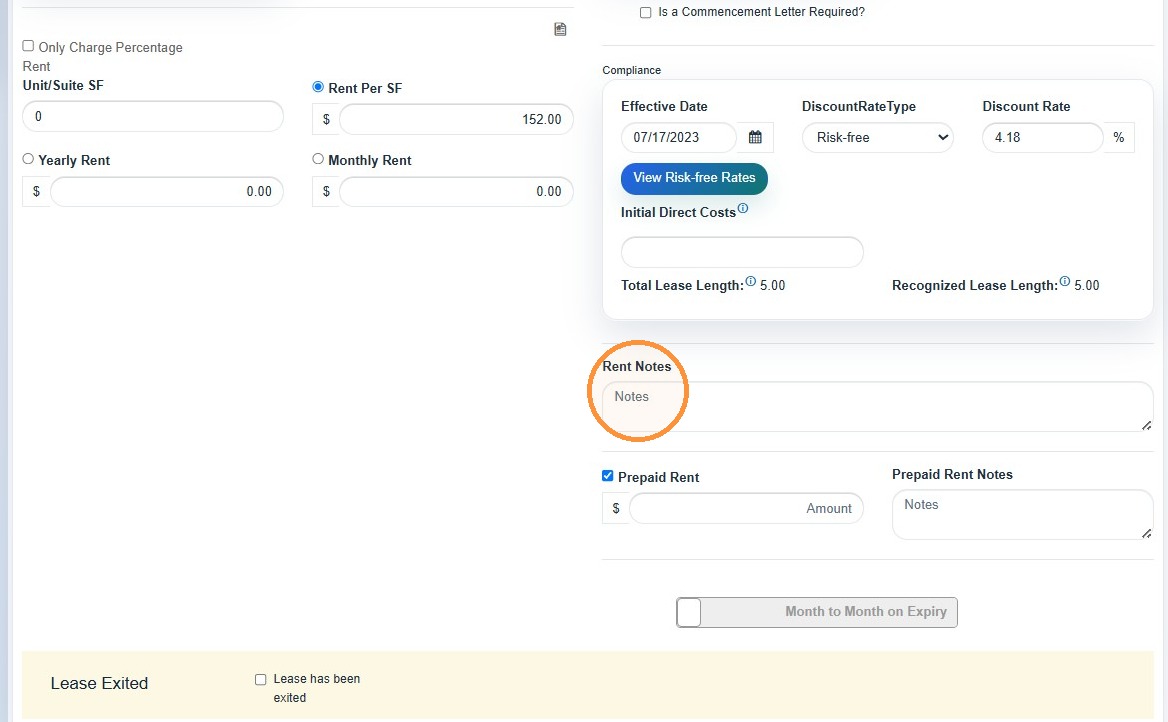
7. Select the Rent Notes to add any explanatory rent notes.
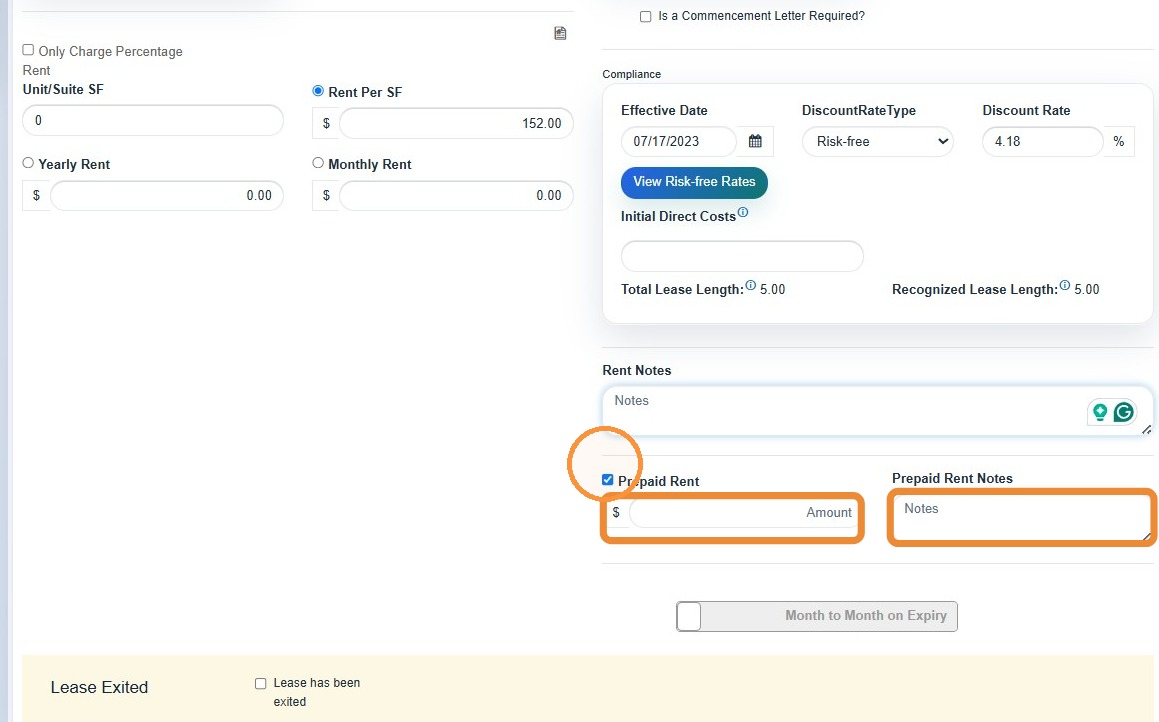
8. If prepaid rent exists, select the prepaid-rent checkbox > Enter the amount > Add a note such as "Paid at lease execution."
Use Rent Notes for unclear, unusual, conditional, or potentially changing rent language.
Document ambiguity rather than silently making an assumption.
9. Review the holdover language > Toggle to Tenant has Holdover > Enter holdover information.
For detailed instructions, refer to How to Add Holder.
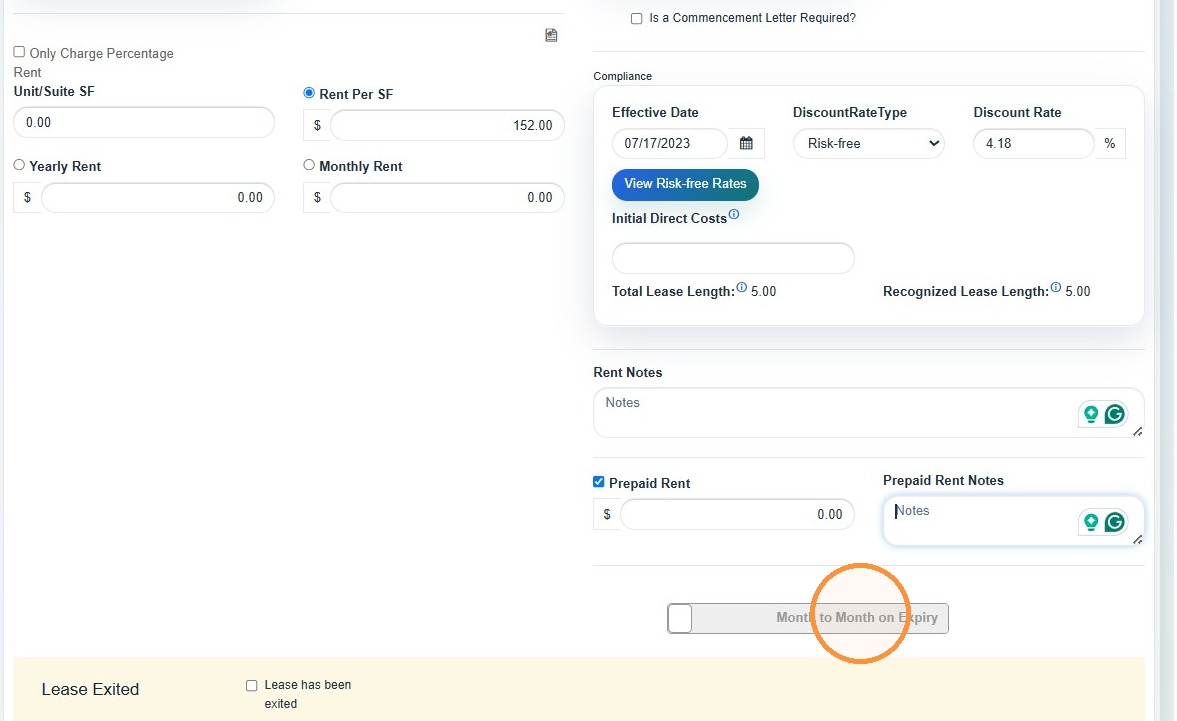
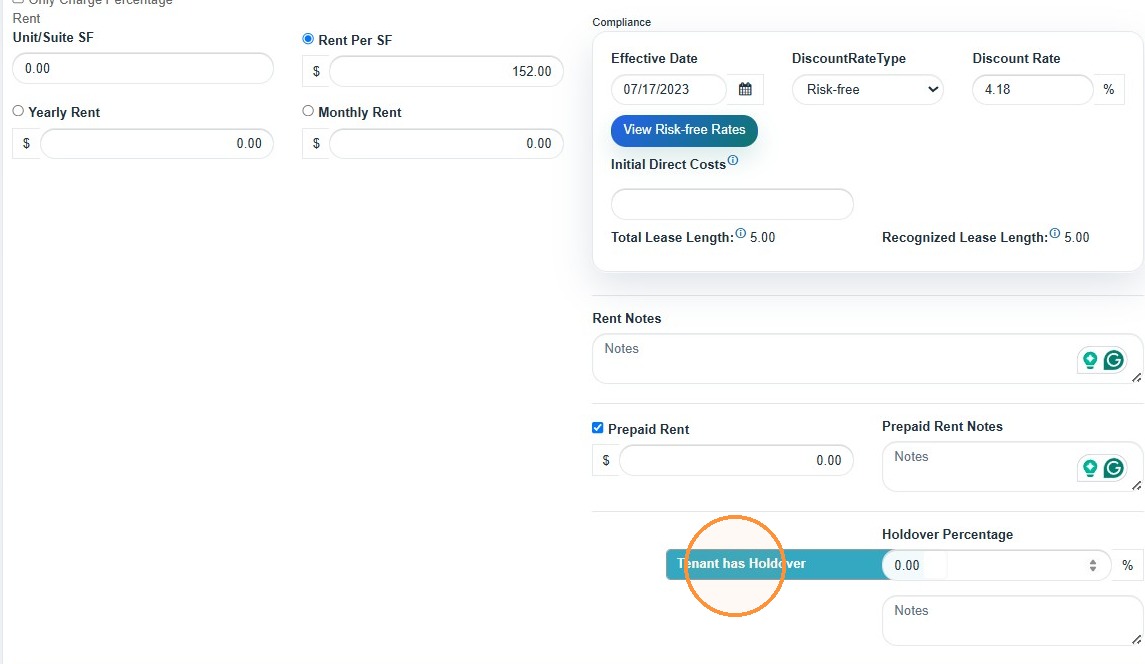
10. Once all information is entered, select Save.
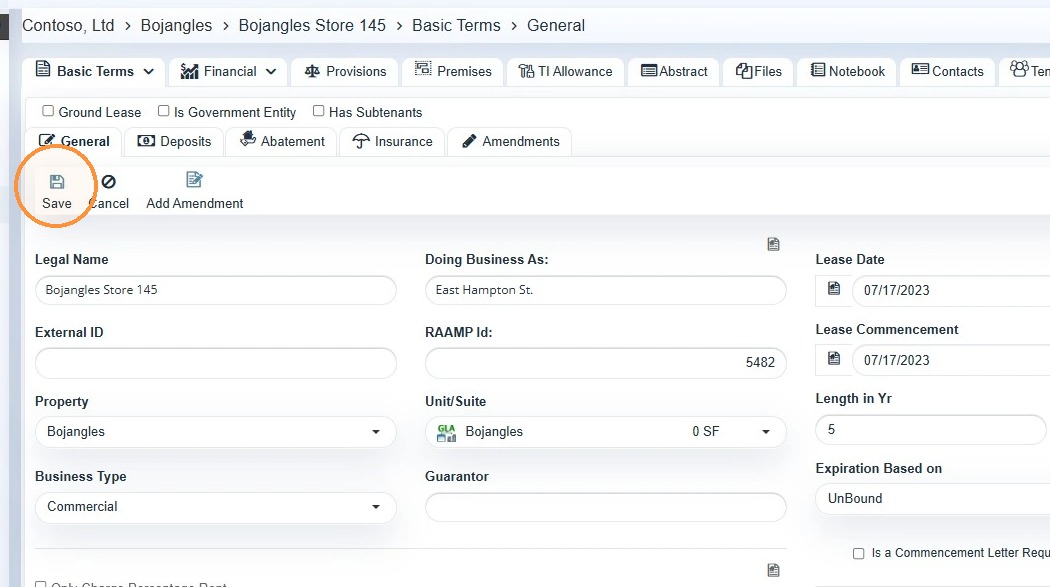
Important: Most General tab information is initially created during tenant setup. Changes after lease execution should generally be recorded through an amendment rather than by overwriting the original lease data.
Subtenants
11. The Has Subtenants checkbox must be selected for the tab to appear.
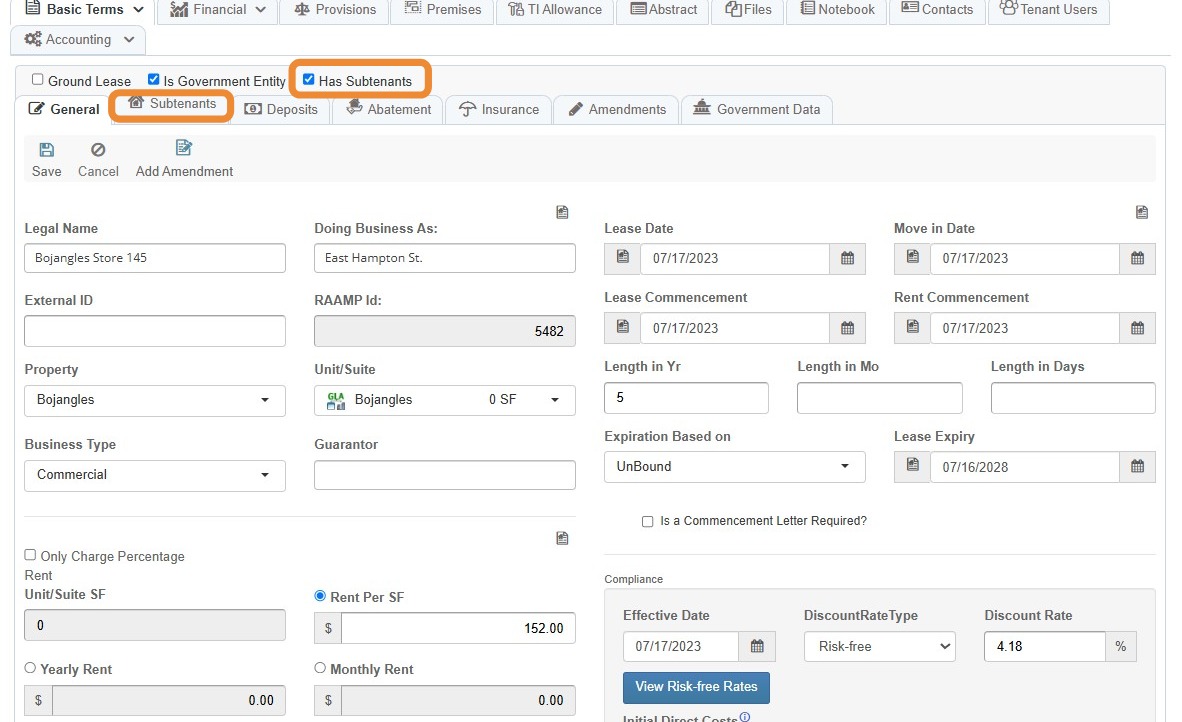
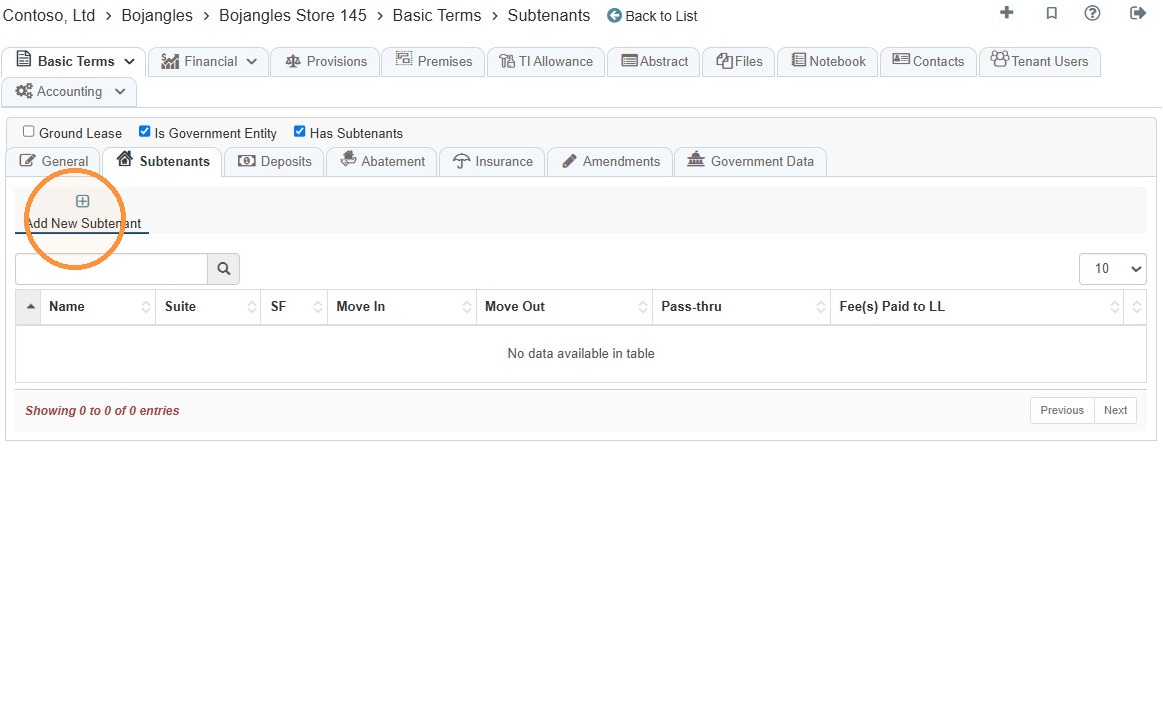
12. Select Add New Subtenant.
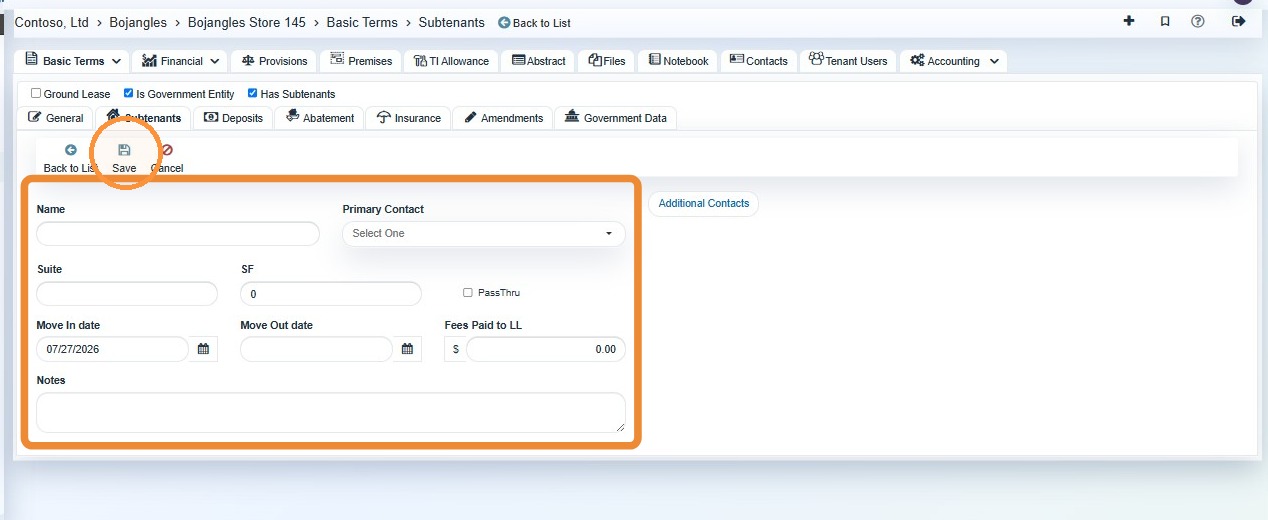
13. Complete all information for the subtenant > Select Save.
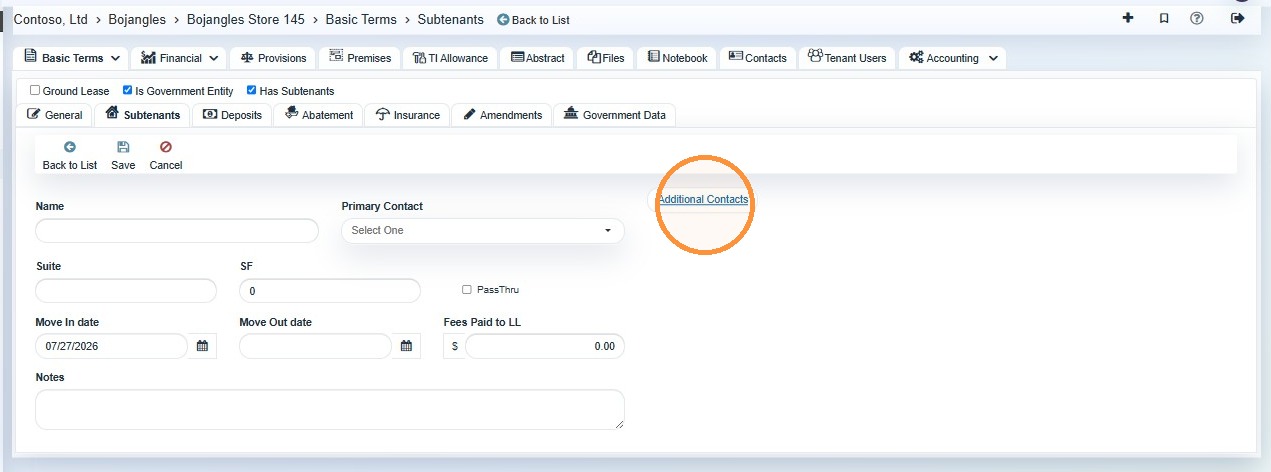
14. Select Additional Contacts to add more contacts for the subtenant.
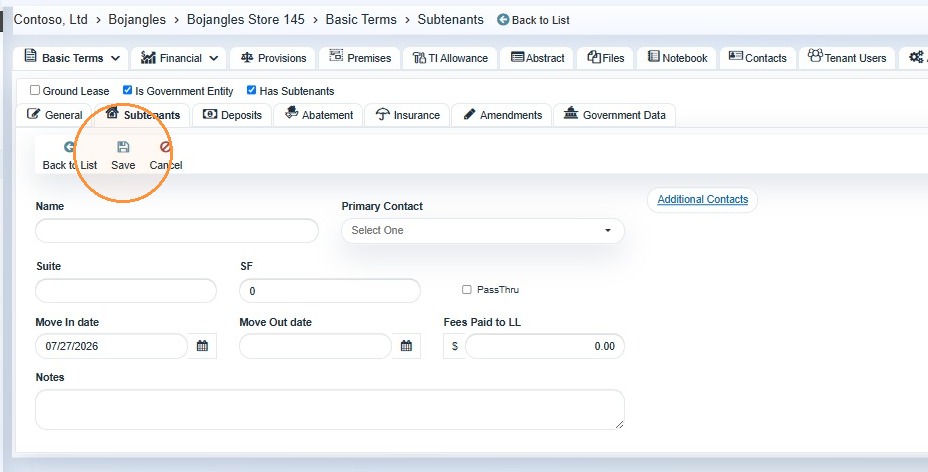
15. Once all subtenant information is entered, select Save.
Deposits
Purpose: Record security deposits and document whether they are new, rolled over, or increased.
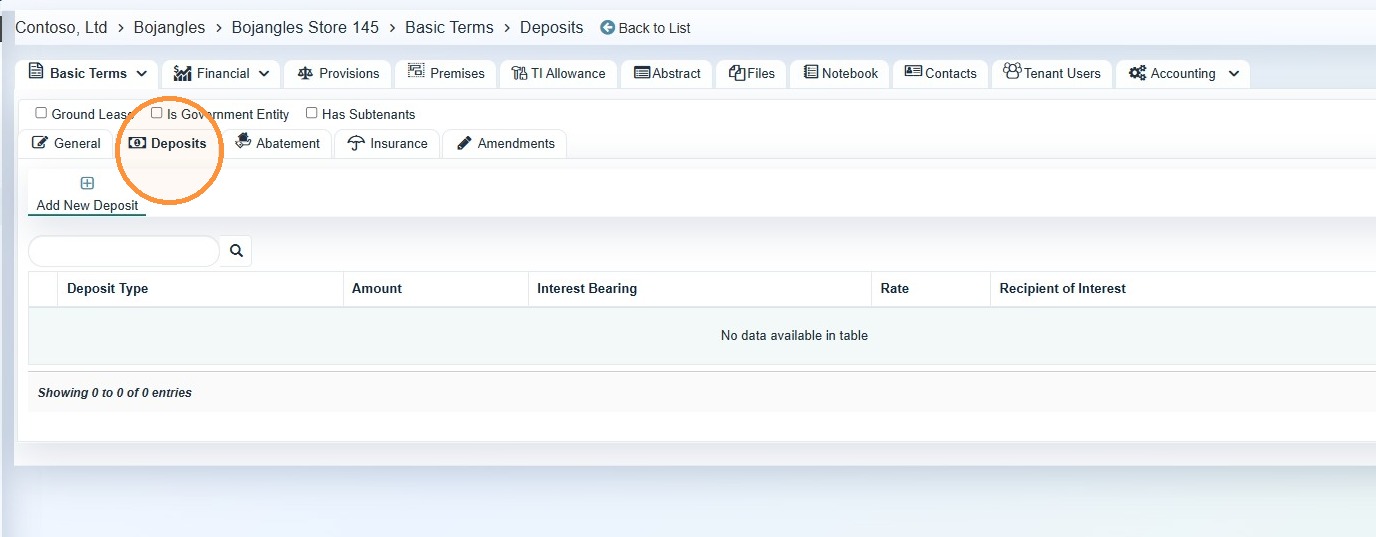
16. Select Deposits.
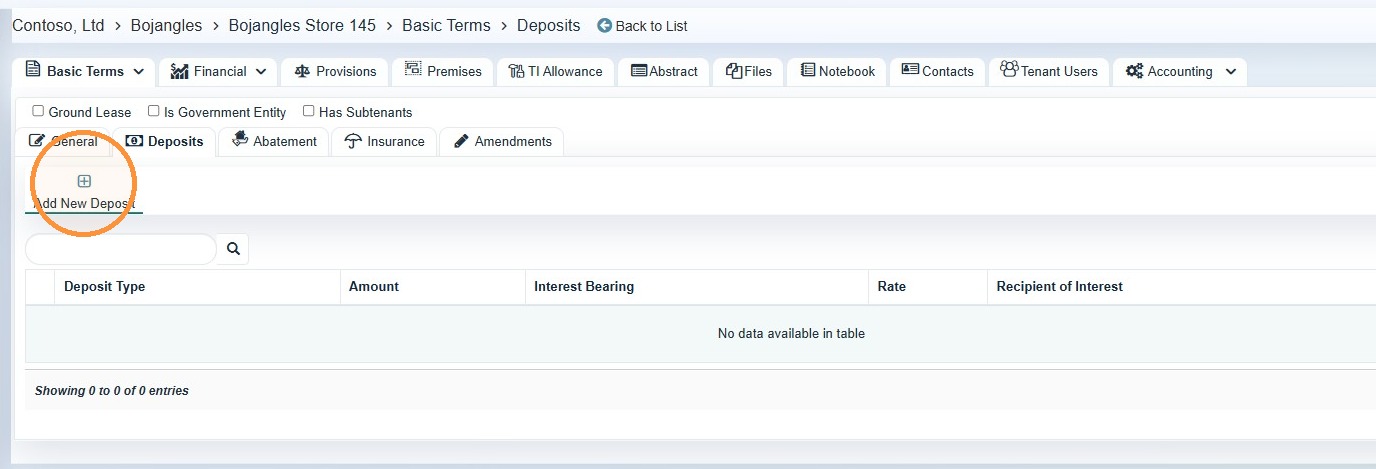
17. Select Add New Deposit.
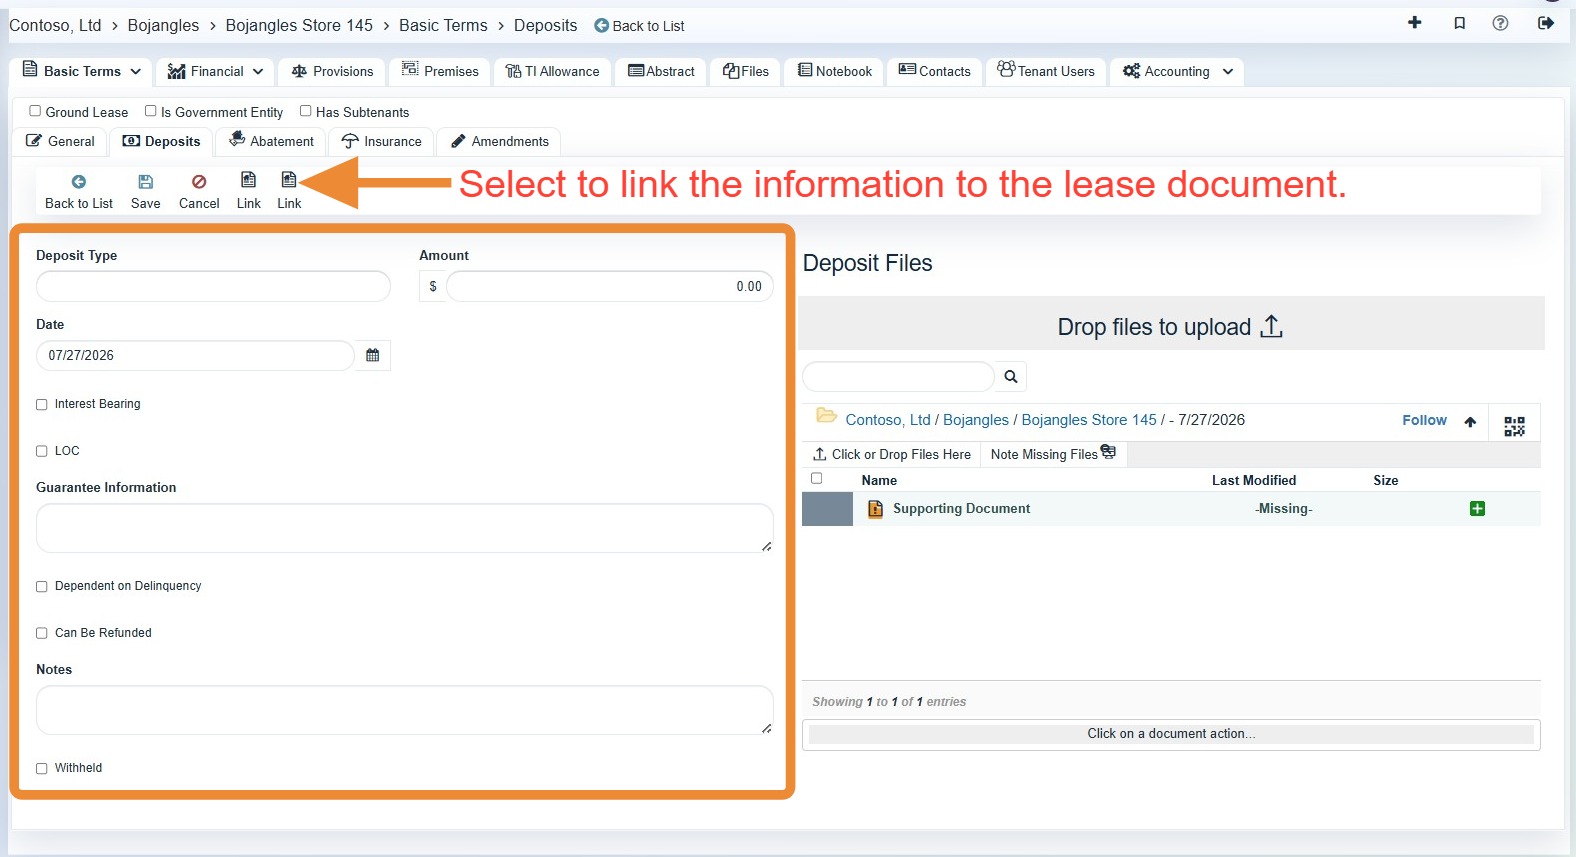
For more detailed instructions, refer to How to Add a Tenant Deposit with Supporting Documents.
18. Complete all required deposit information > Link the deposit information to the lease document.
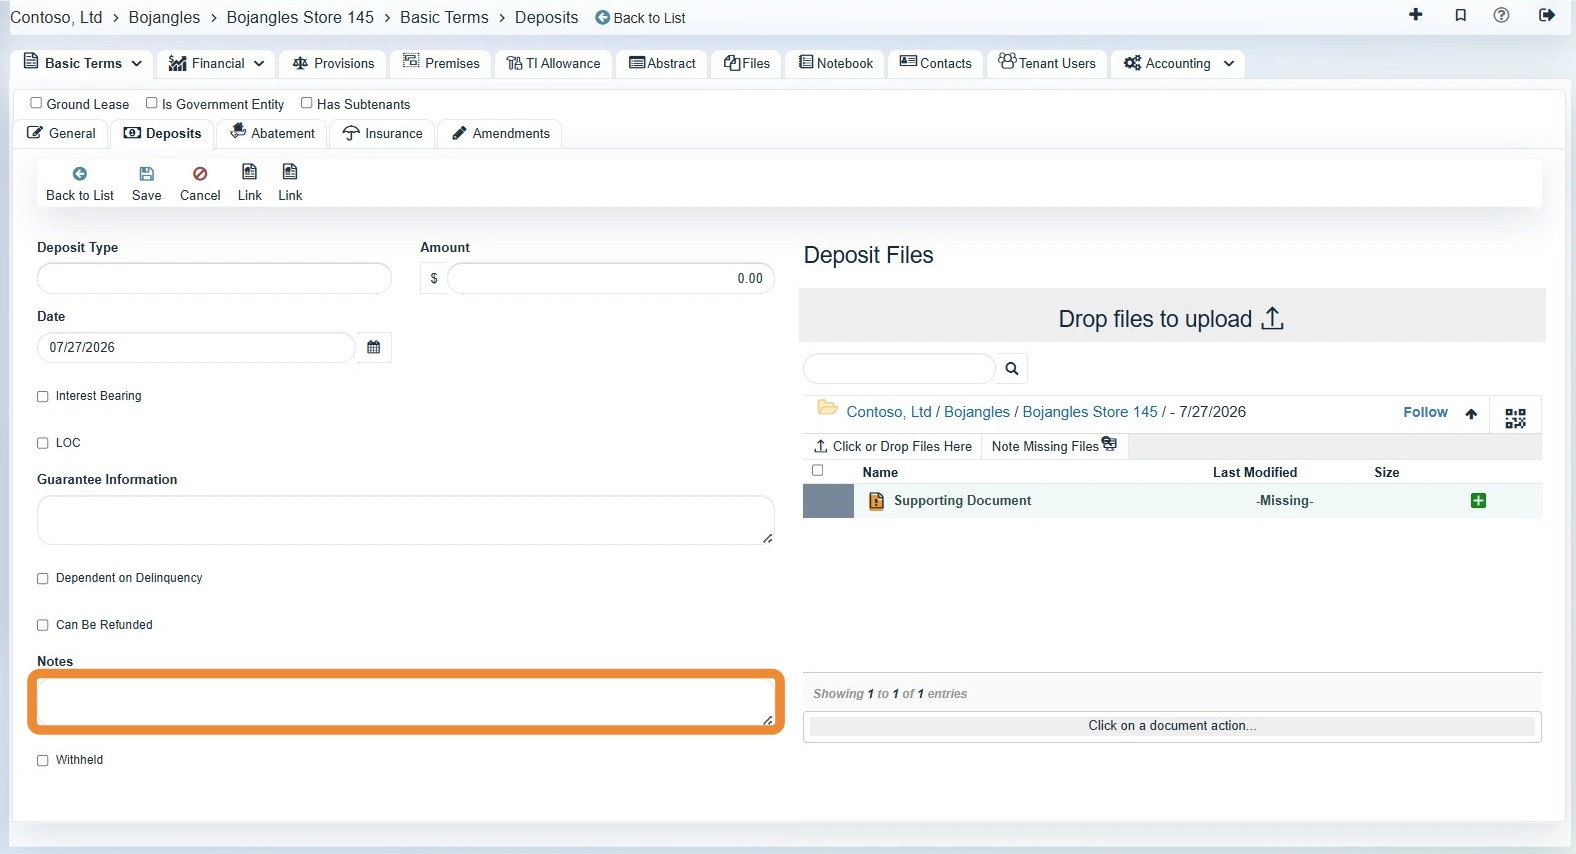
19. Add notes explaining the source or history of the deposit.
- New lease: Enter the security deposit stated in the lease.
- Renewal: Note "Deposit from previous lease" when the existing deposit rolls forward.
- Increase: Create an additional deposit entry and explain the previous amount and the new amount paid at execution.
20. Upload supporting documentation, such as a copy of the check, when available.
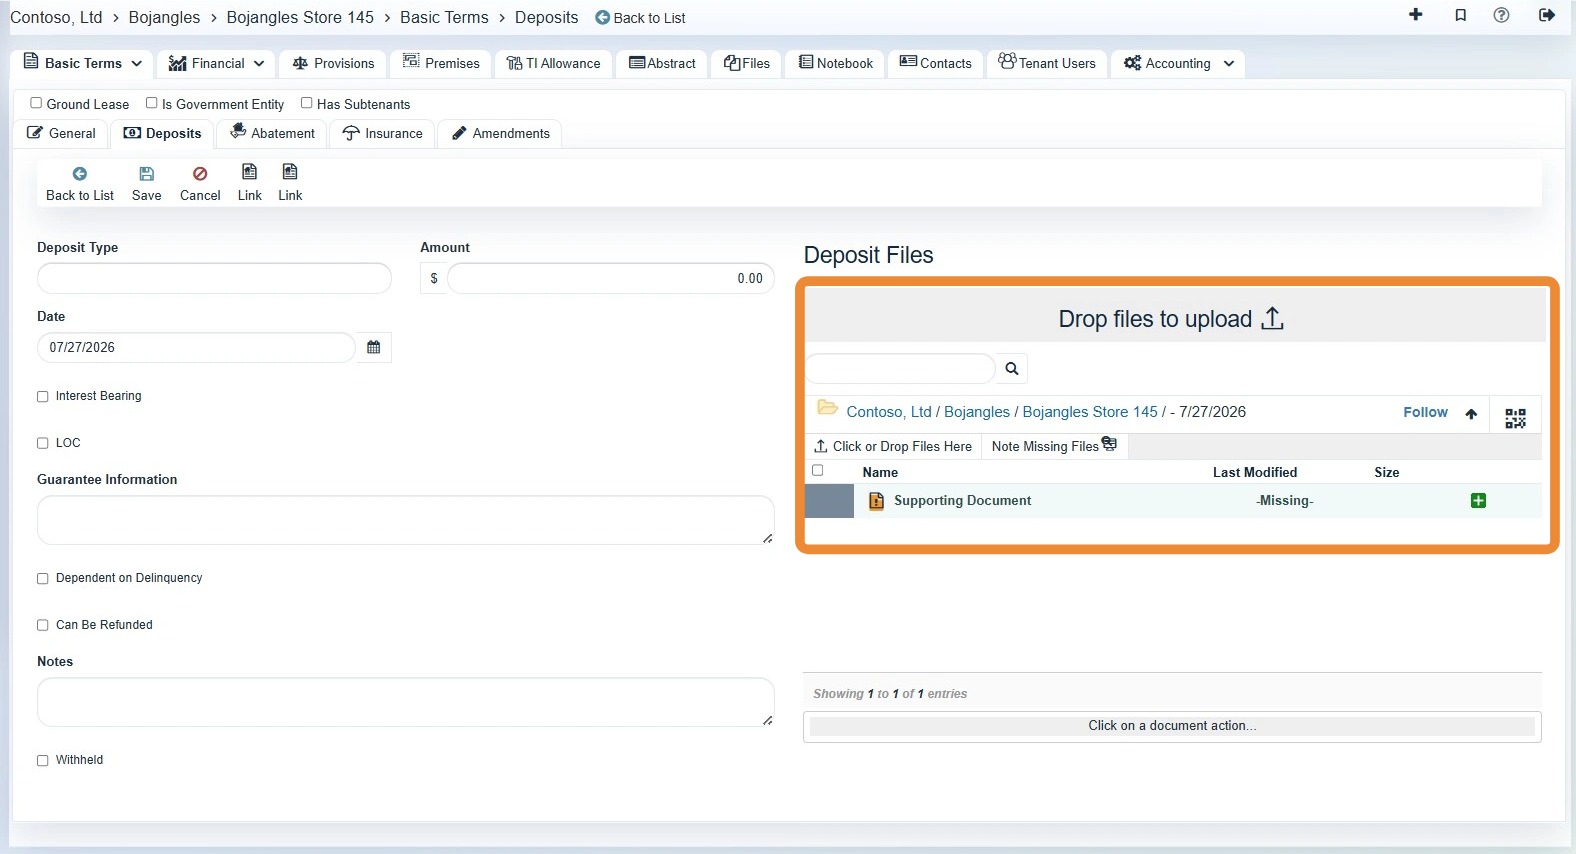
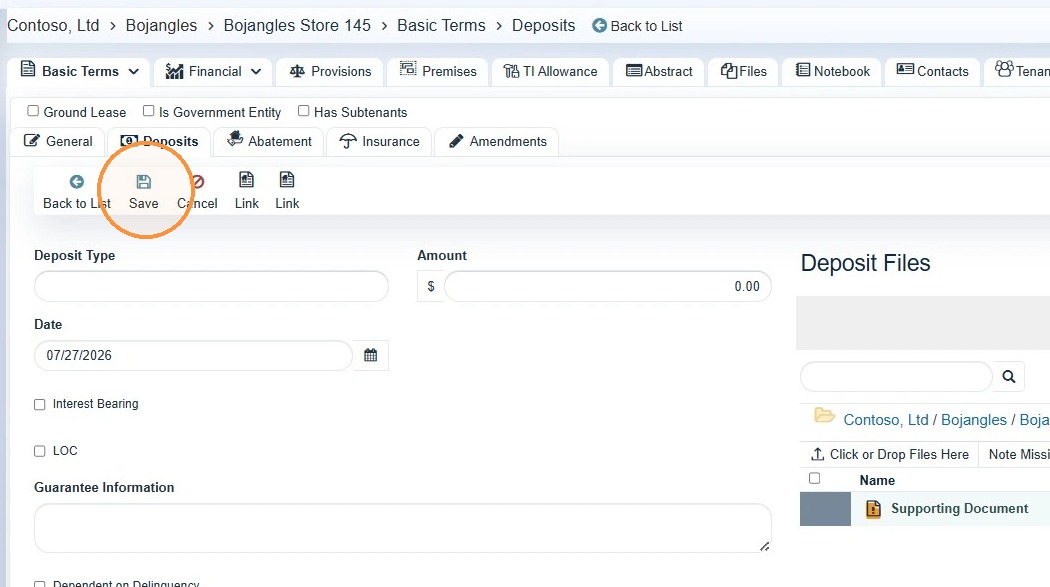
21. Once all information is entered and linked to the lease and related files uploaded, select Save.
Abatement
Purpose: Record rent-free or reduced-rent periods that occur after the normal rent commencement structure.
Do not create a separate abatement solely because rent begins later than lease commencement; the rent commencement date already captures that situation.
Use an abatement entry when the tenant receives free or reduced rent during a later defined period.
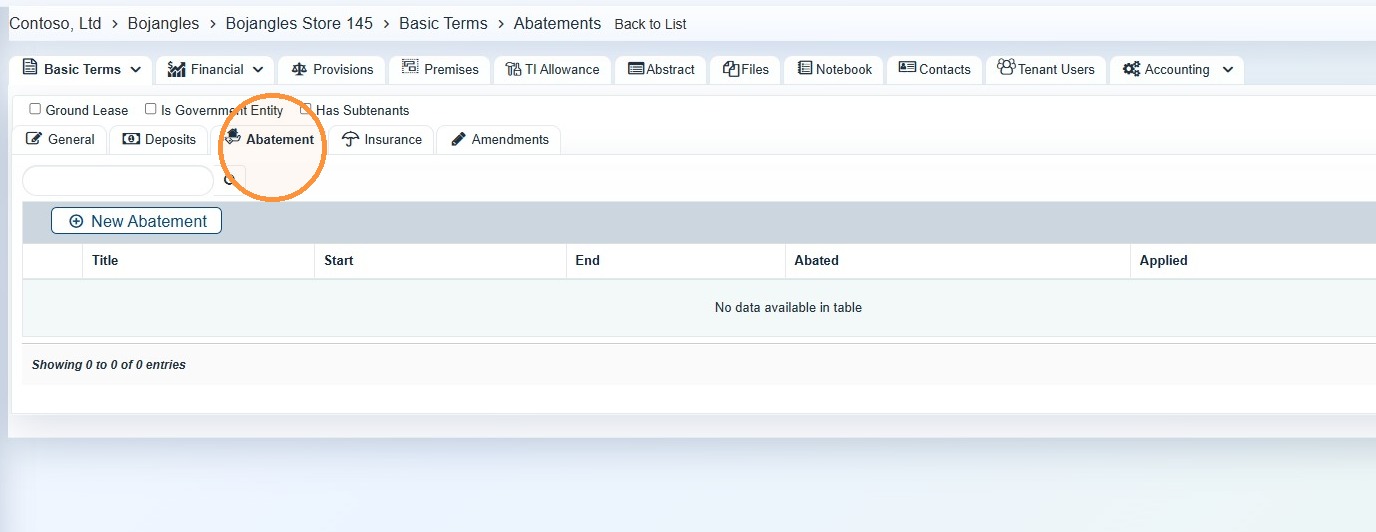
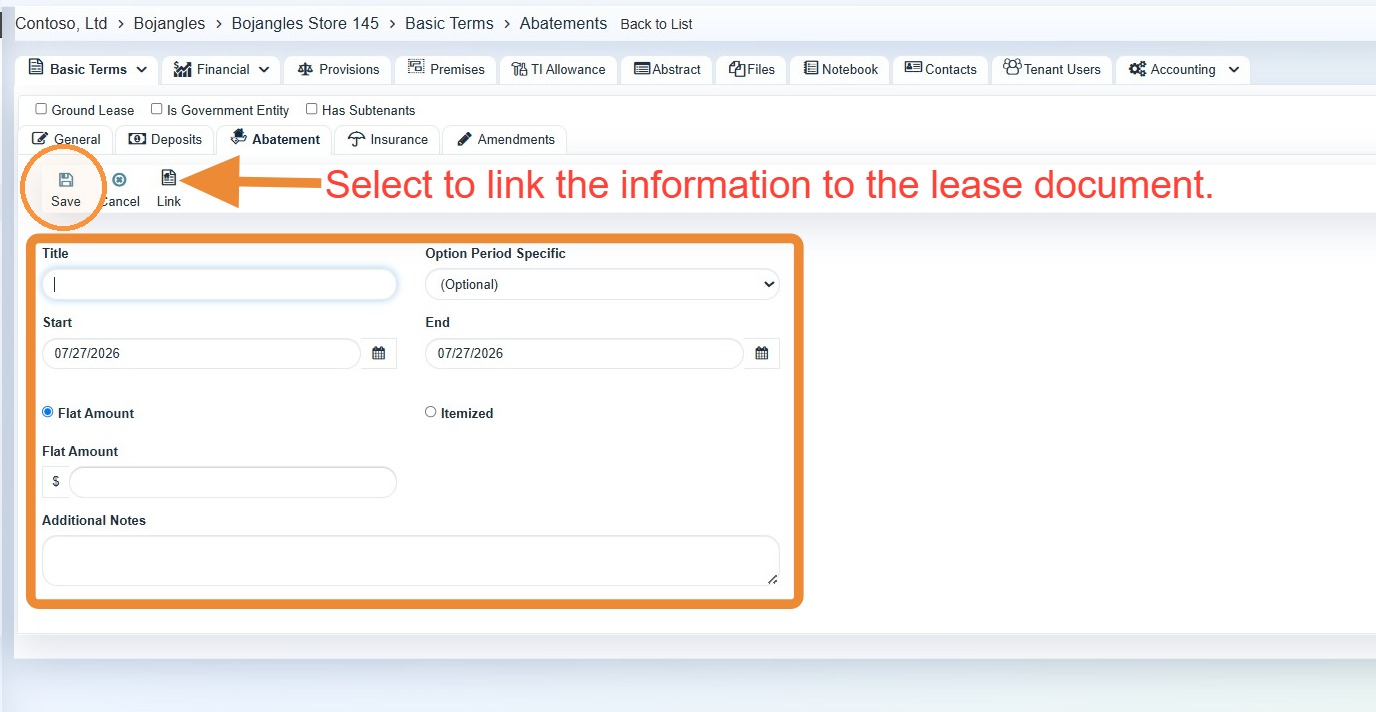
22. Select the Abatement tab.
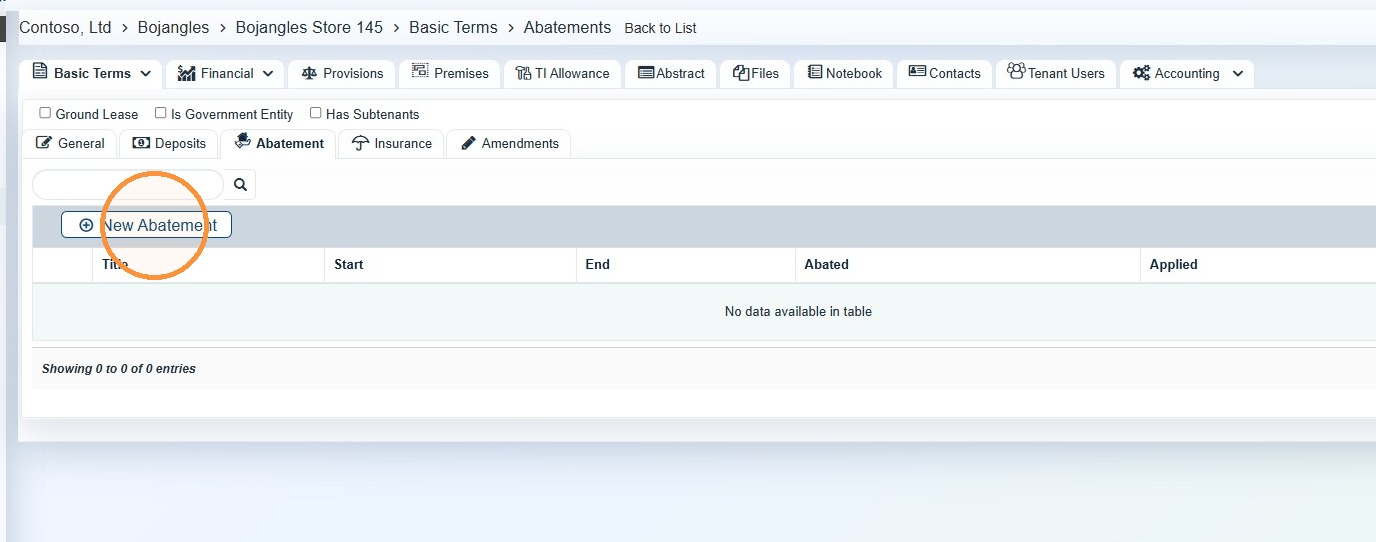
23. Select New Abatement.
24. Enter all abatement information > Link the abatement information to the lease document > Select Save.
For detailed instructions, refer to How to Create a New Abatement for Date Range.
Insurance
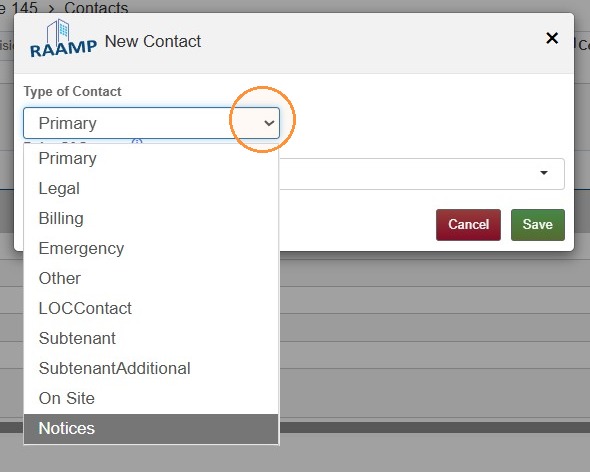
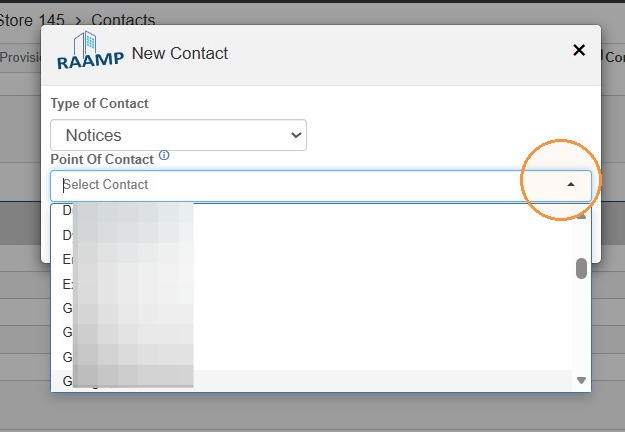
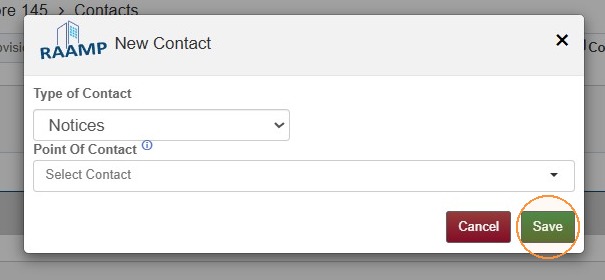
Purpose: Capture the tenant insurance requirements and compare them with the insurance policy actually provided.
Policy verification
Upload the actual insurance document when received.
Enter the policy expiration date.
Confirm the policy limits match the lease requirements.
Review mismatches or red indicators before marking the item complete.
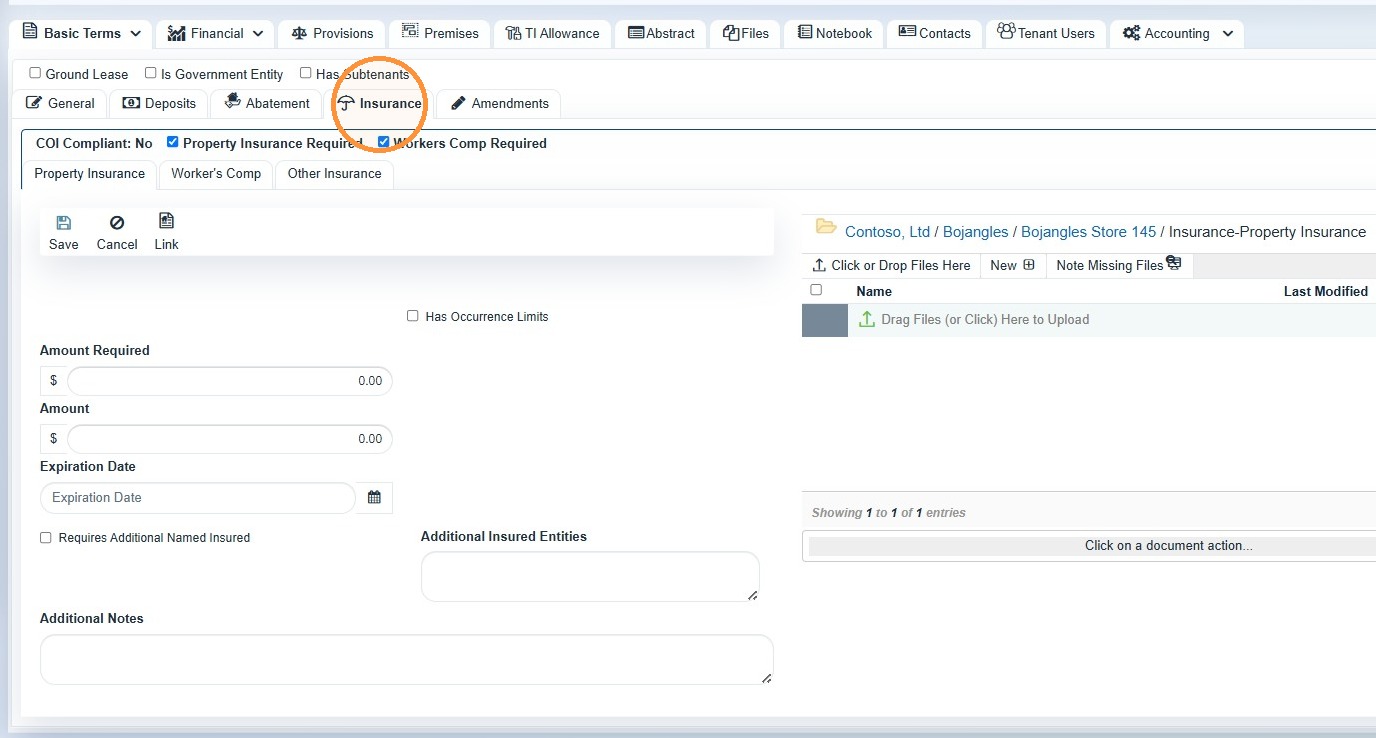
25. Select the Insurance tab.
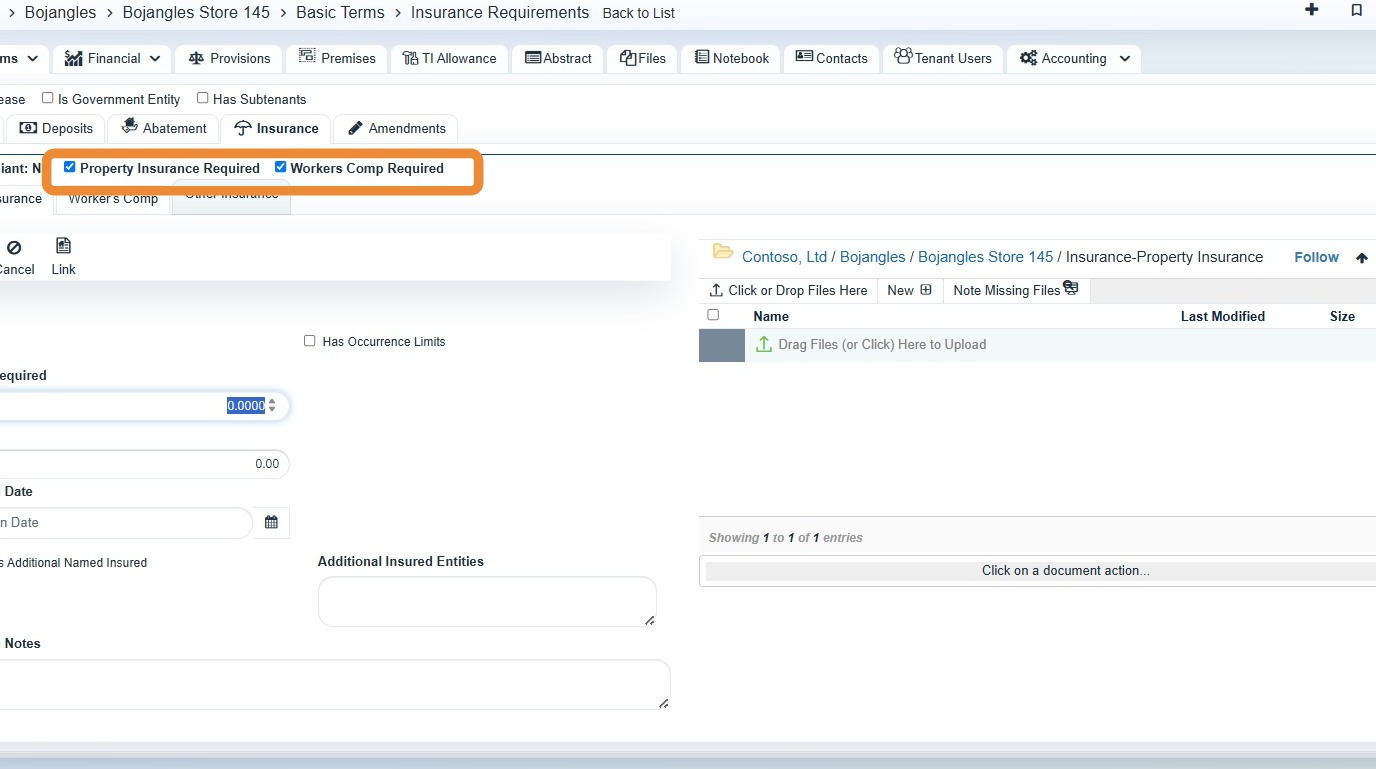
26. The Property Insurance Required and/or Workers Comp Required checkbox(es) must be selected for the tab(s) to appear.
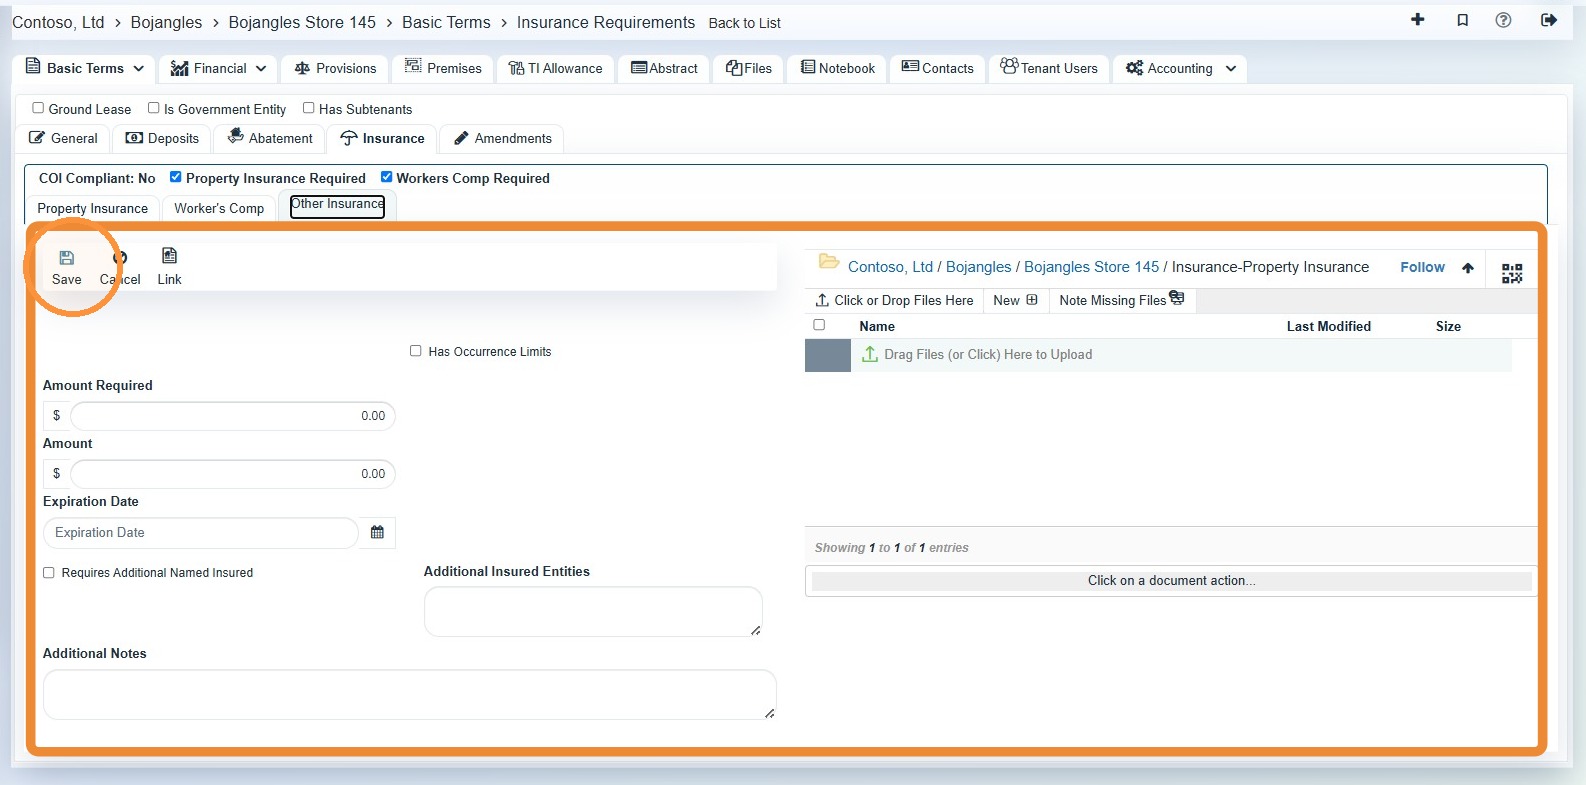
27. Enter the information, link the information to the lease, and upload supporting documents, like a copy of the insurance policy > Select Save.
For detailed instructions, refer to How to Add and Edit Tenant Insurance.
Government Data
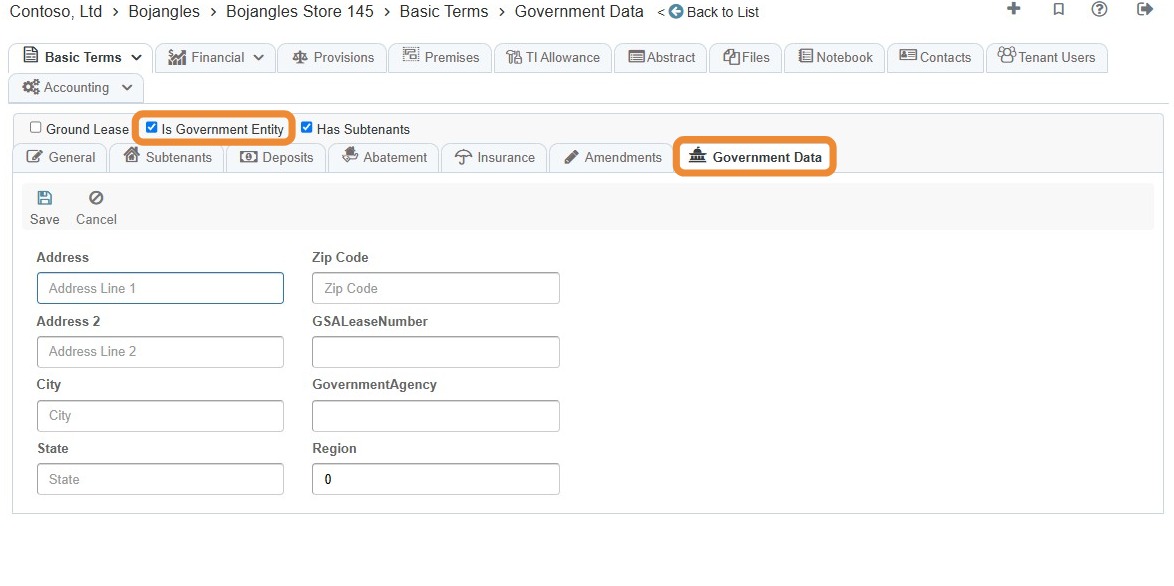
28. The Is Government Entity checkbox must be selected for the tab to appear.
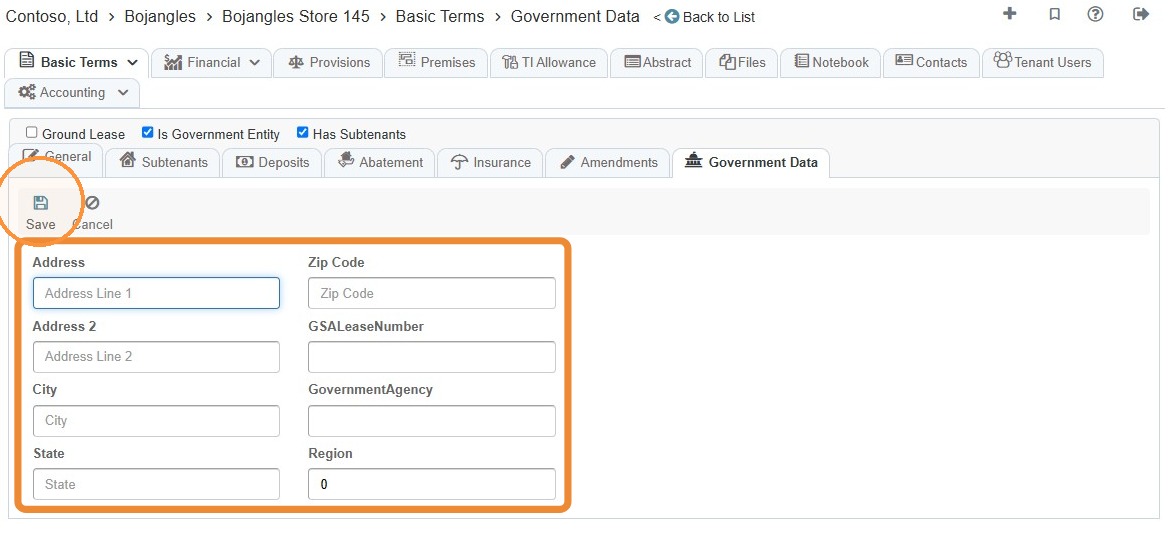
29. Enter the information > Select Save.
Financial: Escalations
Purpose: Enter the financial terms that drive rent schedules, recoveries, delinquency settings, percentage rent, and reporting requirements.
Priority: The Financial tab is one of the most important parts of the lease abstraction because it contains escalations, option periods, charges, delinquency rules, percentage rent, and sales-reporting requirements.
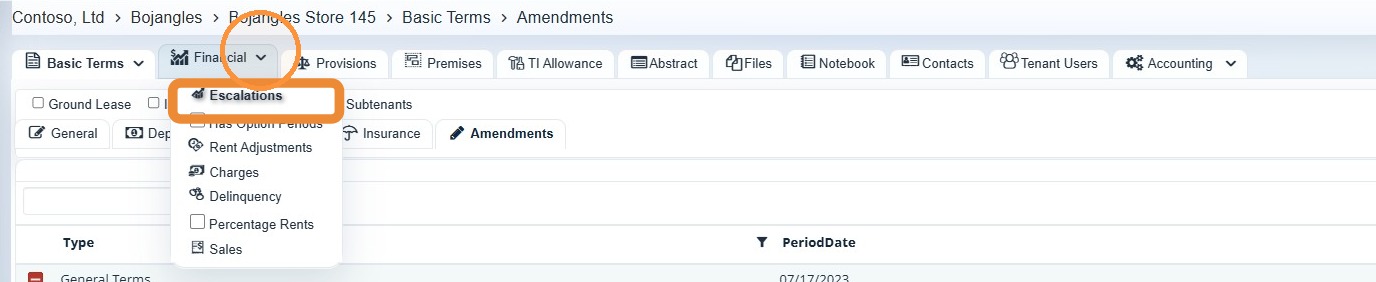
30. Select the Financial tab > Select Escalations.
31. When entering Escalations:
Use periodic escalation when the lease states a repeating formula, such as a 3% annual increase.
Use manual specification when the lease provides an exact rent schedule or chart.
When available, enter the annual amount and verify that monthly and annual figures reconcile.
For detailed instructions, refer to Financial - Escalations and Escalations: How to Add Variant Rent.
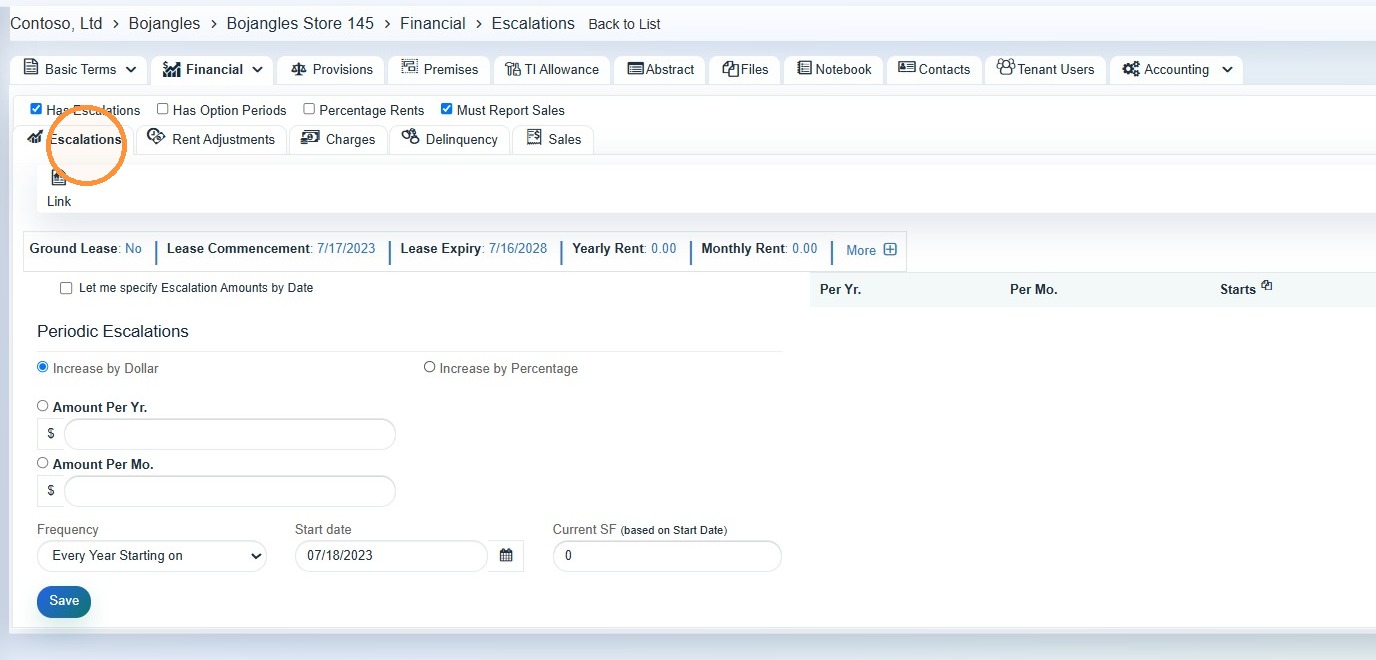
Critical date check: The escalation start date may default to the first day of the option or rent period. Change it to the next applicable escalation date so RAAMP does not create two rent amounts beginning on the same date.
Financial: Option Periods
32. The Has Option Periods checkbox must be selected for the tab to appear.
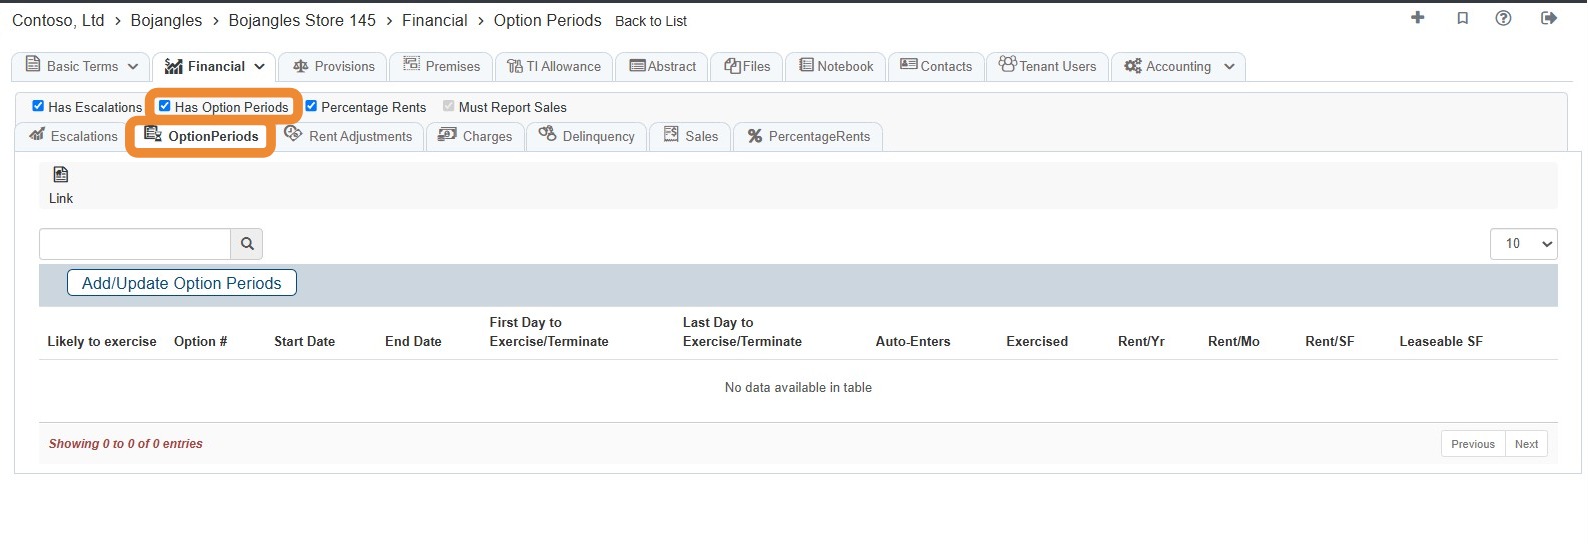
33. Select Add/Update Option Periods.
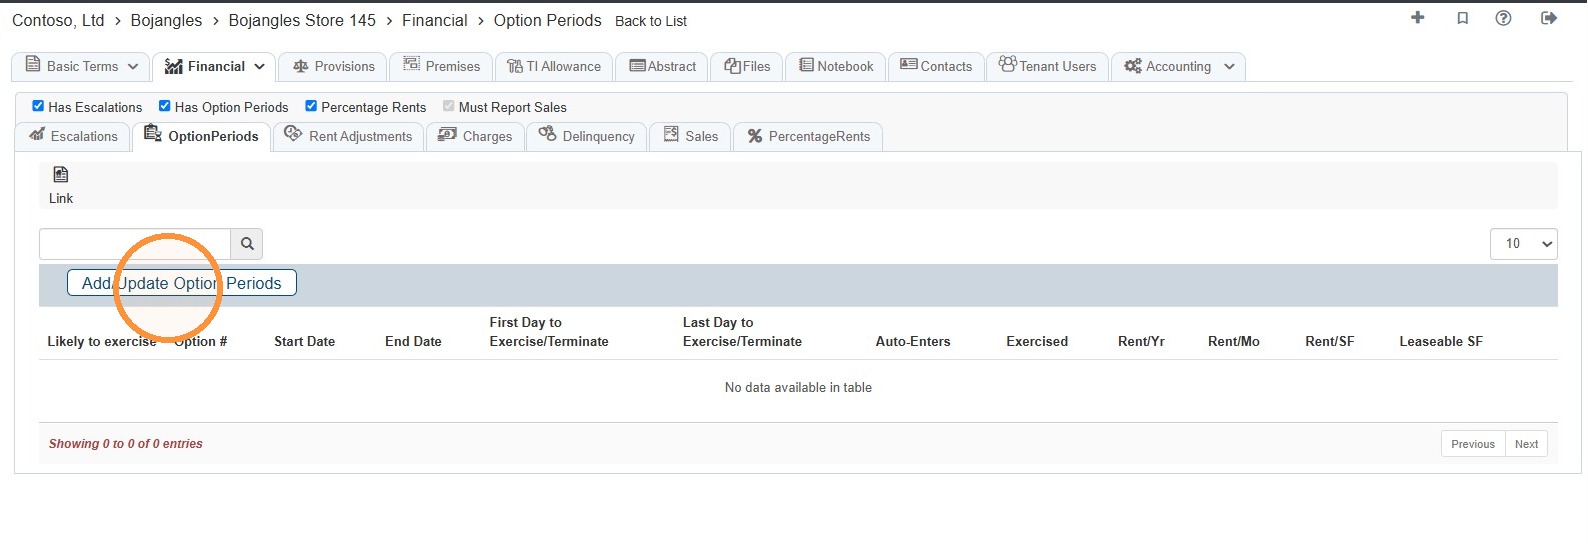
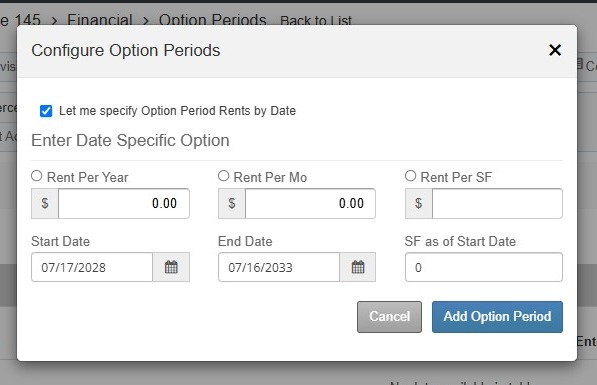
34. Complete the information in the Configure Option Periods box > Select Add Option Period.
For detailed instructions, refer to Option Periods: How to Add Variant Rent.
Rent Adjustments
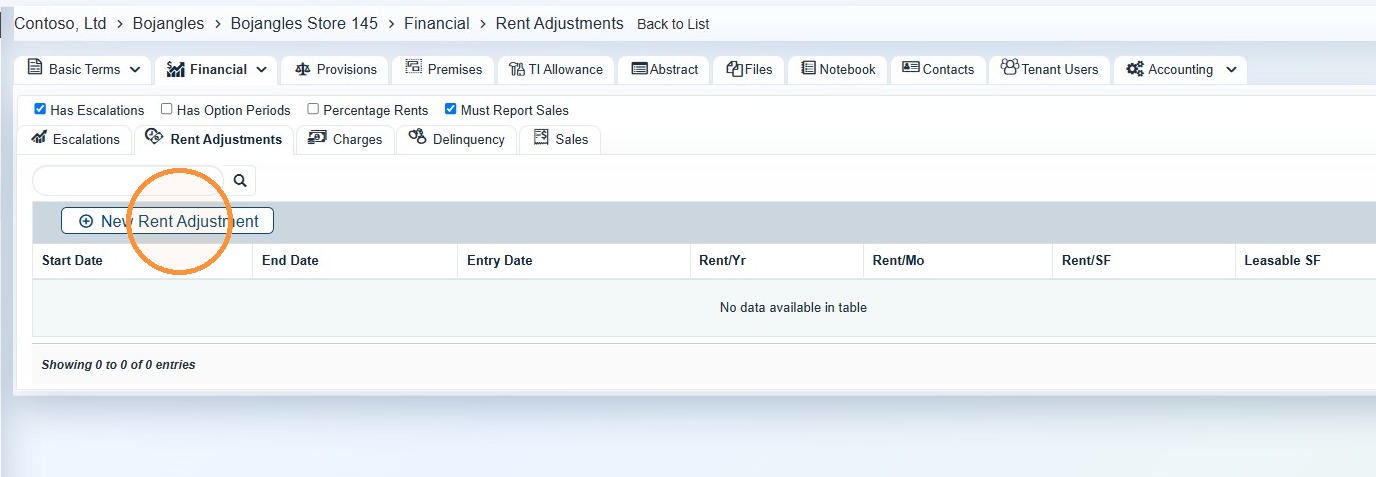
35. Select the Rent Adjustments tab.
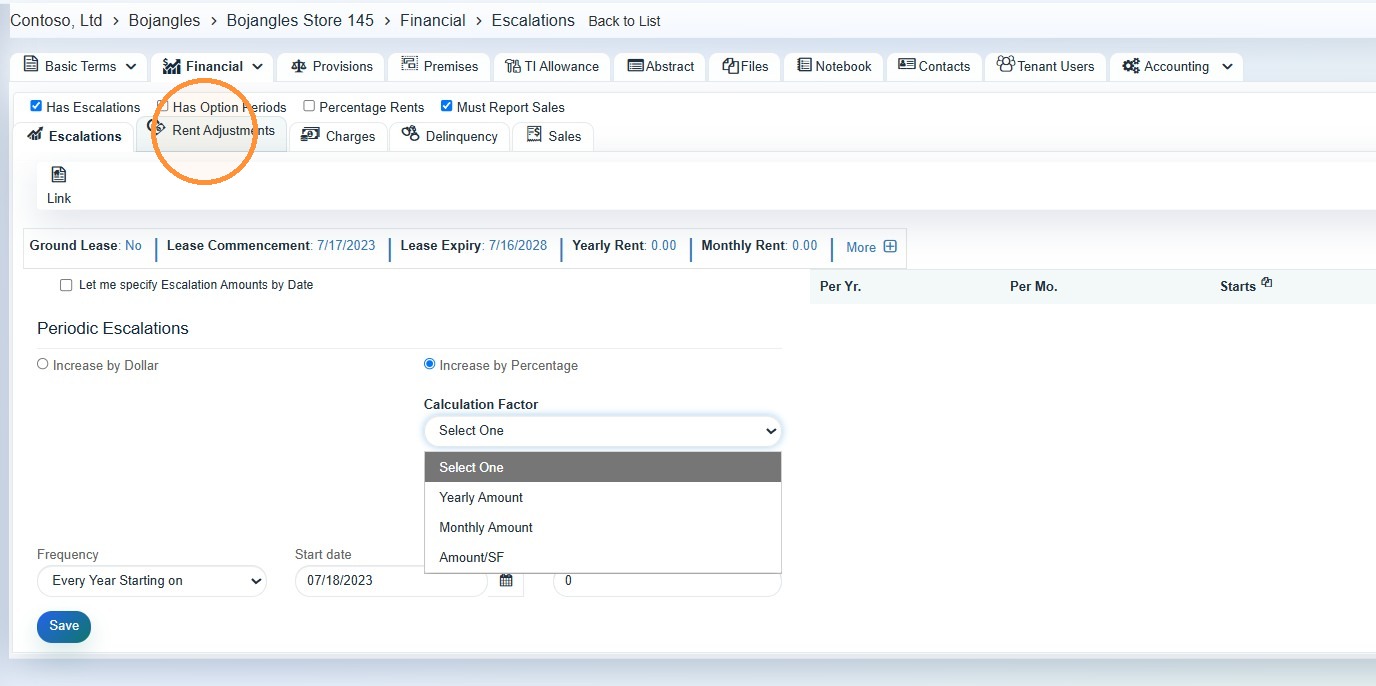
36. Select New Rent Adjustment.
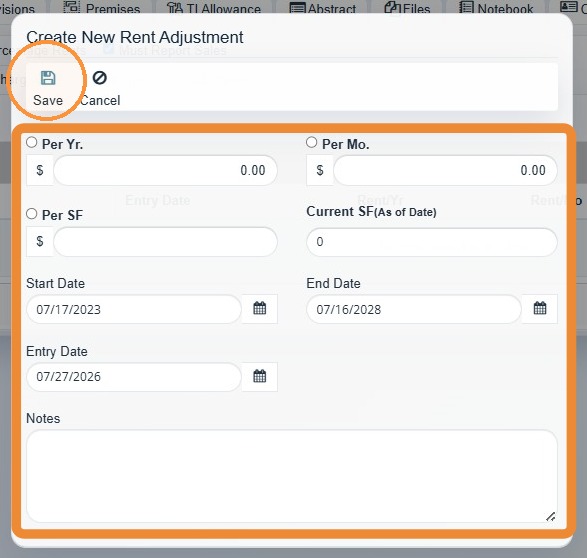
37. Enter the rent adjustment information > Select Save.
Charges
Create charges for CAM, insurance, property taxes, merchant association fees, and other recurring recoveries, and map account(s) to the charge(s).
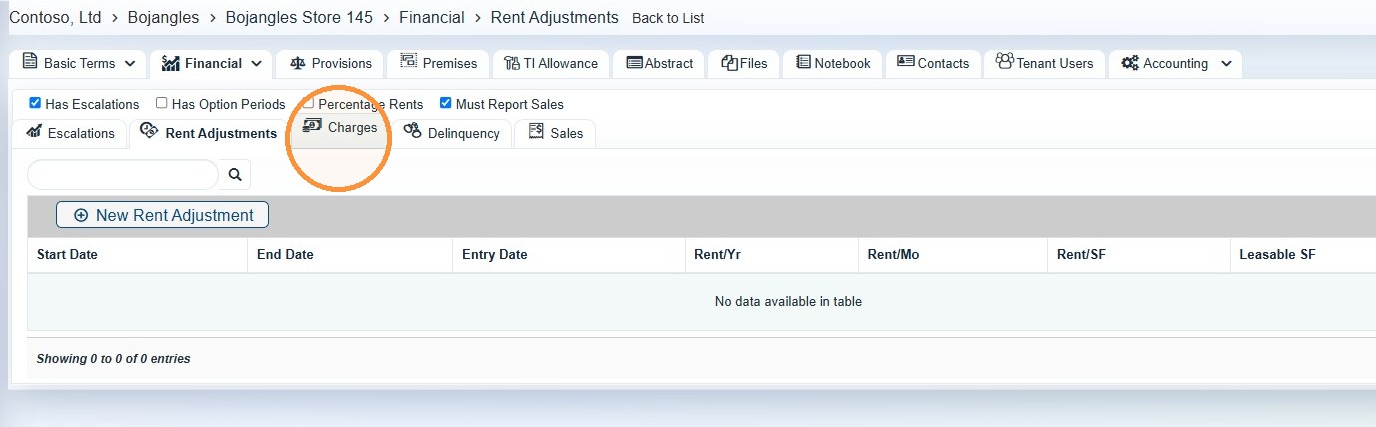
38. Select the Charges tab.
39. Select Create New Charge.
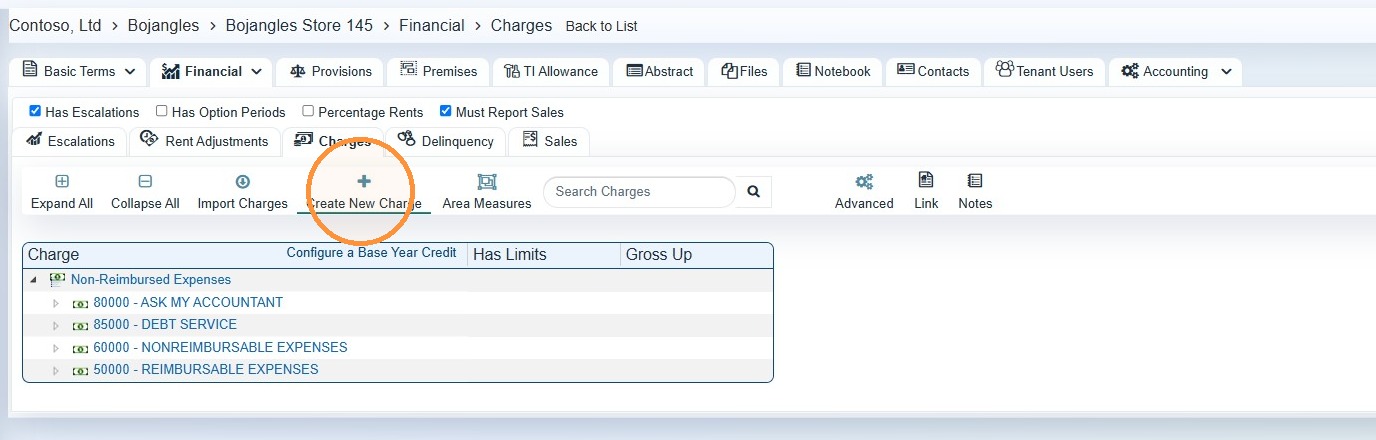
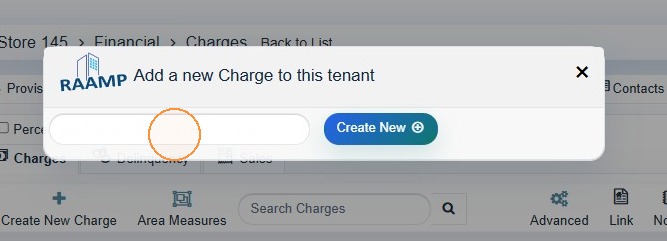
40. Select the text field > Enter a name for the charge, e.g. Taxes, Insurance, etc. > Select Create New.
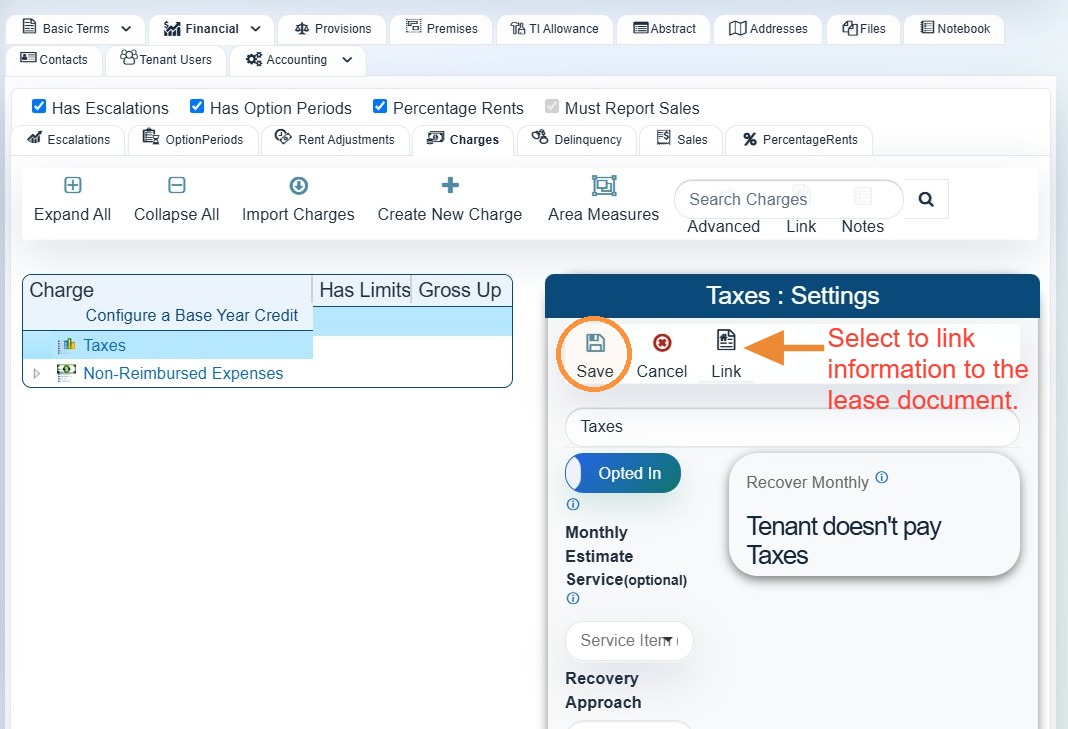
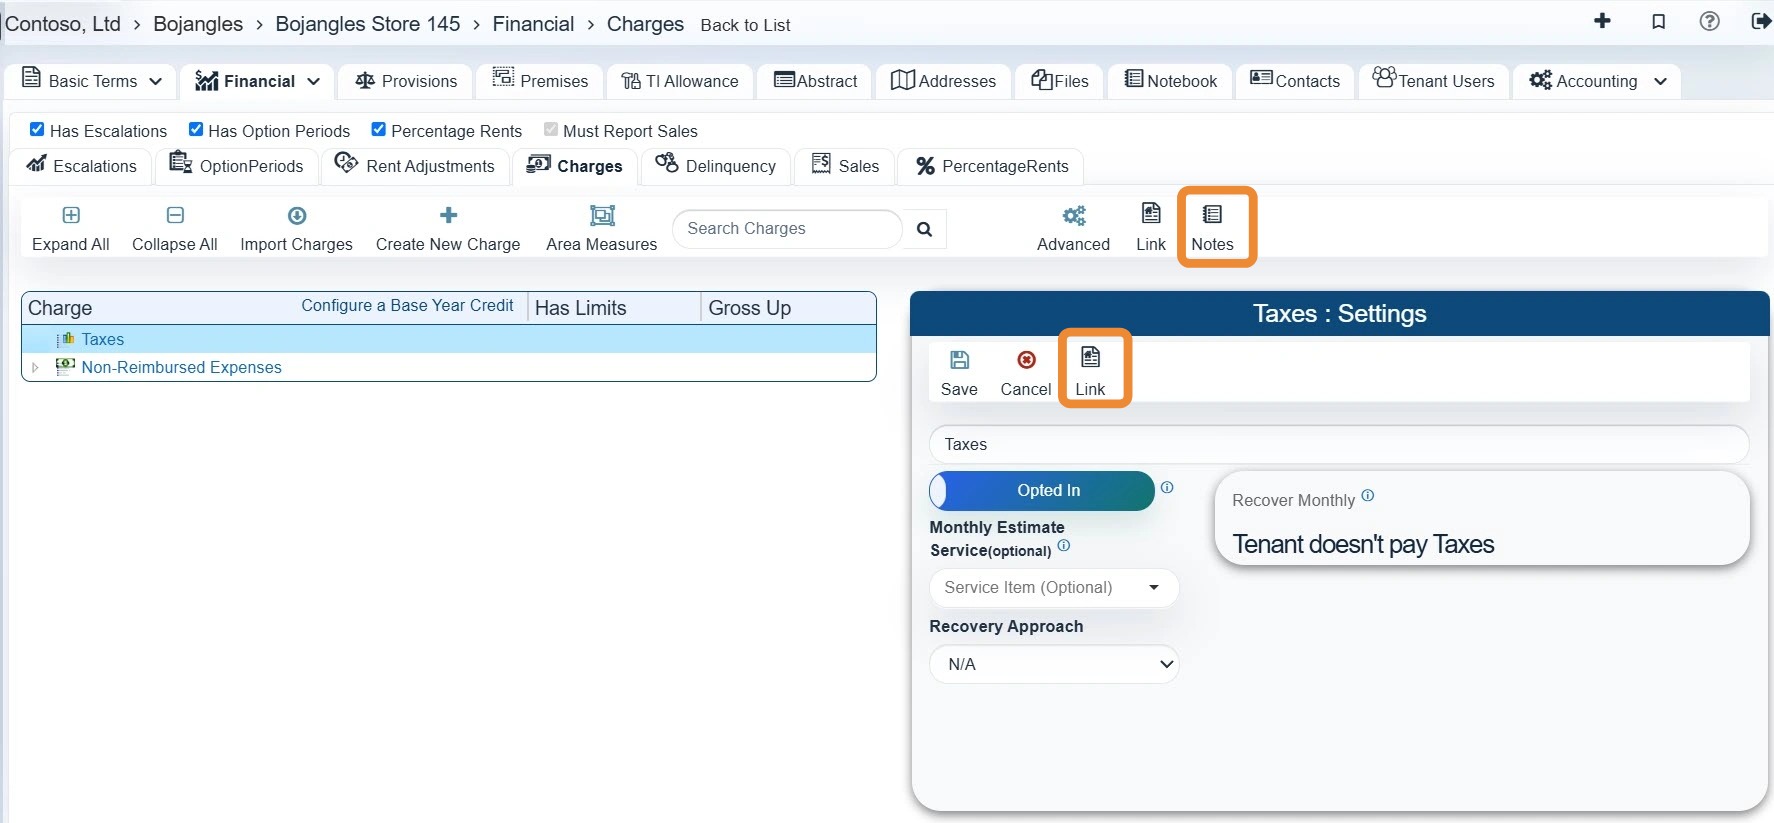
41. Enter the information > Link the charges information to the lease document > Select Save.
When the lease creates an obligation but does not state an amount, create/document the charge and note that billing must obtain the amount.
- Use notes for unusual calculations and link the relevant lease section.
CRITICAL - REQUIRED FOR AUTOMATED CAM RECONCILIATIONS
Creating the tenant charge alone is not enough for RAAMP to perform an automated CAM reconciliation. The appropriate expense accounts must also be assigned to the correct charge pool.
If an expense account is not mapped to the applicable CAM, Insurance, or Tax charge, RAAMP will not know to include expenses posted to that account in future automated CAM reconciliations.
For detailed instructions, refer to How to Add a Tenant Charge and Map Accounts to Charges.
Delinquency
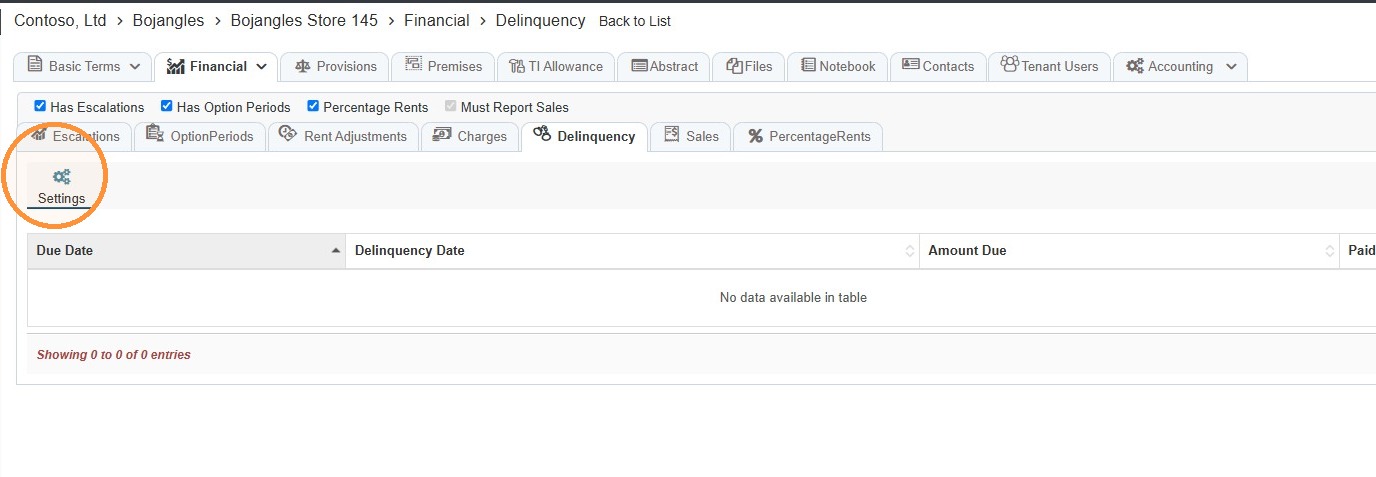
42. Select the Delinquency tab.
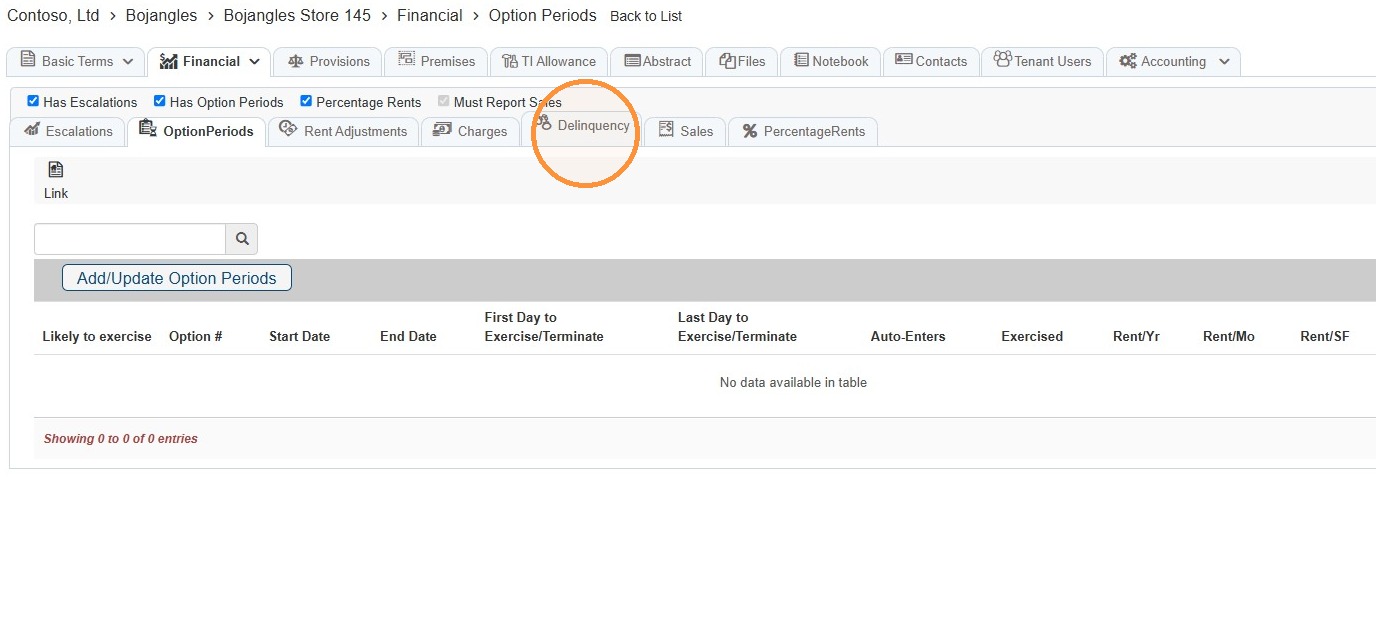
43. Select Settings.
NOTE: Use Settings rather than creating a delinquency entry during abstraction.
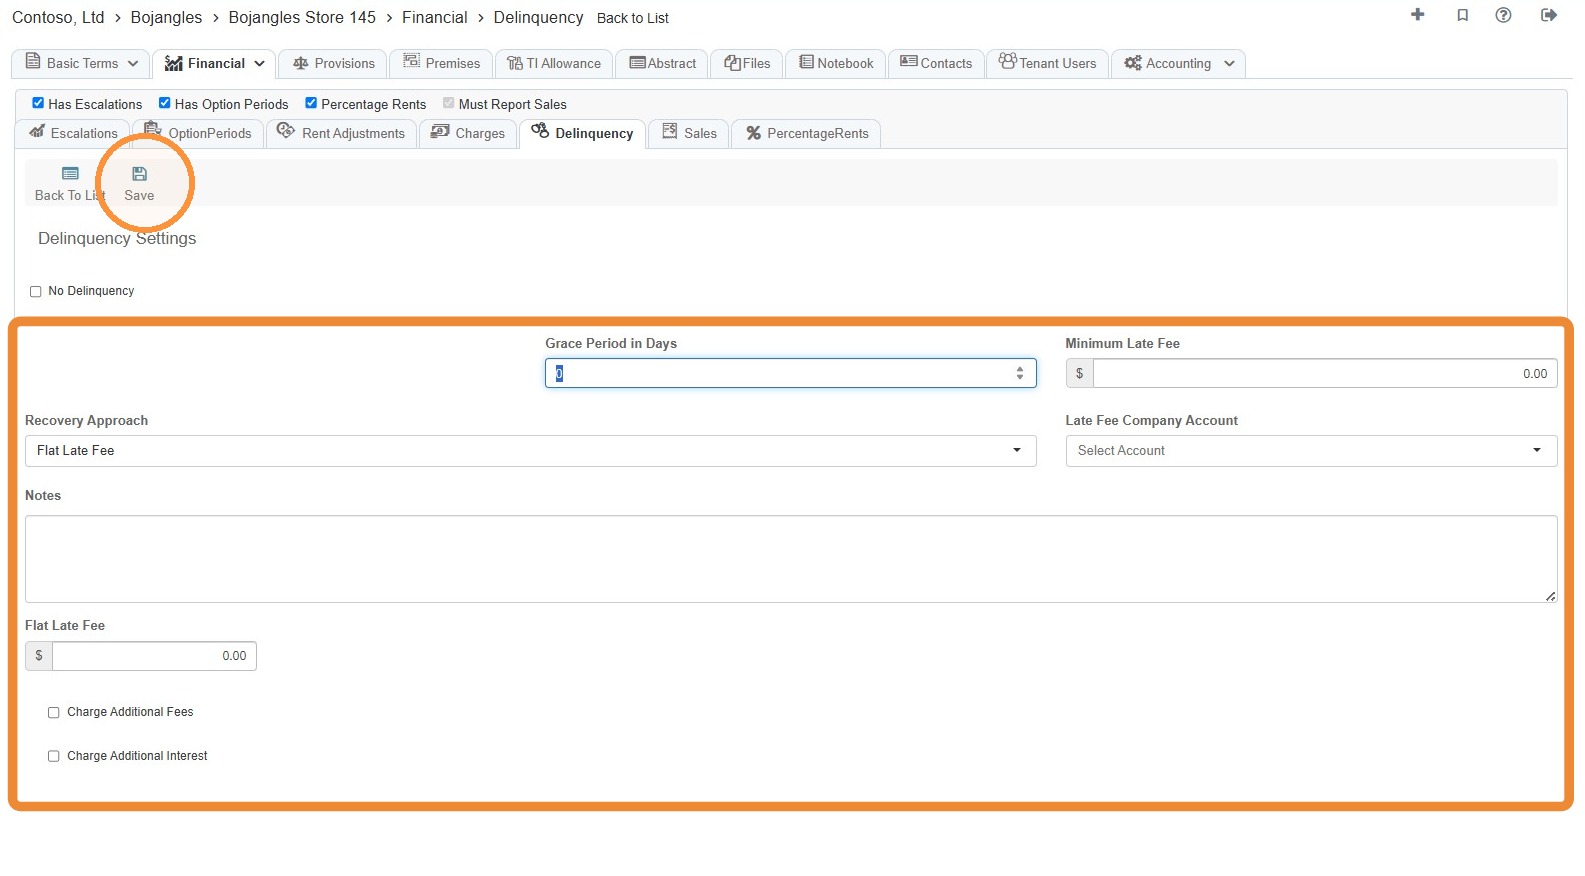
44. Enter the delinquency information stated in the lease > Select Save.
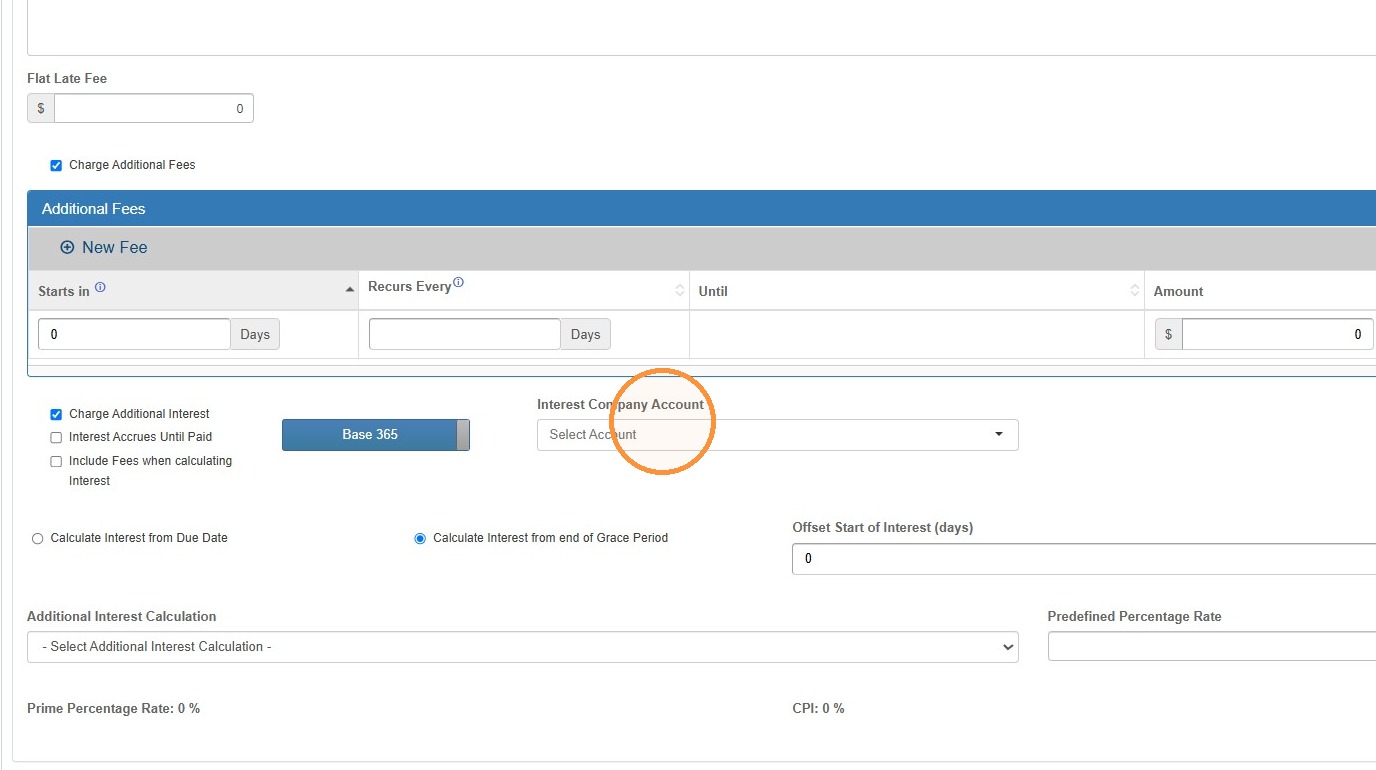
45. Additional Fees and Interest View
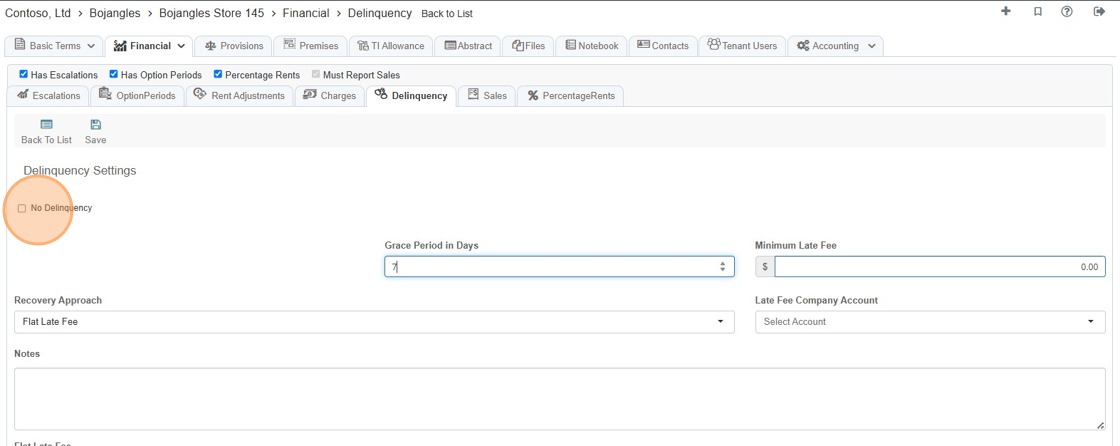
Tip: If the lease contains no late-fee language, mark the No Delinquency checkbox so reviewers know the section was checked > Select Save.
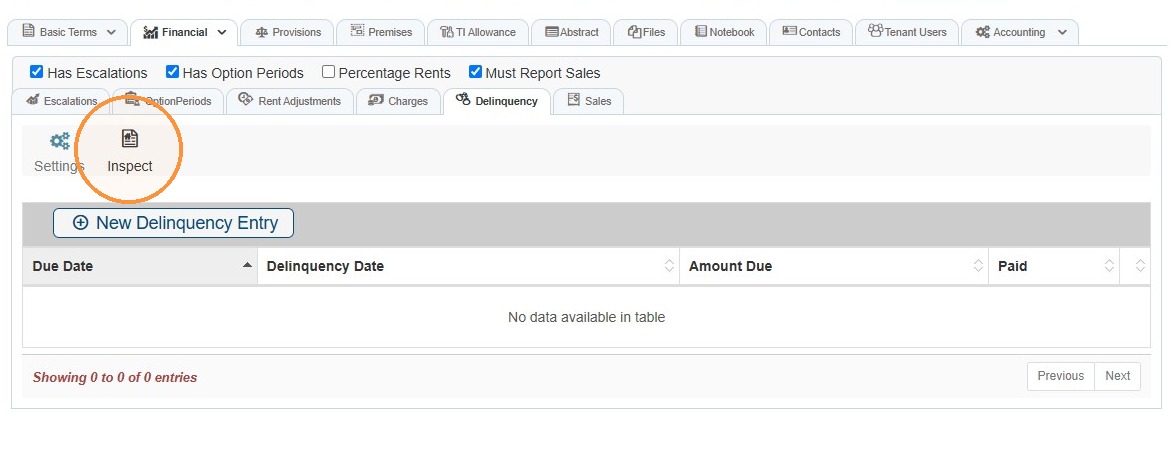
46. After saving the settings, select Back to List > Select Inspect to link the supporting lease language; the link control may not appear until after the settings are saved.
Sales
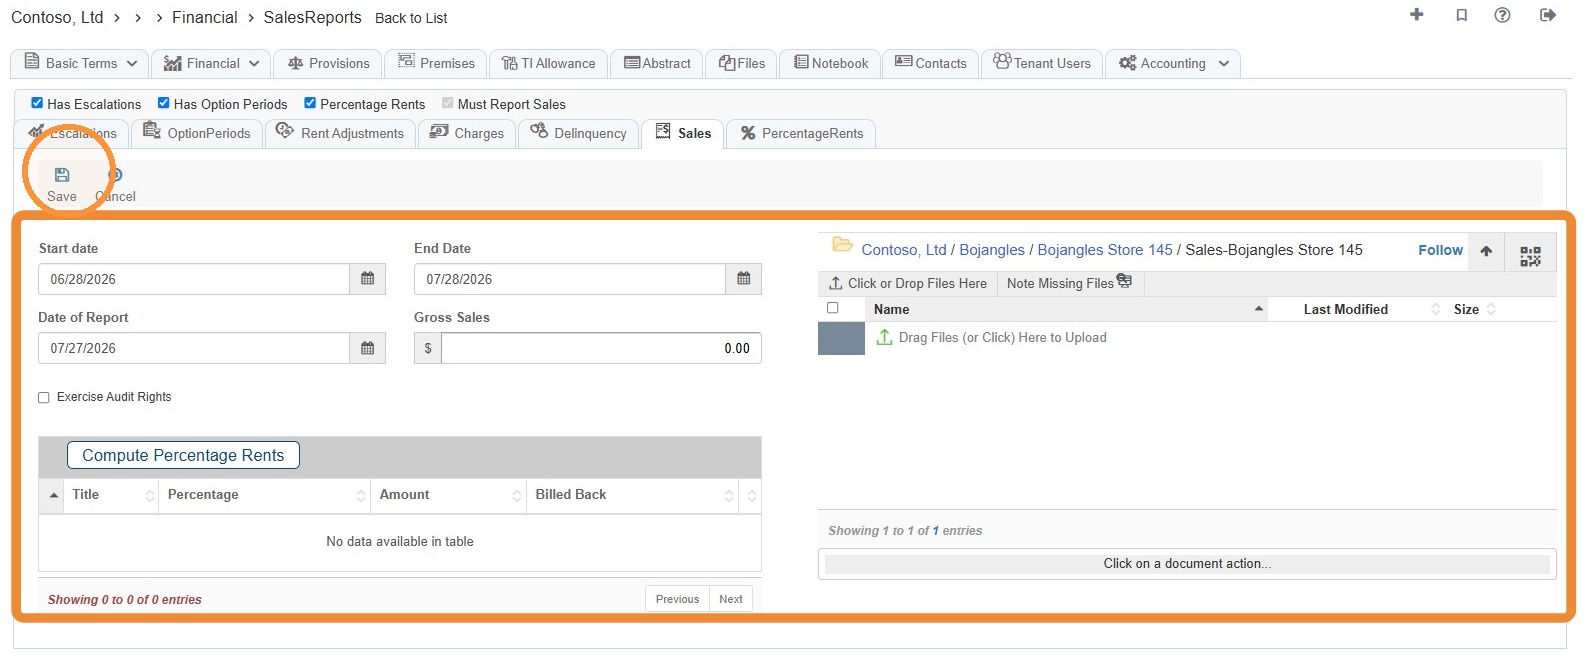
Tip: Percentage rent normally requires sales reporting, but a lease may require sales reports without percentage rent.
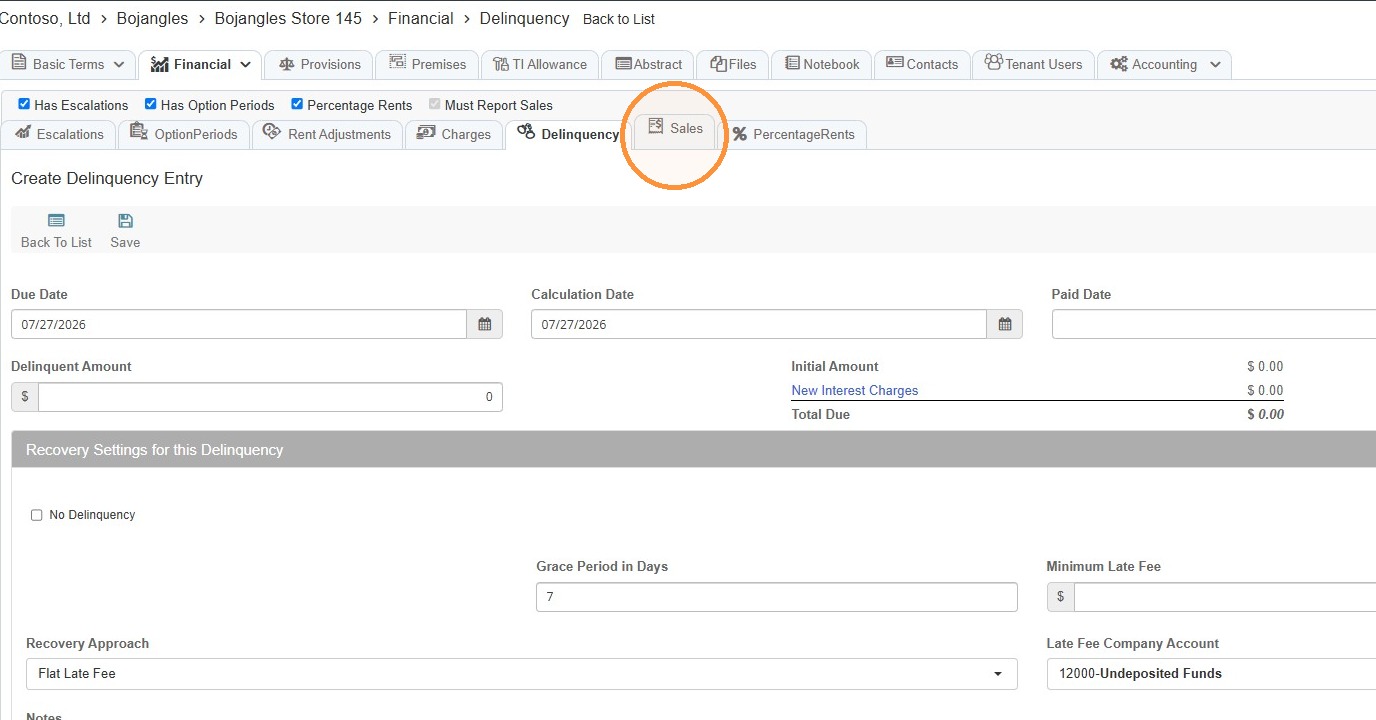
47. Select the Sales tab.
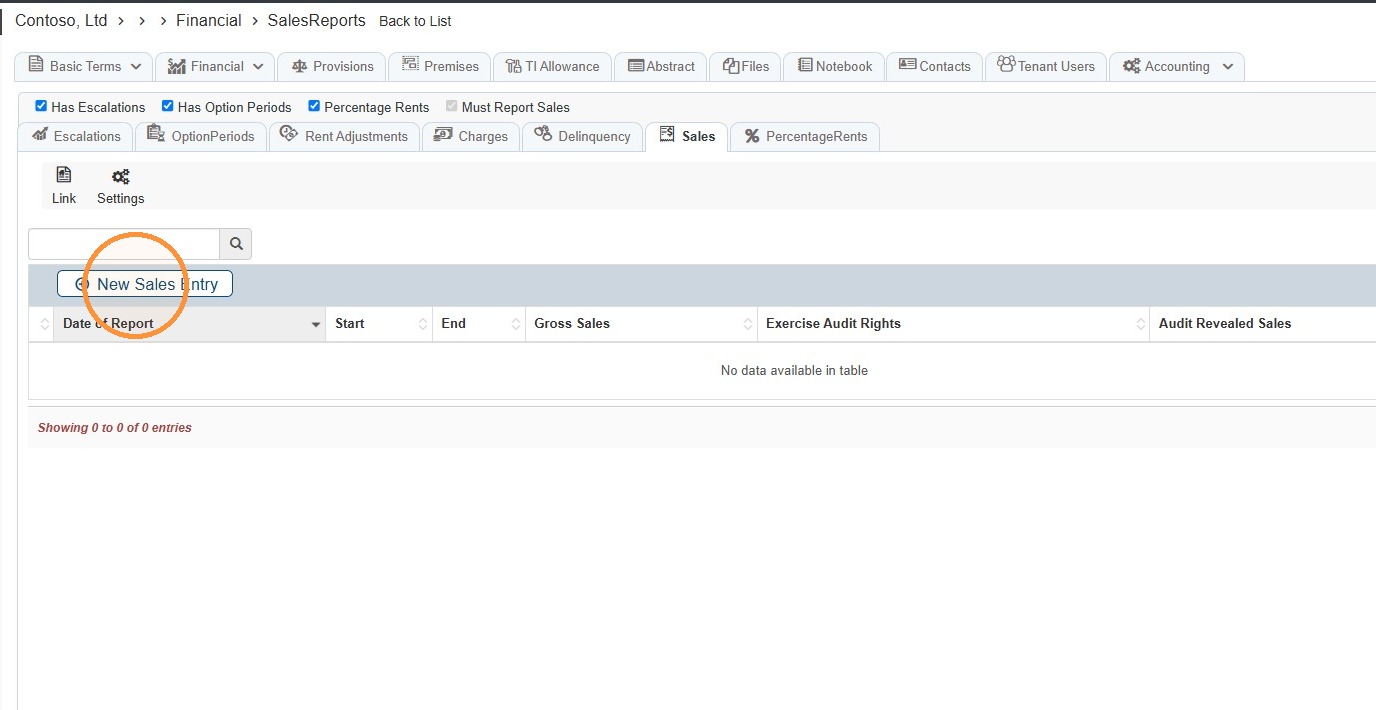
48. Select New Sales Entry.
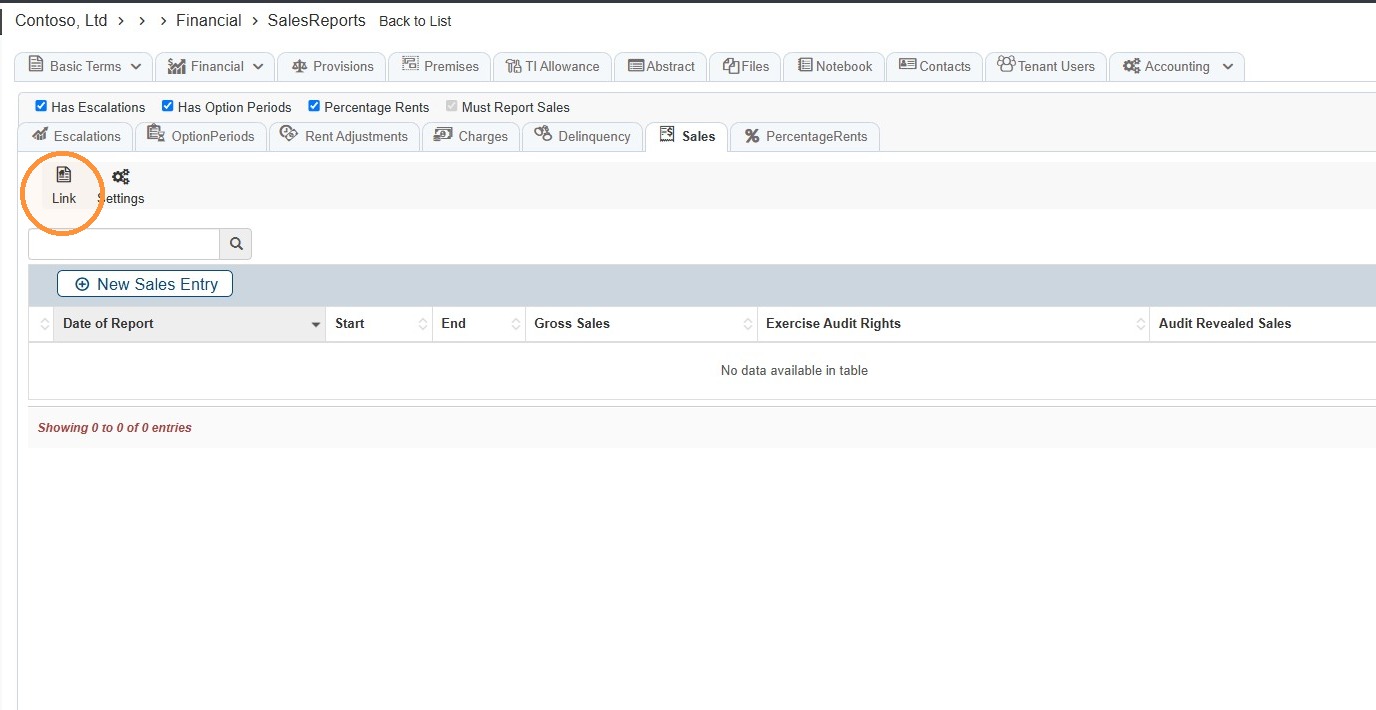
49. Always link the information to the lease document.
50. Enter the information stated in the lease > Upload supporting documents > Select Save.
Enter the first reporting date, reporting frequency, and the number of days after the period end that the report is due.
Percentage Rents
Tip: Enable percentage rent when required by the lease.
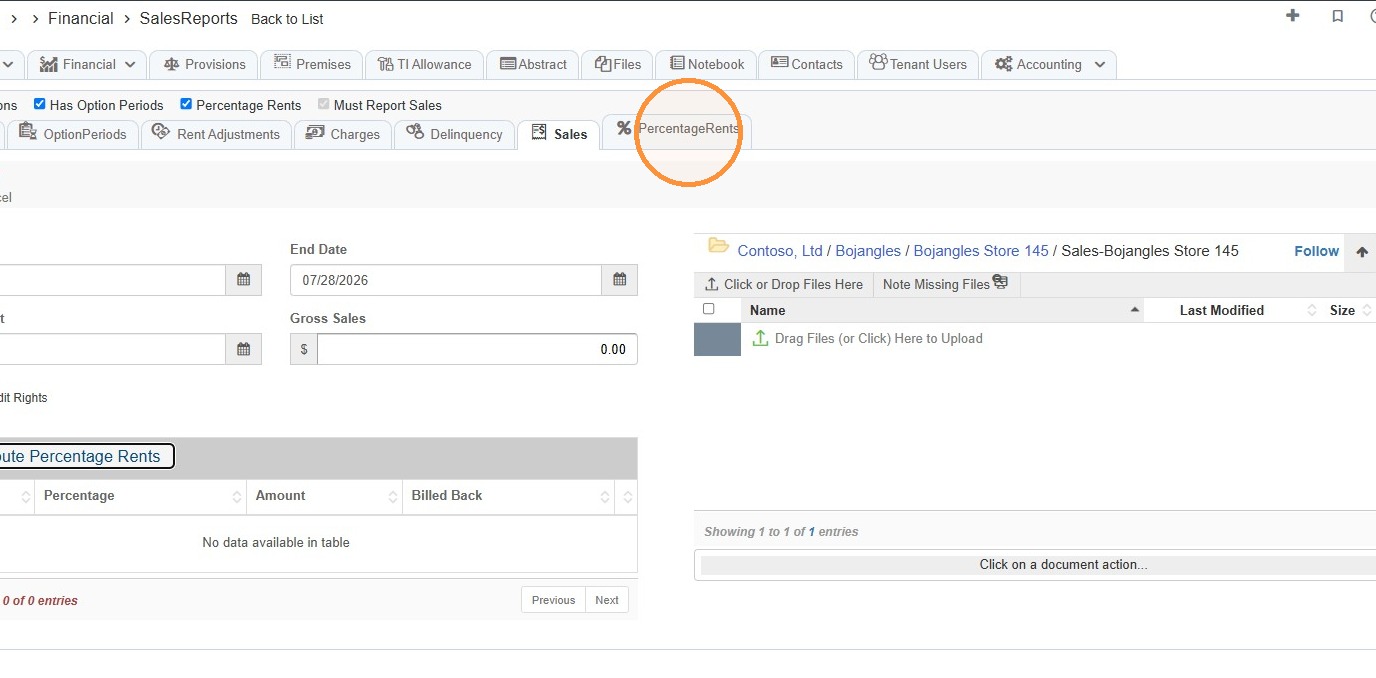
51. Select the Percentage Rents tab.
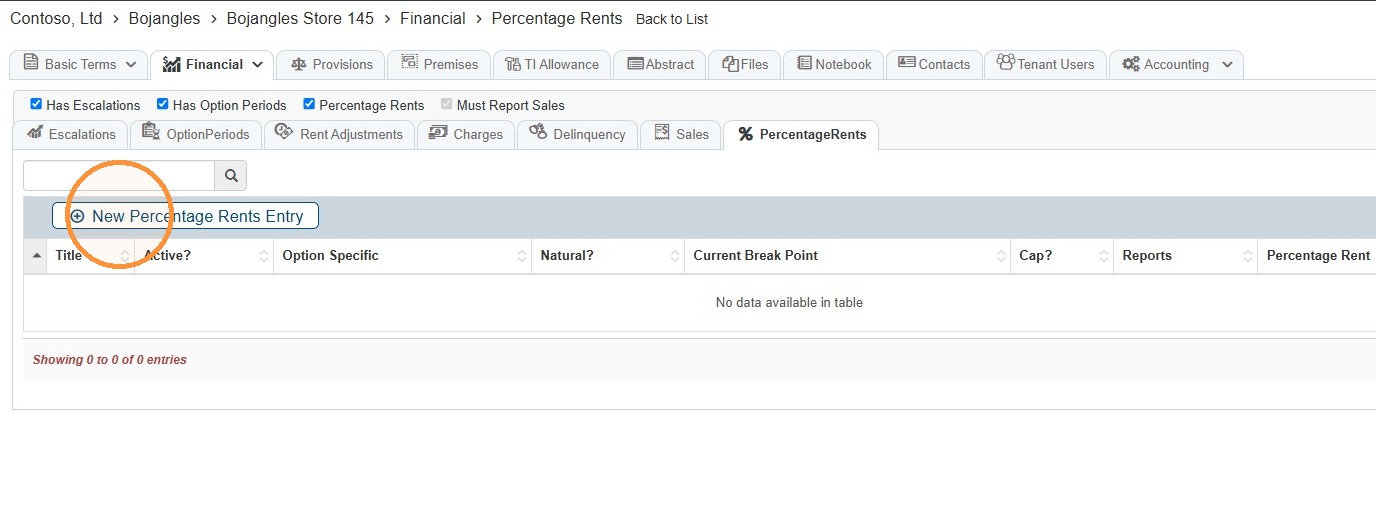
52. Select New Percentage Rents Entry.
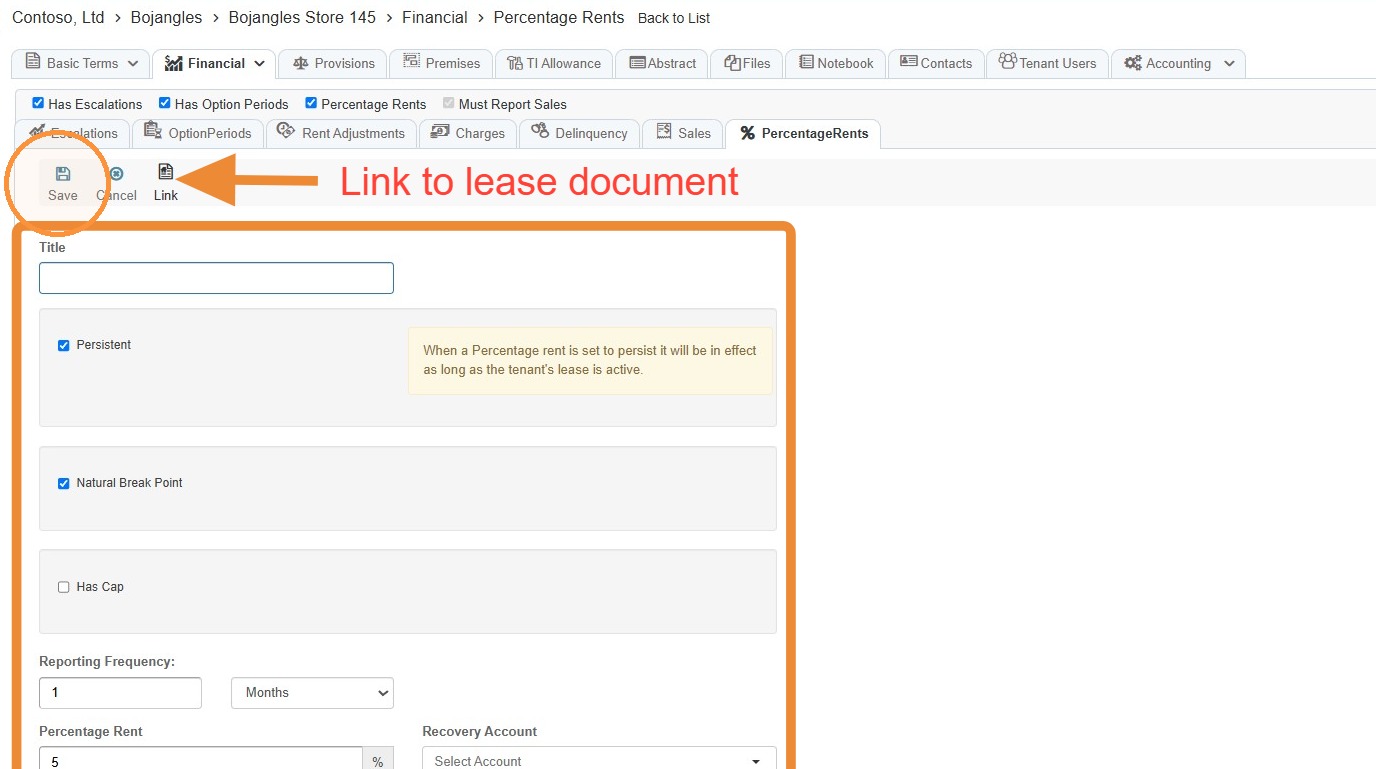
53. Enter the information stated in the lease > Link to the lease document > Select Save.
Provisions
Purpose: Summarize material operational clauses that users need to see on the lease abstract.
Common provisions
Repairs and maintenance
HVAC responsibilities
Relocation rights
Radius restrictions
Exclusive-use restrictions
Parking requirements
Required operating hours
Other client-specific or material clauses
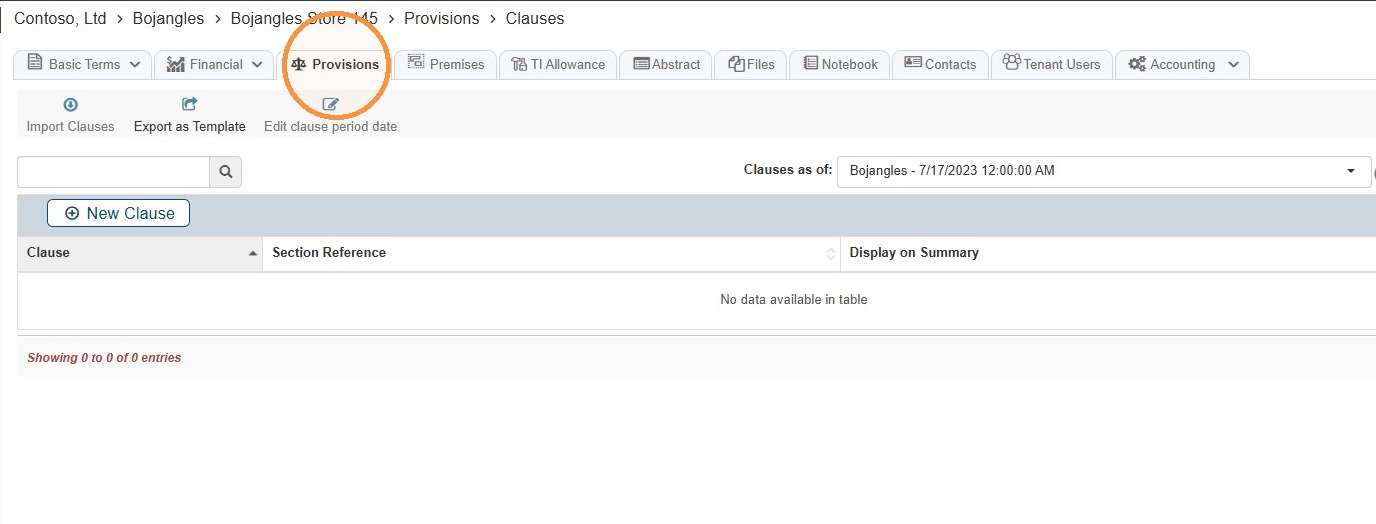
54. Select the Provisions tab.
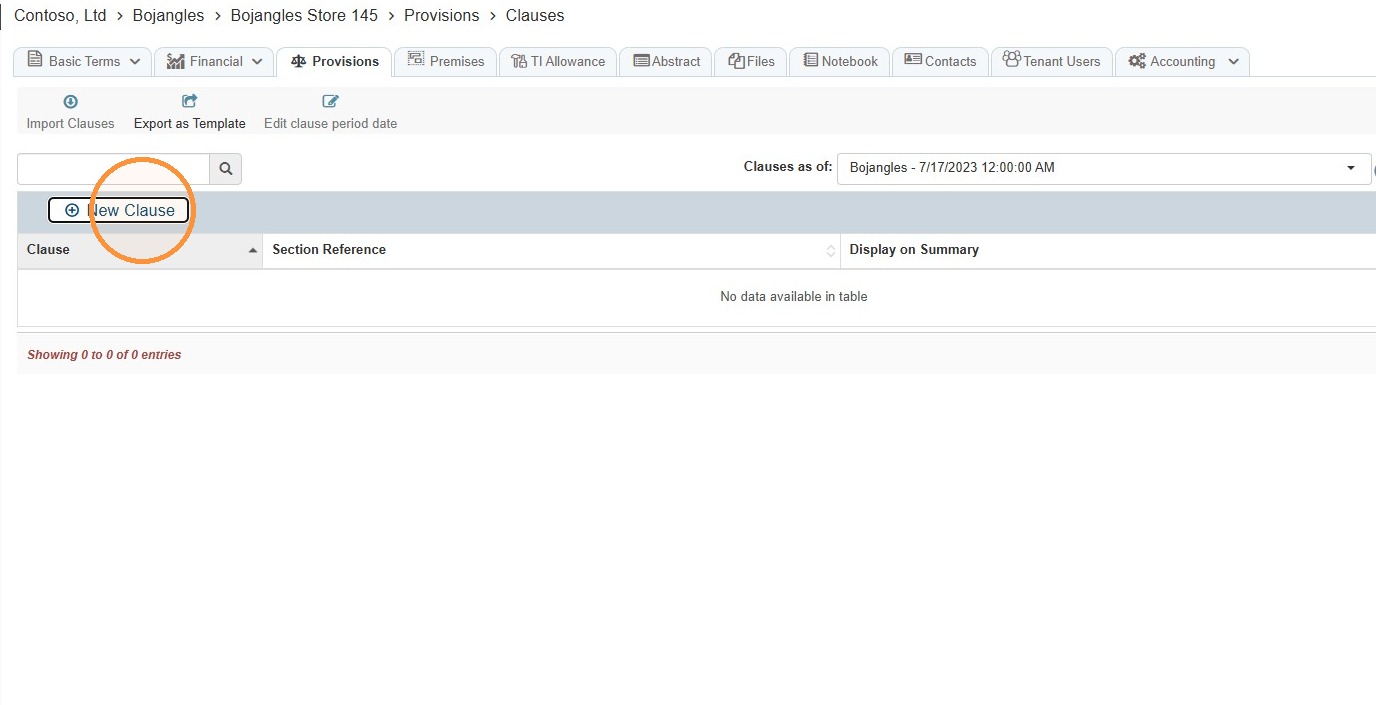
55. Select New Clause.
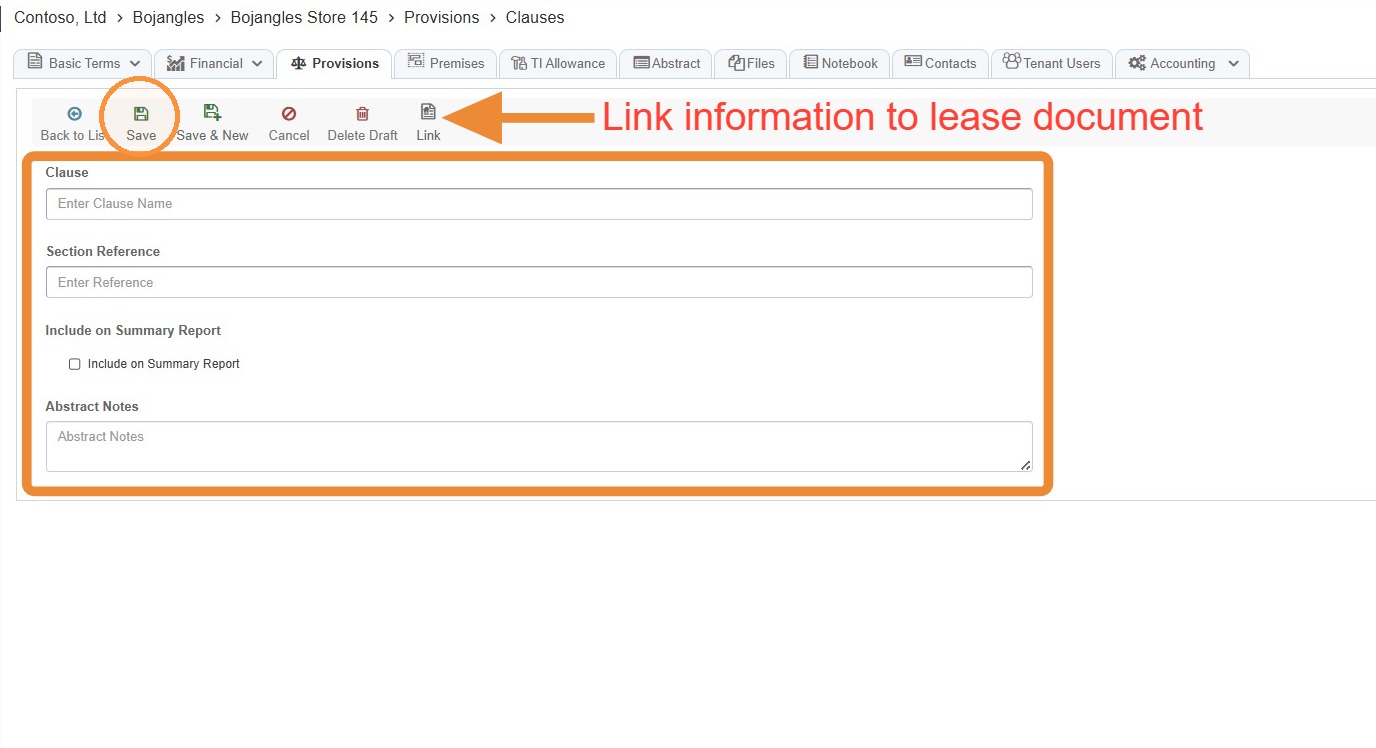
56. Enter the information stated in the lease > Link the information to the lease document > Select Save.
For detailed instructions, refer to How to Add Provisions.
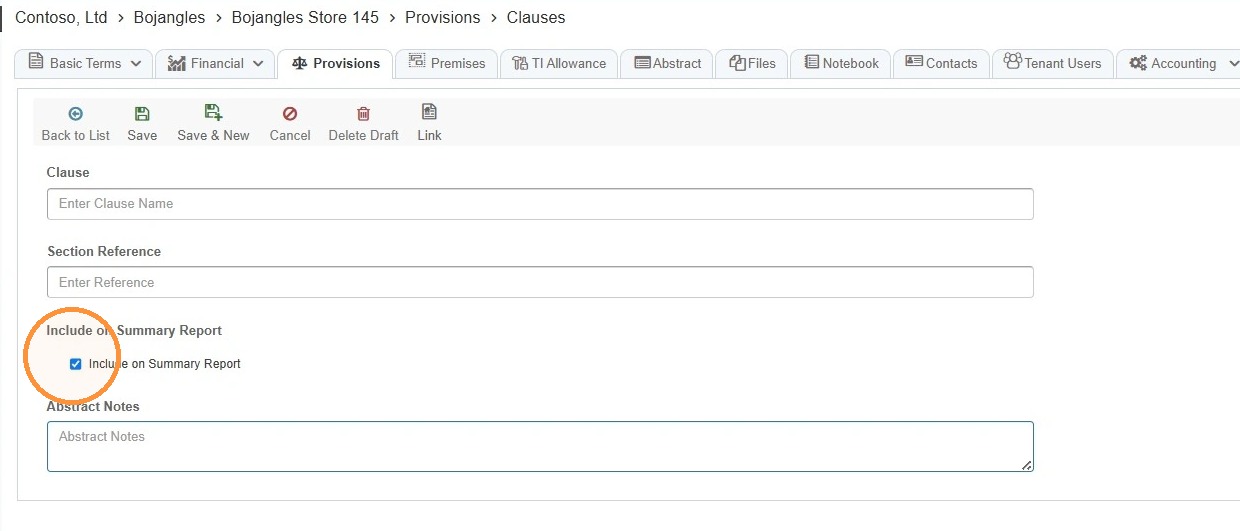
Quality check: The Include on Summary Report checkbox must be selected for important provisions. If it is not selected, the provision will not appear on the abstract.
Premises
Purpose: Record the approved use of the leased premises.
57. Select the Premises tab.
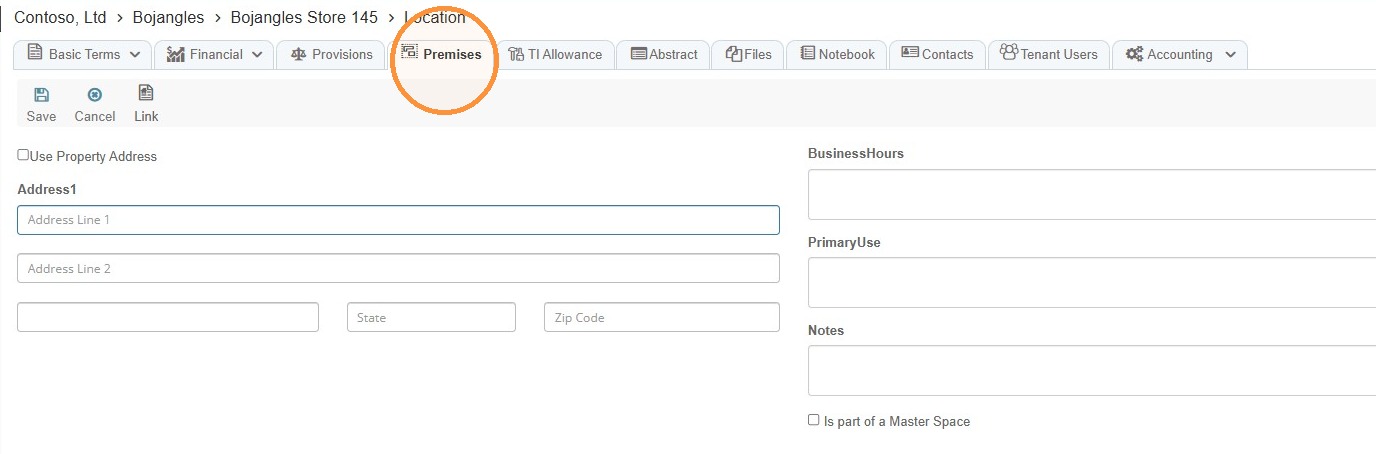
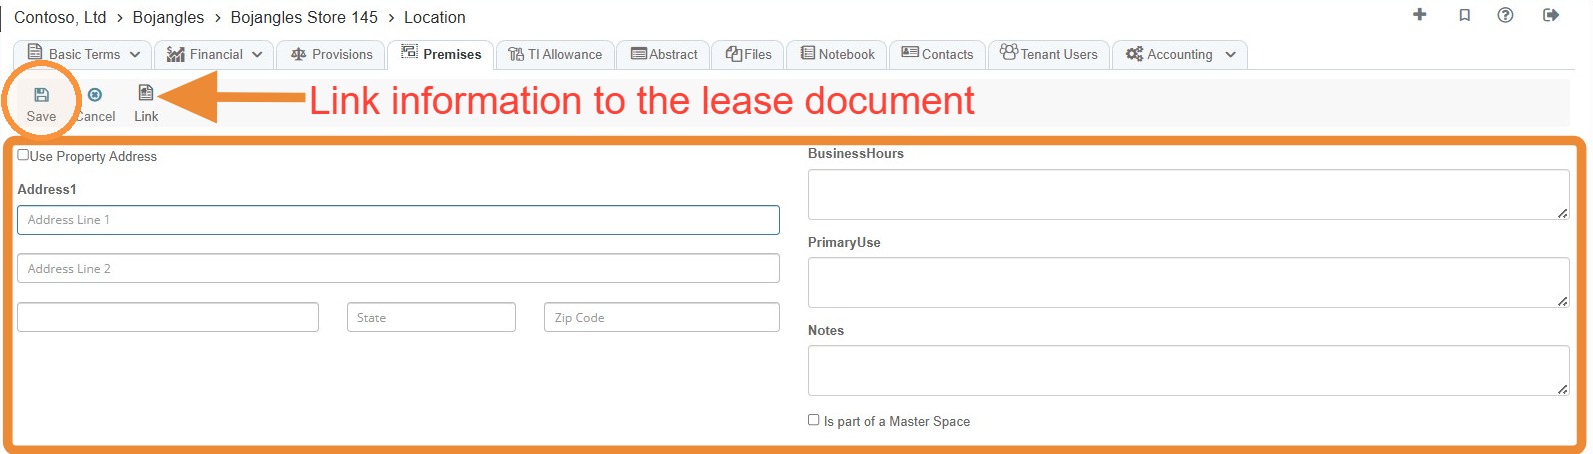
58. Enter the primary or permitted use stated in the lease, such as retail, office, restaurant, veterinary clinic, or dry cleaning > Link the lease section that defines the permitted use > Select Save.
Tip: Treat mandatory operating hours as a provision when they are specifically stated and material.
TI Allowance
Purpose: Record lease-provided funds or allowances for work performed in the premises.
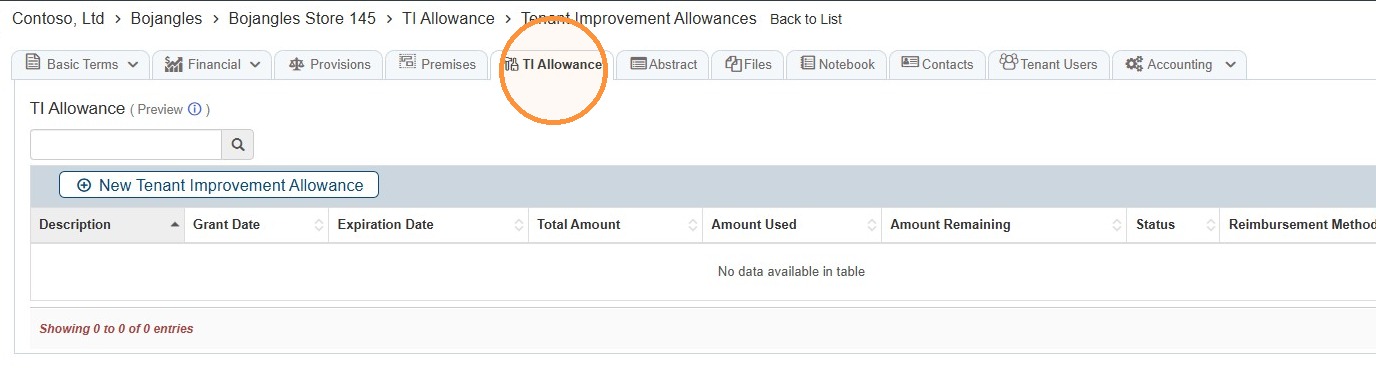
59. Select the TI Allowance tab.
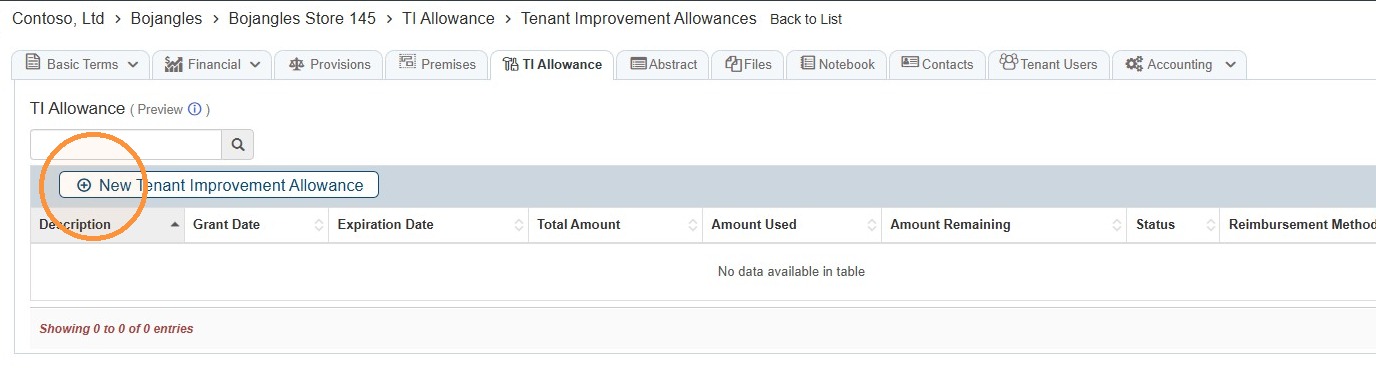
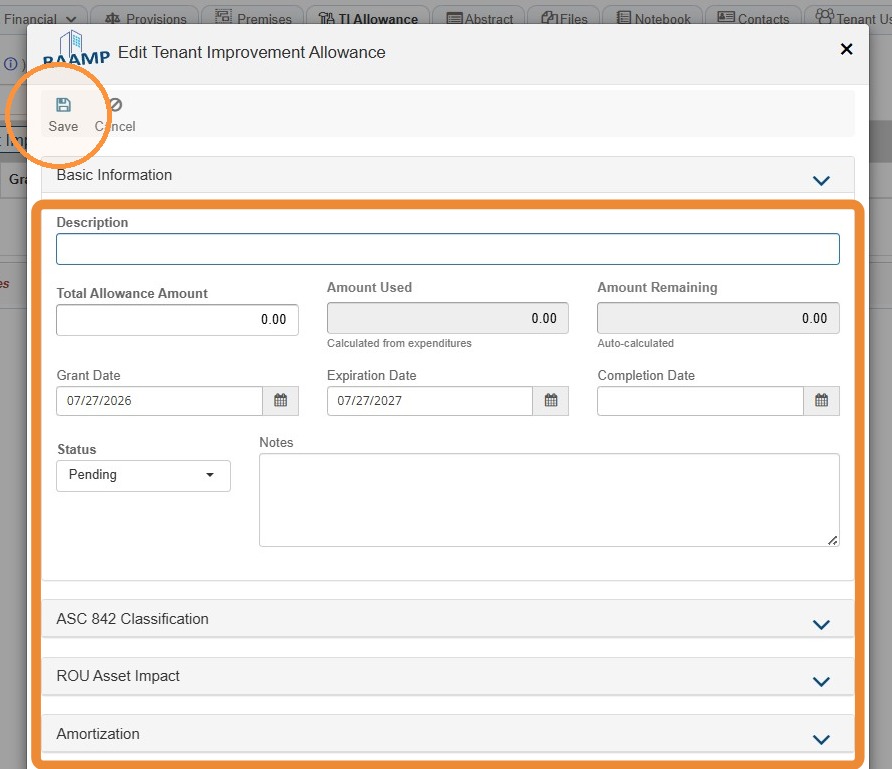
60. Select New Tenant Improvement Allowance.
61. Enter the information > Select Save > Link the information to the lease document.
For detailed instructions, refer to How to Add and Edit a New TI Allowance and Expenditure.
Files
Purpose: Maintain the lease document and flag missing critical documents.
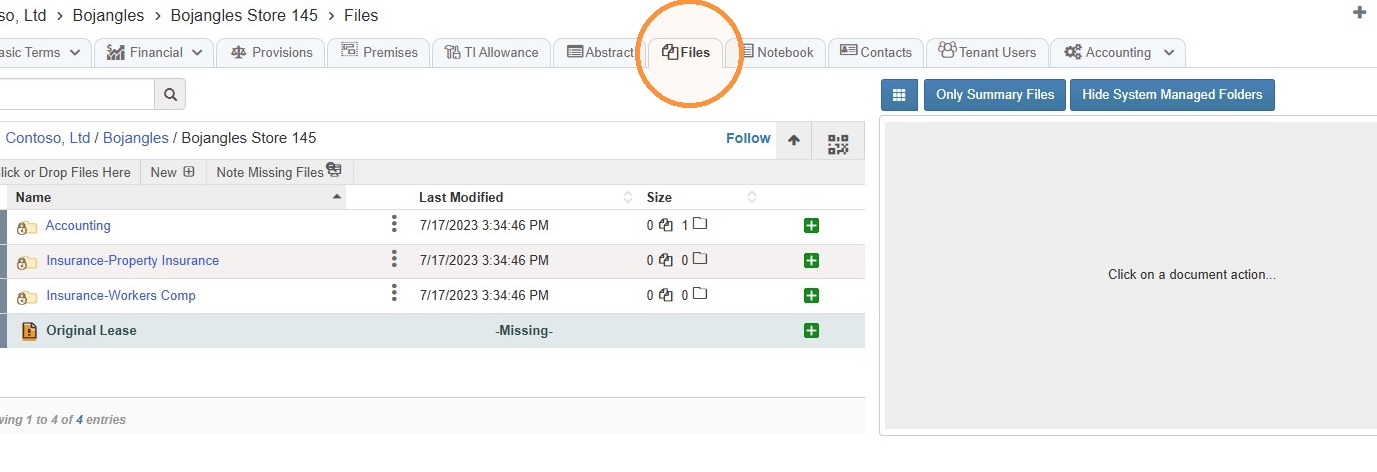
62. Select the Files tab.
Tenant Files Checklist:
The original lease, amendments, option exercise letters, and other lease-related documents are uploaded.
Insurance policies are uploaded in the Insurance tab so they appear in the correct insurance folder.
Deposit evidence is uploaded in the Deposits tab so it appears in the correct deposit folder.
When a critical document is missing, add its expected name, mark it Critical, and add it so the record reflects the missing item.
Do not interpret the original lease's default "missing" status without confirming whether the file is actually attached elsewhere in the record.
Tip: To ensure tenant files are uploaded correctly, see How to Upload Files and Extend Files Access for Tenants.
Contacts
Purpose: Record tenant contacts used for notices, billing, and other lease communications.
63. Select the Contacts tab > Select New Tenant Contact.
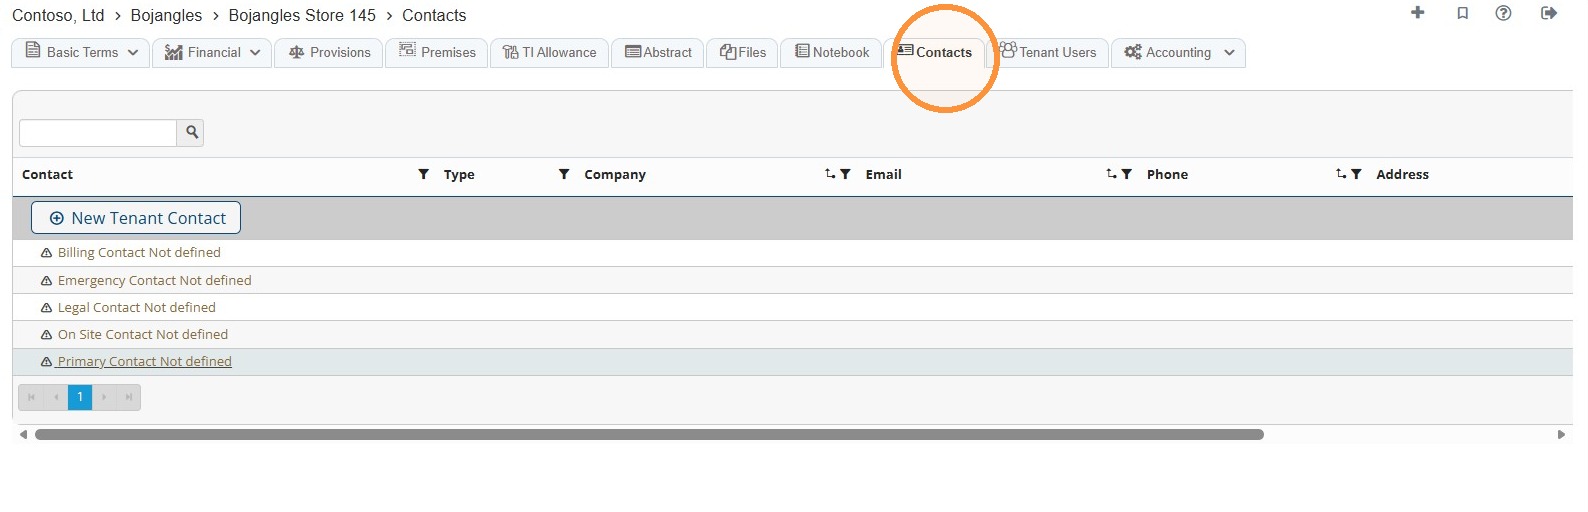
64. Select the Type of Contact dropdown > Select the appropriate option > Select/Enter a Point of Contact > Select Save.
Use Notices for the formal notice contact stated in the lease.
Add a Billing contact when needed for accounting workflows.
Add any additional named contacts using the most appropriate role, or select Other when no standard role fits.
Abstract
Purpose: Review the completed abstract as the final checkpoint before the lease abstraction is considered complete.
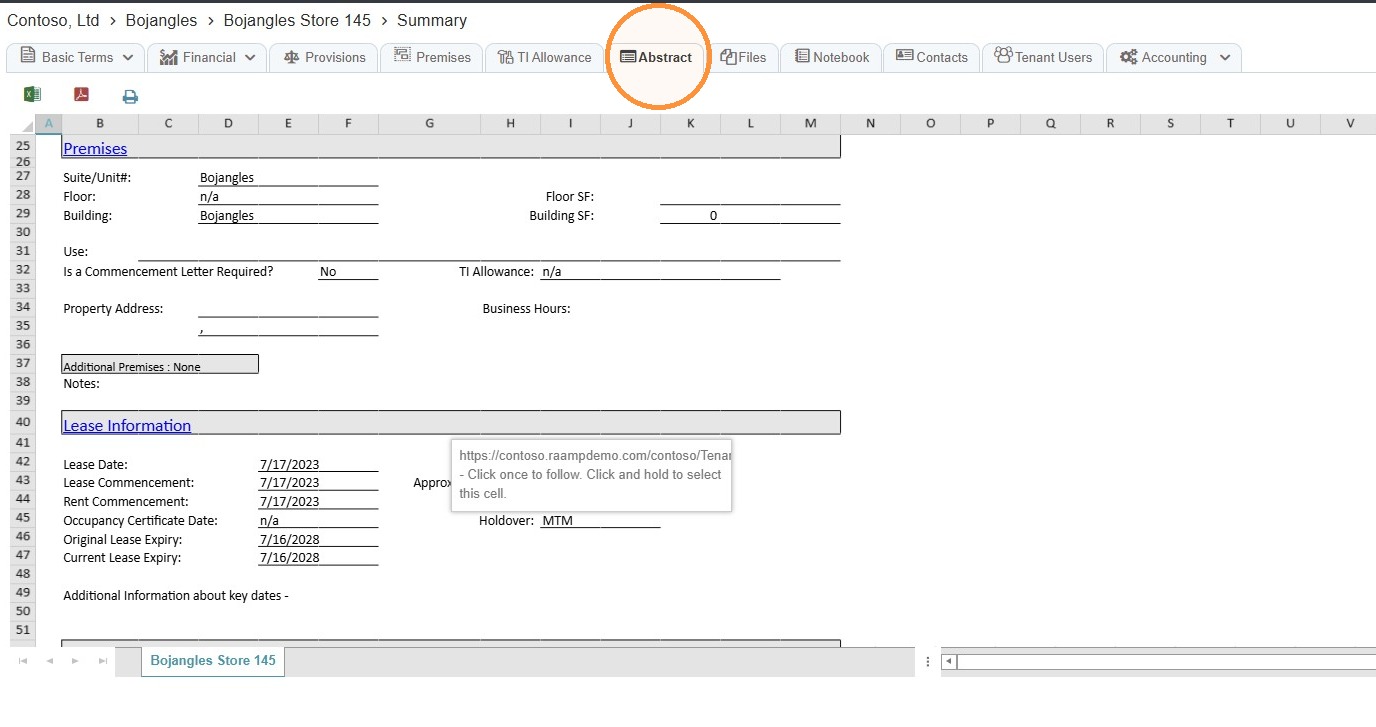
65. Select the Abstract tab after completing all other tabs.
Abstract Review Checklist:
- Scroll through every section and confirm the expected data appears.
- Verify lease dates, premises, original rent, holdover, deposits, escalations, option periods, charges, percentage rent, provisions, and linked documents.
- Confirm important provisions display on the summary.
- Check that amounts and dates are internally consistent.
- Return to the applicable tab to correct missing or inaccurate information.
- Save all corrections and review the Abstract again.
Amendments
Purpose: Apply post-execution changes without overwriting the original lease information.
66. The Amendments tab displays amendment-related information but is not the primary data-entry location.
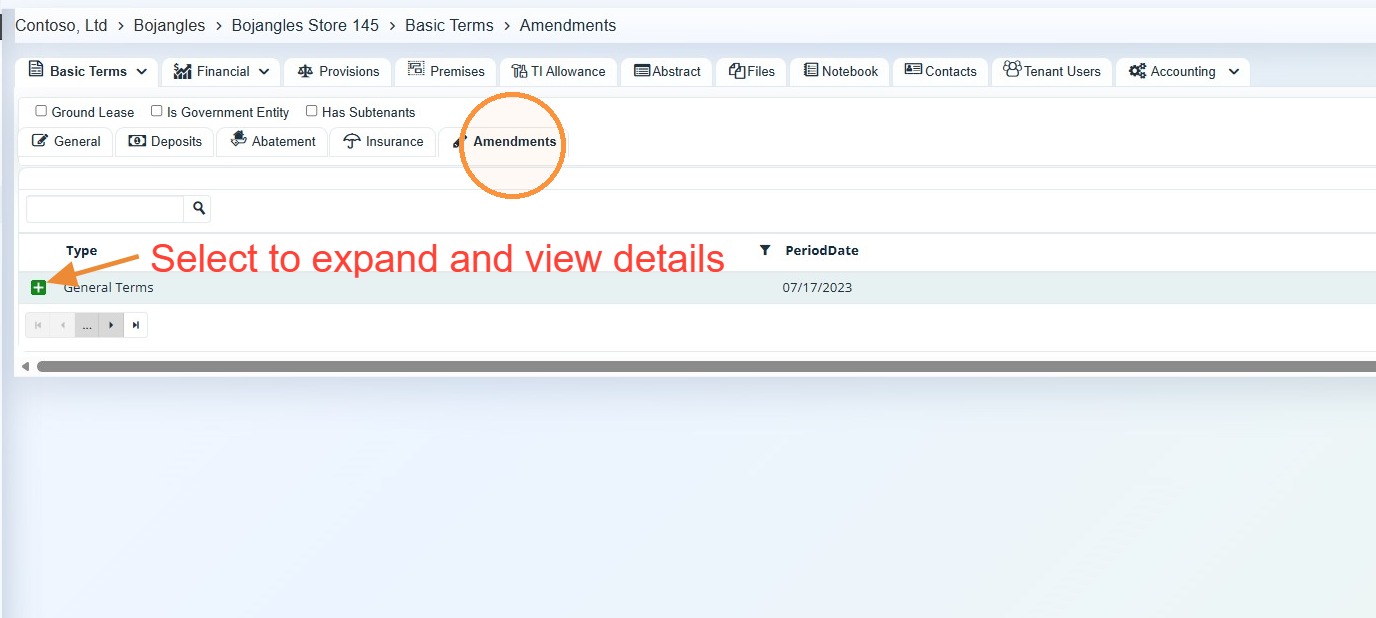
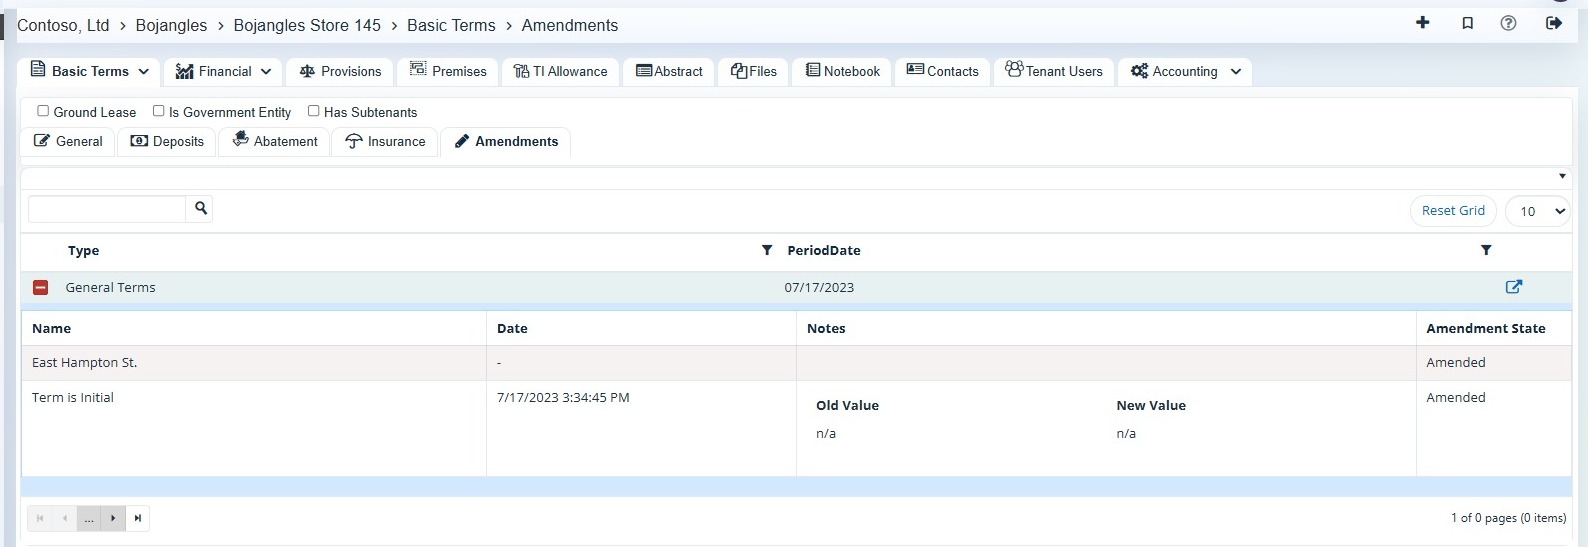
To add an amendment, use Add Amendment on the General tab.
For detailed instructions, refer to How to Create a Lease Amendment and View Historical Data.
