How to Use Pay Bill (RAAMP Pay)
This guide shows exactly how to complete a bill payment using RAAMP Pay, including adding and verifying payee ACH details and linking the correct account. It walks through the menus and button choices step-by-step so you avoid setup mistakes and ensure the payment is authorized. It also shows three places to verify the bill status so you can confirm payment succeeded.
How to Use Pay Bill
Tip: Once RAAMP Pay is verified and a bill is created, you can use the "Pay Bill" option.
Don't know how to add a bill? See:How to Manually Add New Bills/Credit;\ How to Use AI to Enter a Payable/Bill
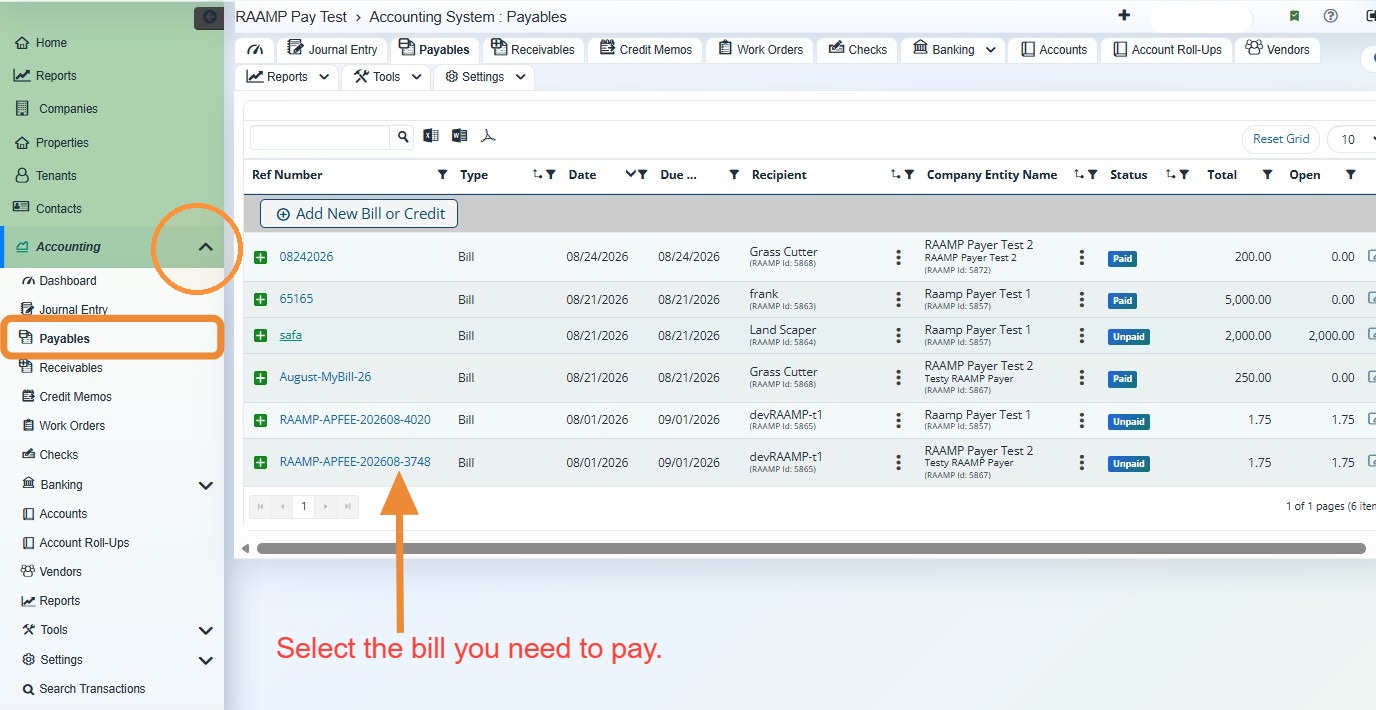
1. From the navigation menu, select Accounting > Select Payables > Select the bill you want to pay.
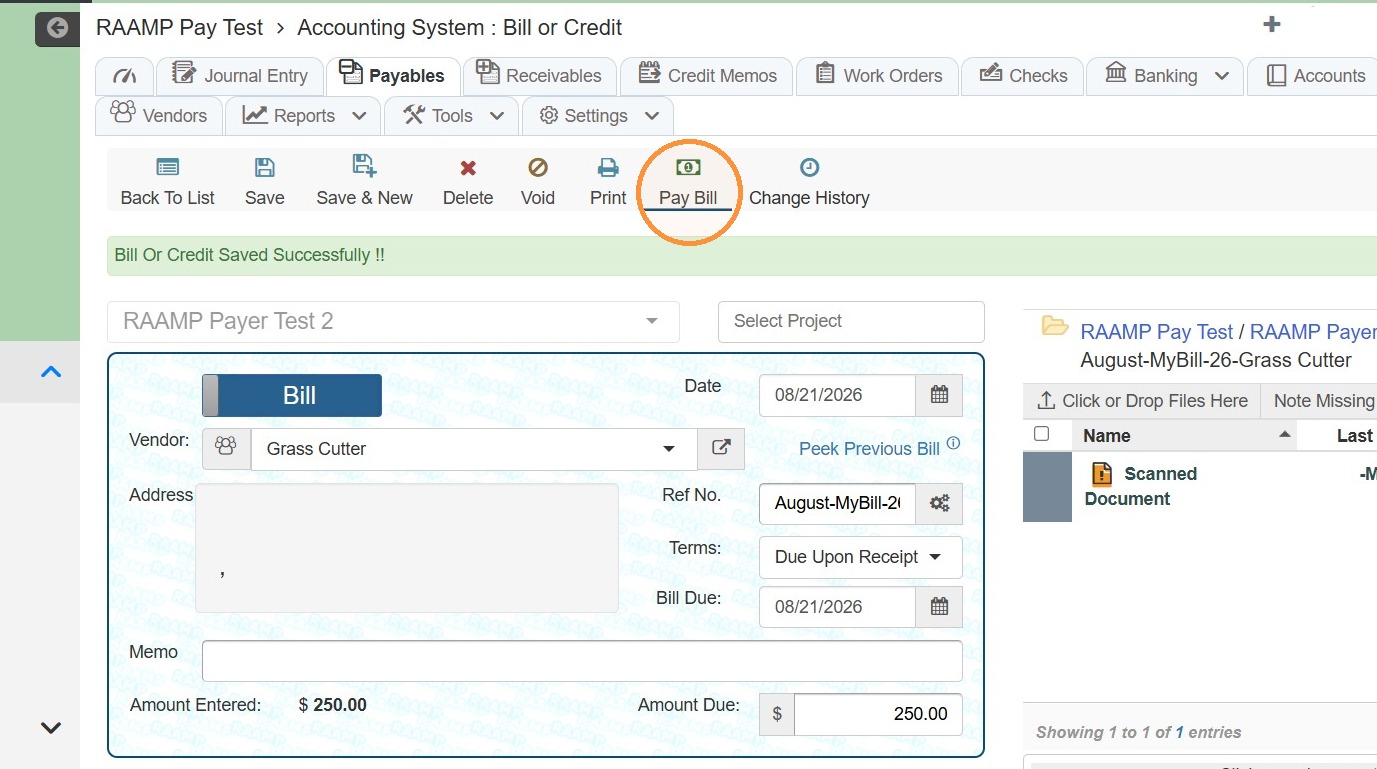
2. Select Pay Bill.
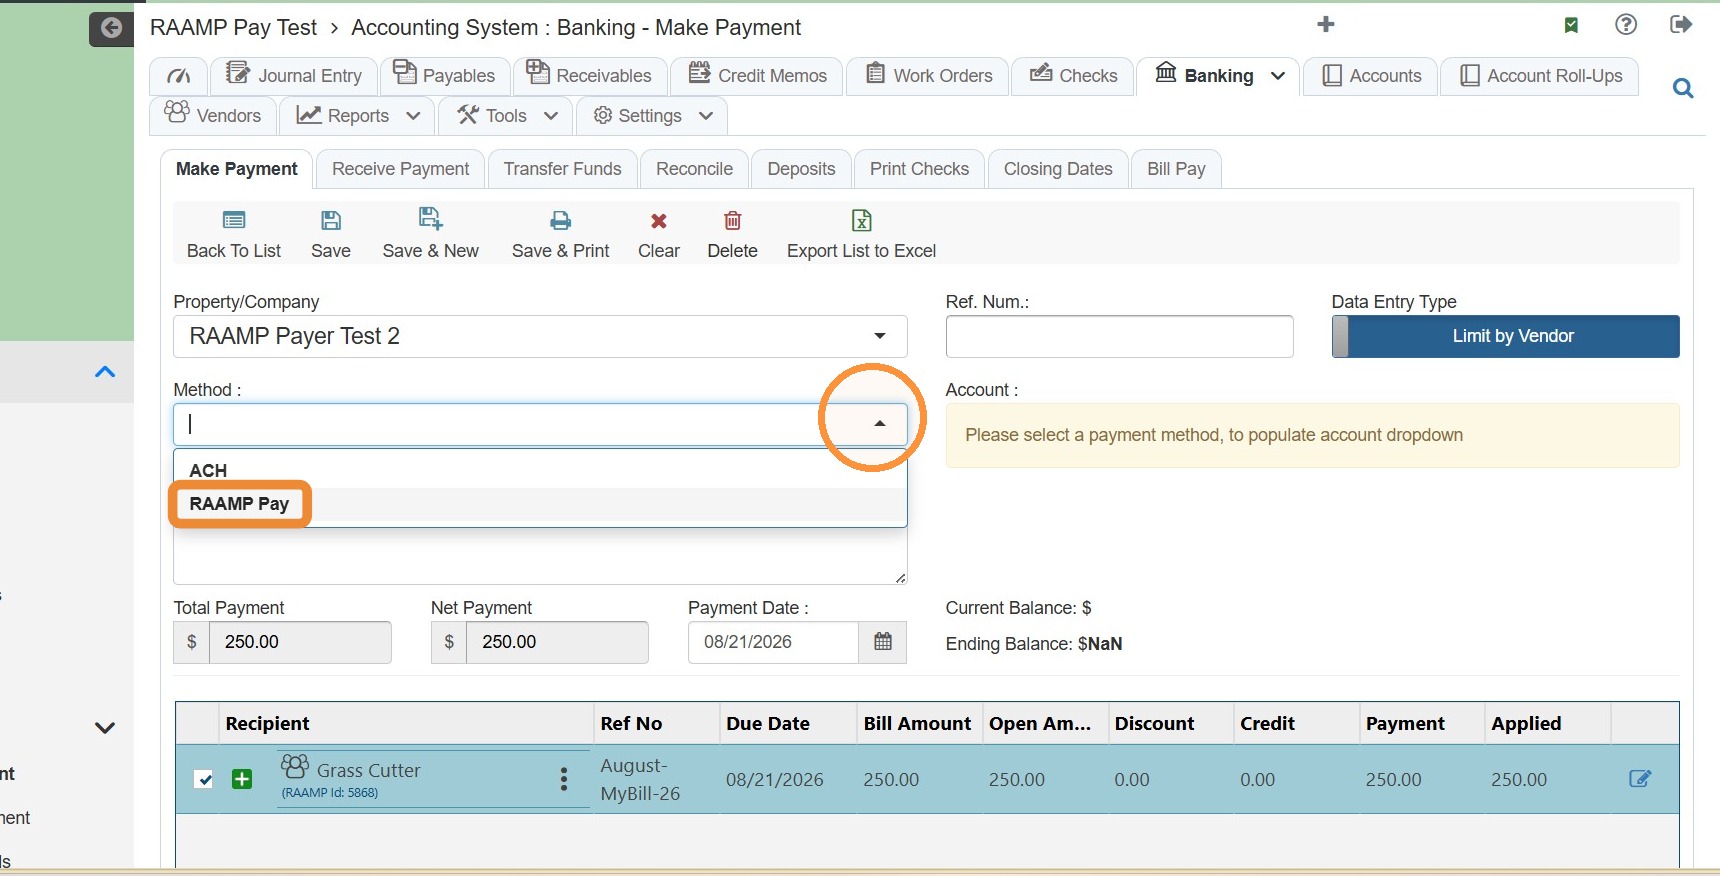
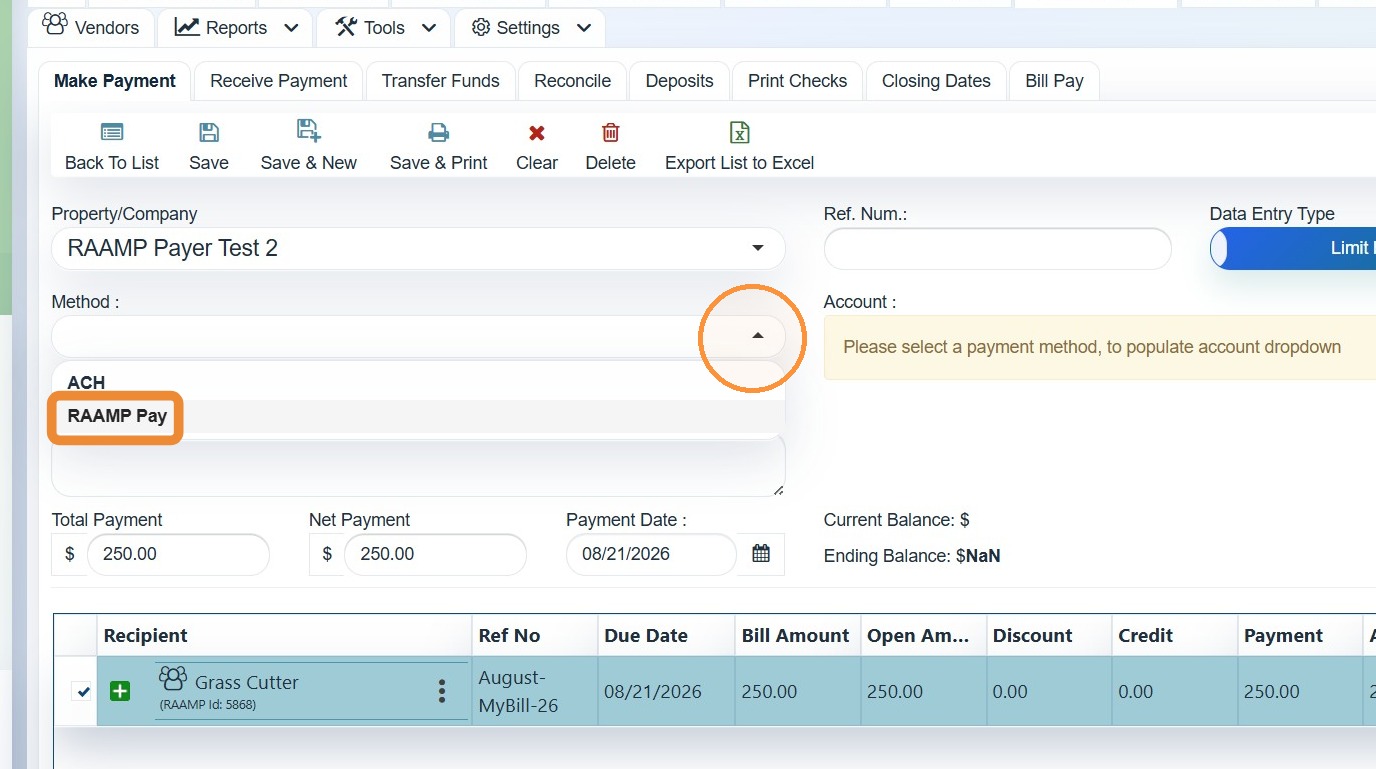
3. Select the Method dropdown menu > Select RAAMP Pay.
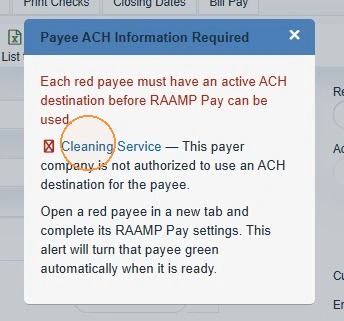
4. If you receive the Payee ACH Information Required box, select the red payee to complete the RAAMP Pay Settings.
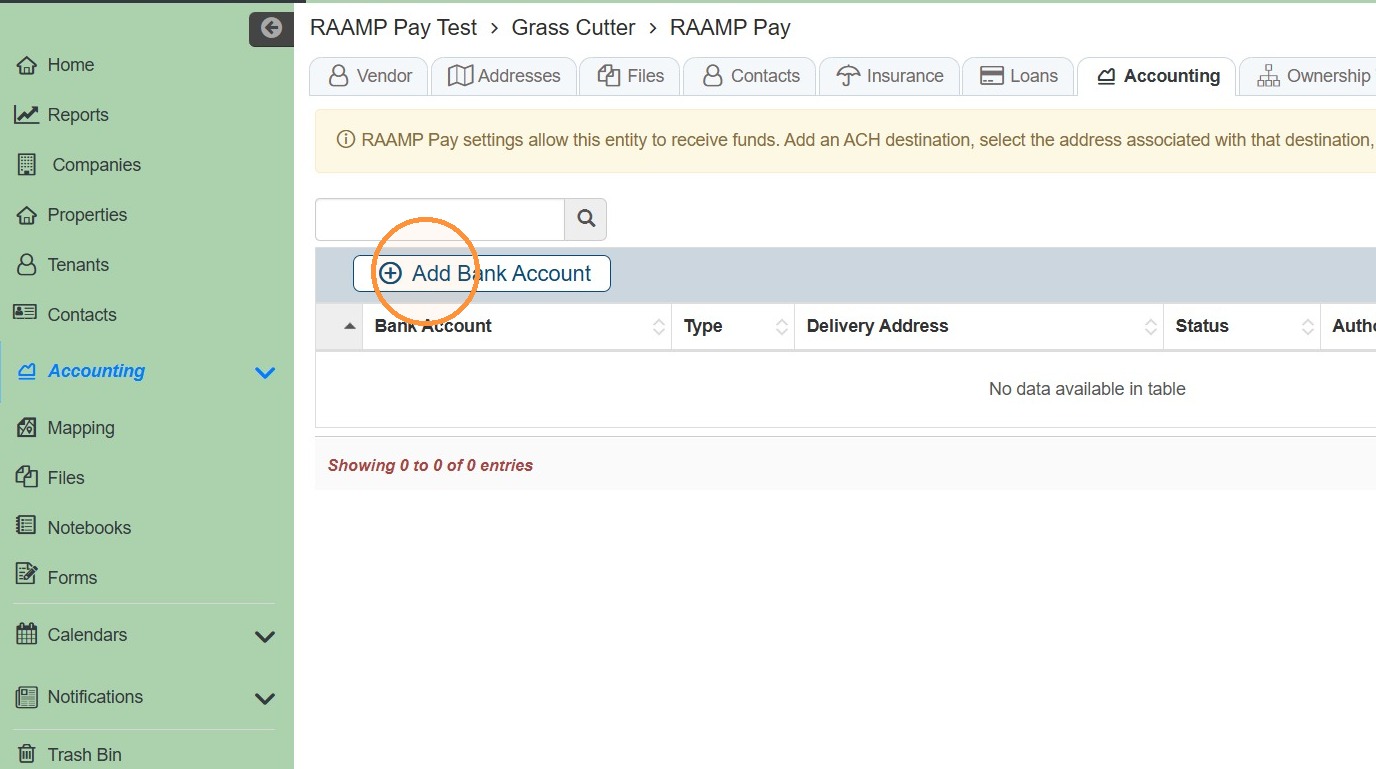
5. Select Add Bank Account.
6. Enter the ACH Destination information.
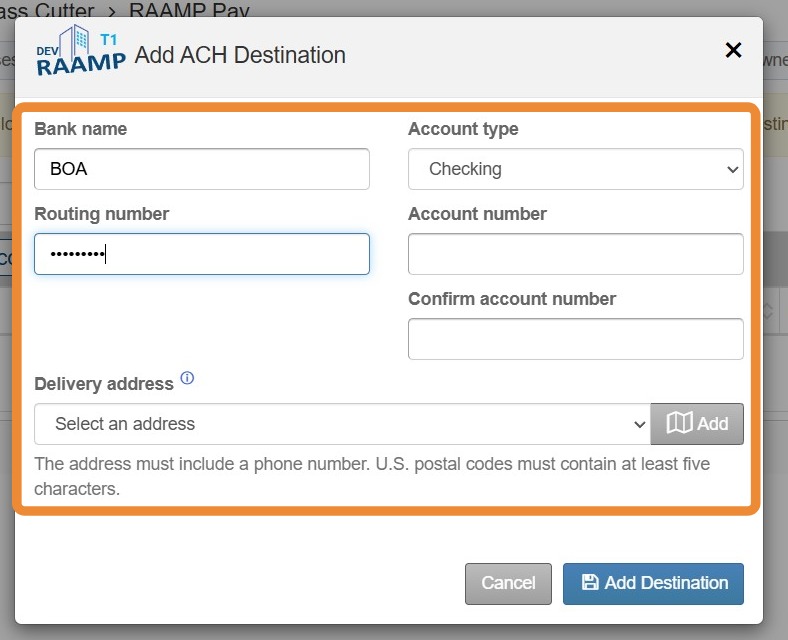
7. Select Add Destination.
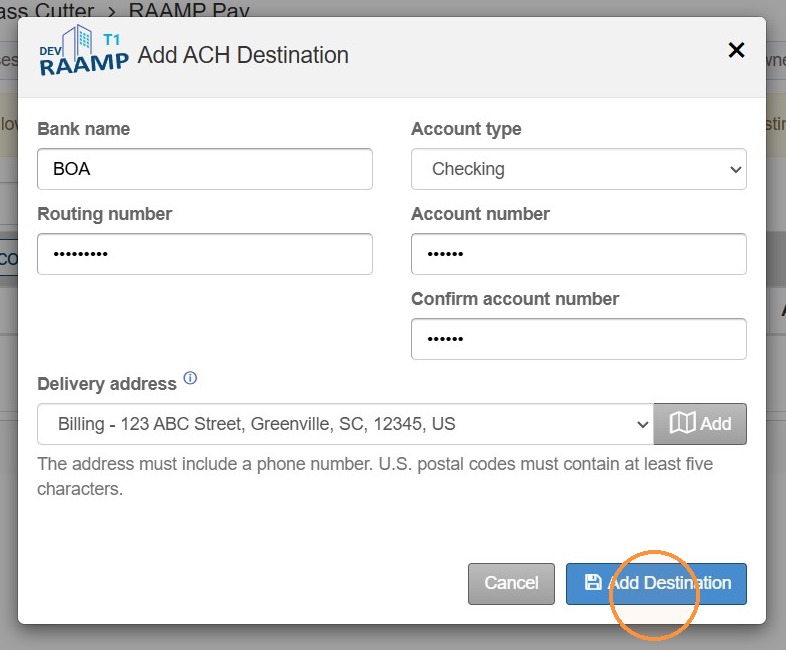
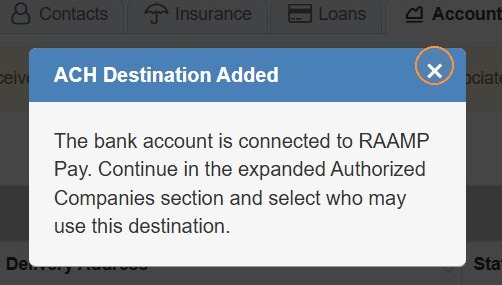
8. You'll receive the ACH Destination Added box > Select the x to exit.
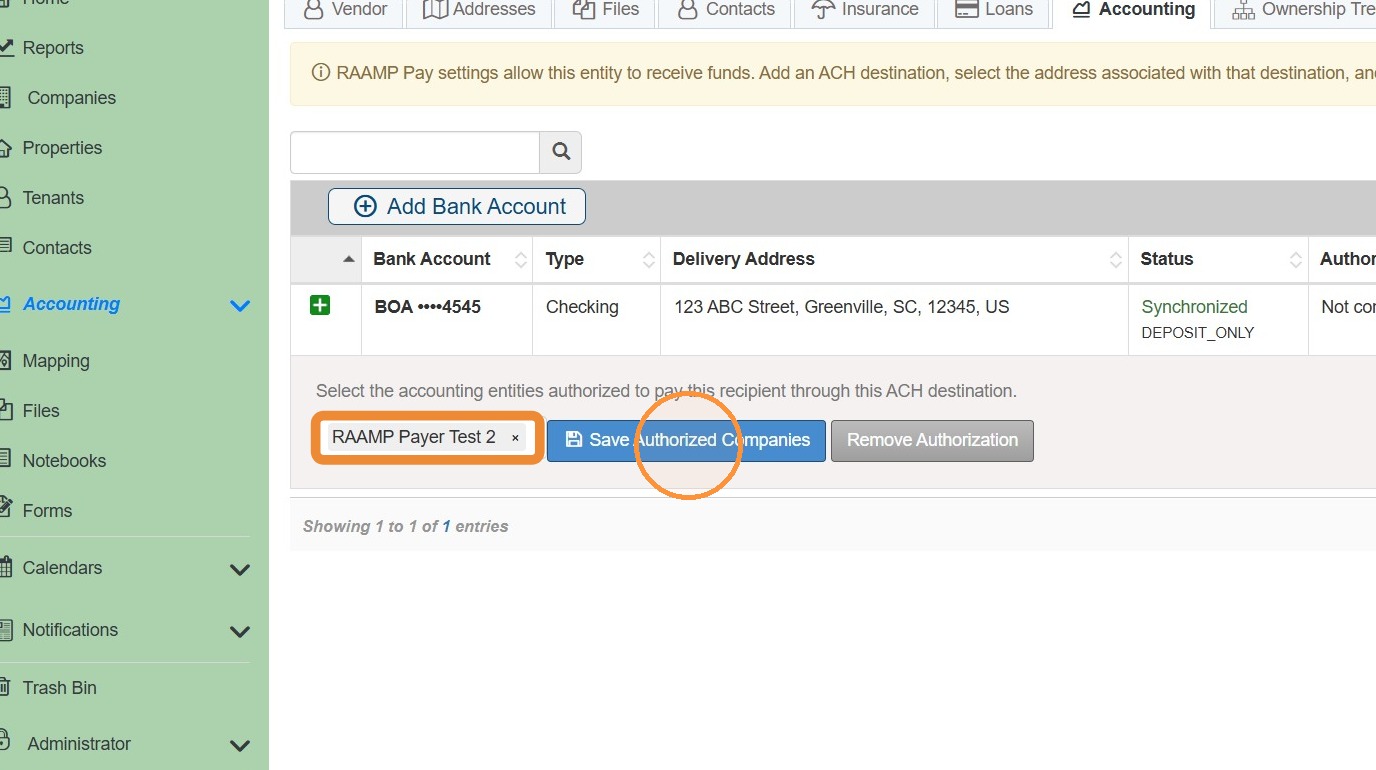
9. Select the appropriate accounting entity > Select Save Authorized Companies.
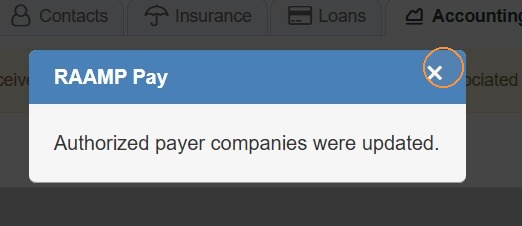
10. You'll receive a confirmation > Select the x to exit.
11. Return to the payables tab and the Payees Ready for RAAMP Pay alert will notify you the vendor is ready for RAAMP Pay.
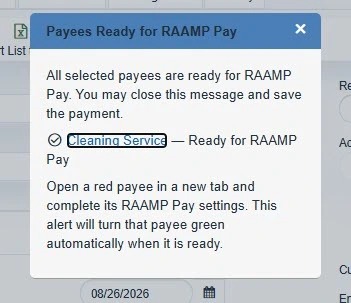
12. Return to the bill > Select the Method dropdown menu > Select RAAMP Pay.
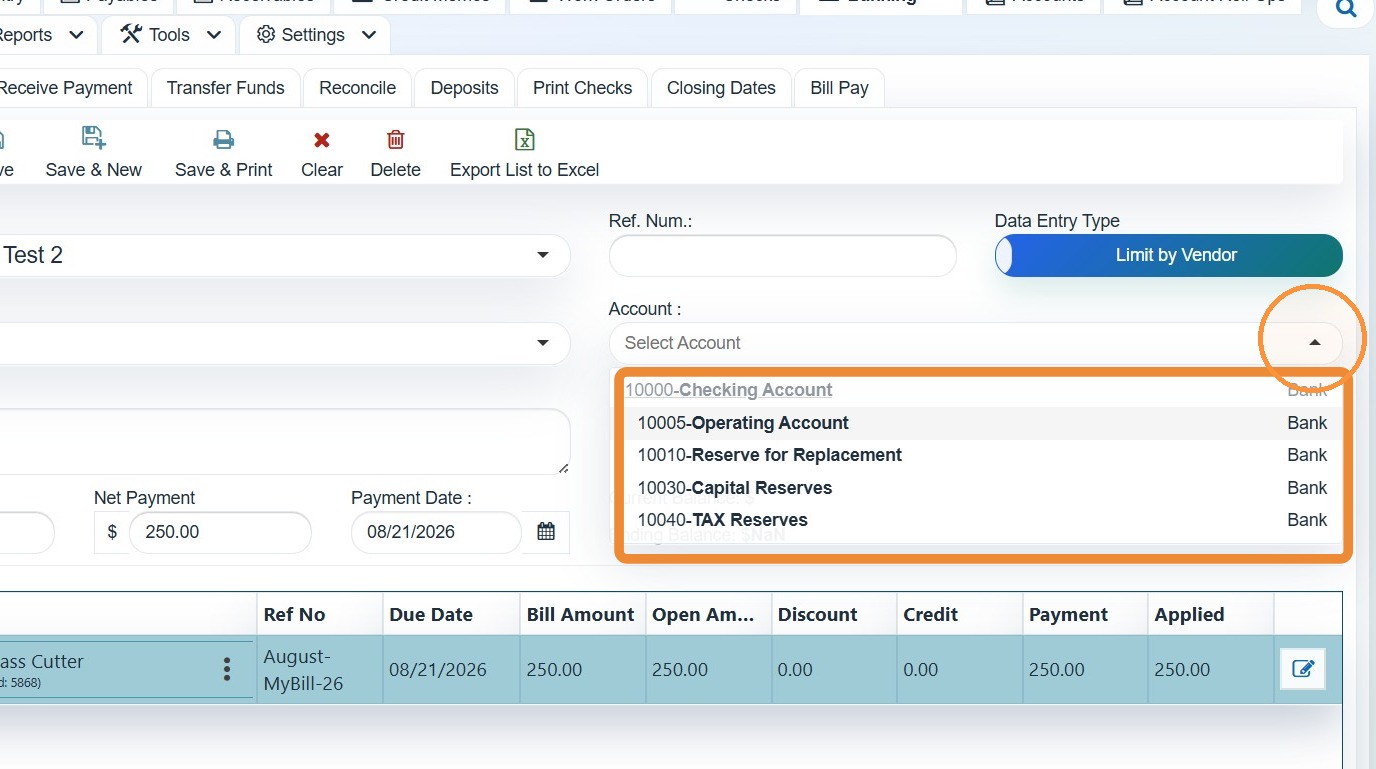
13. Select the Account dropdown menu > Select the appropriate account.
14. Confirm you have entered a reference number.
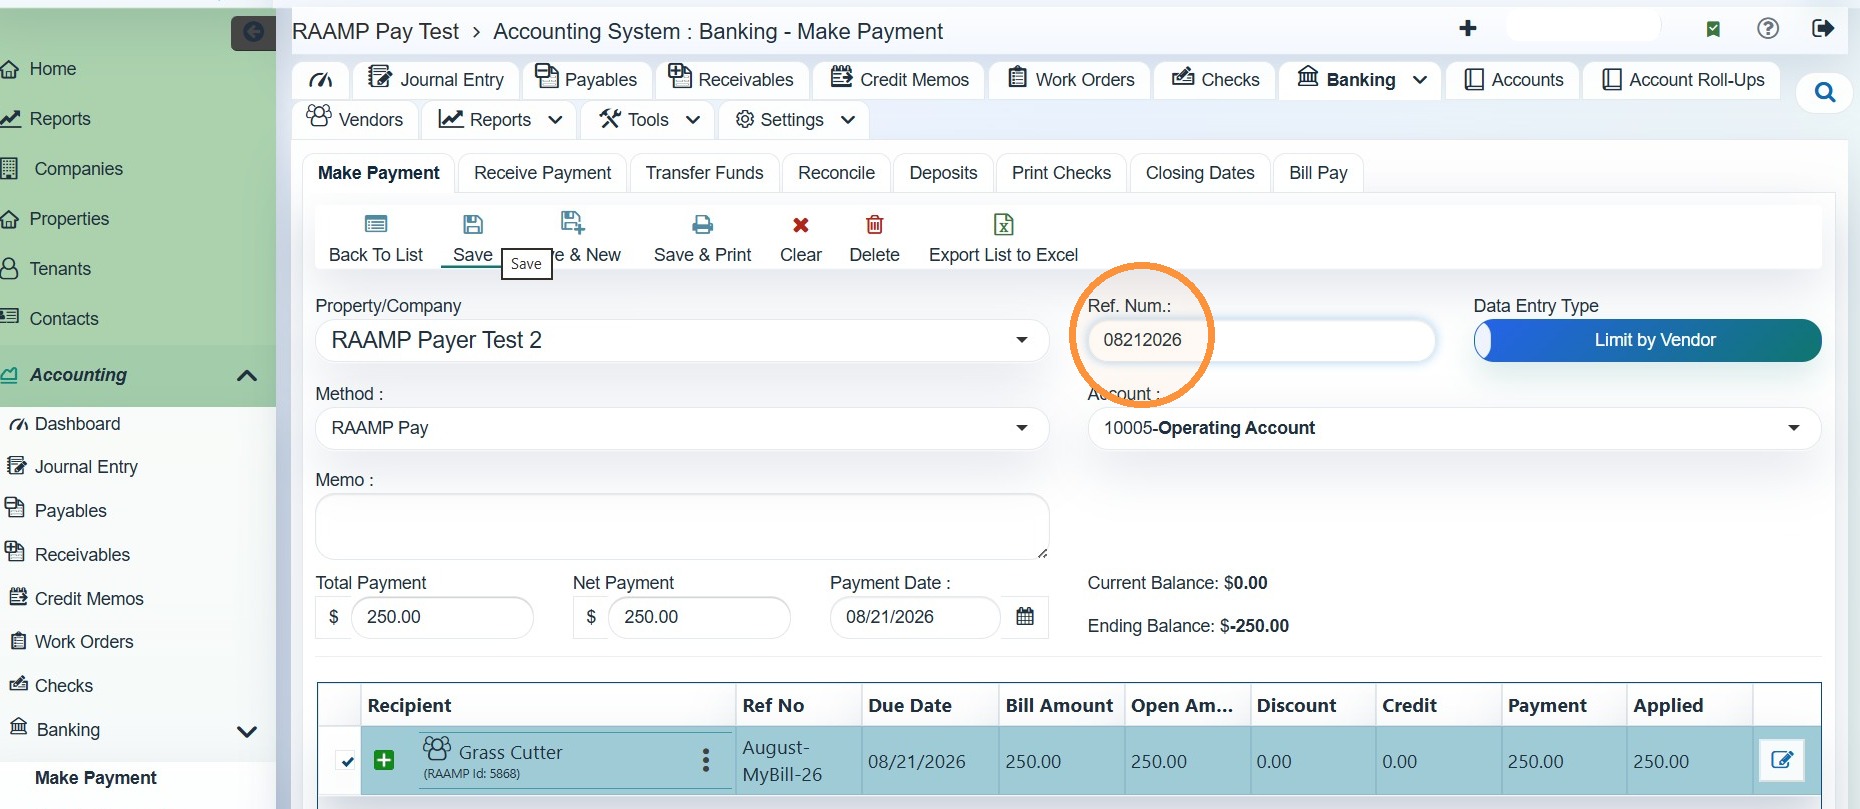
15. Select Save.
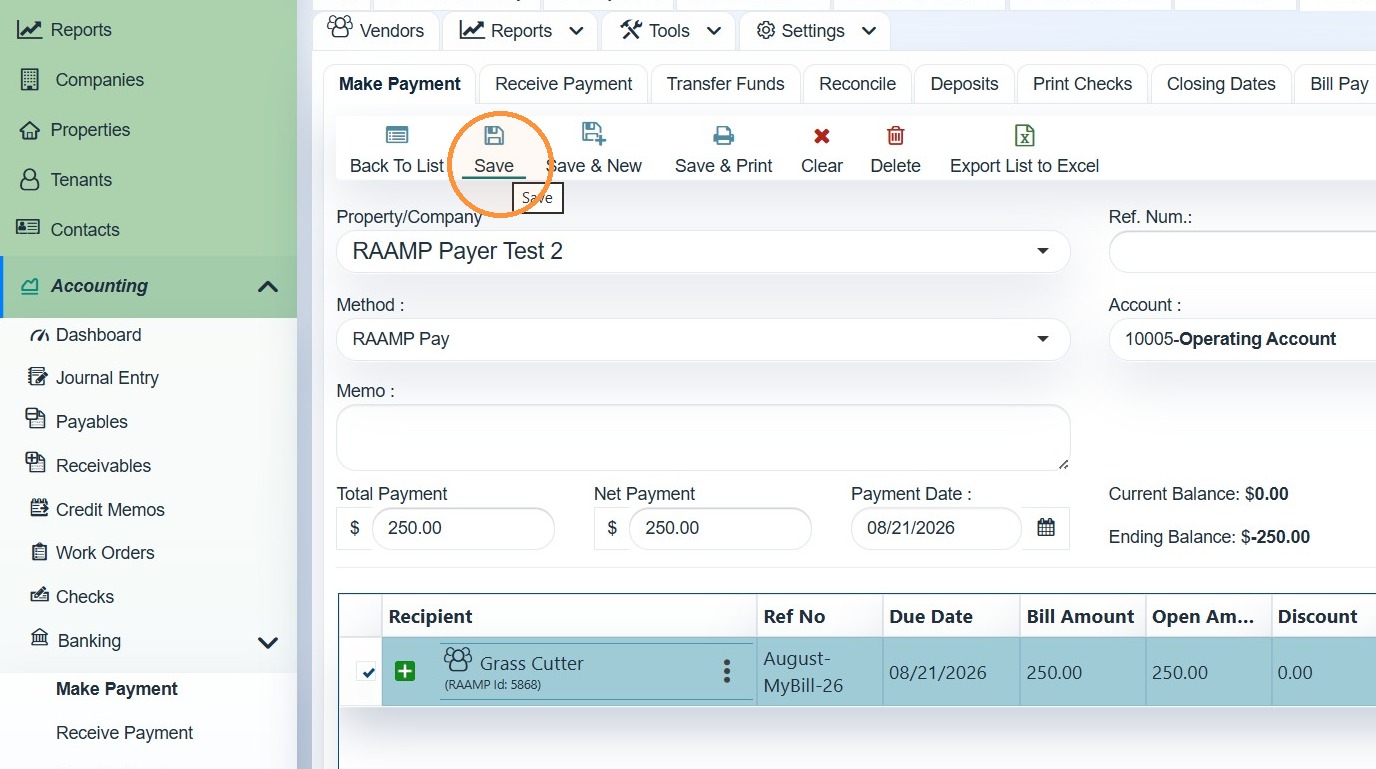
16. You'll receive a confirmation message > Select the x to exit.
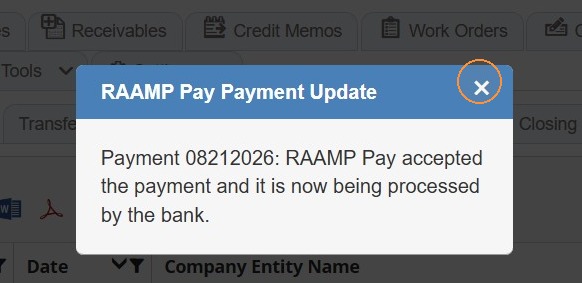
Confirming Payment
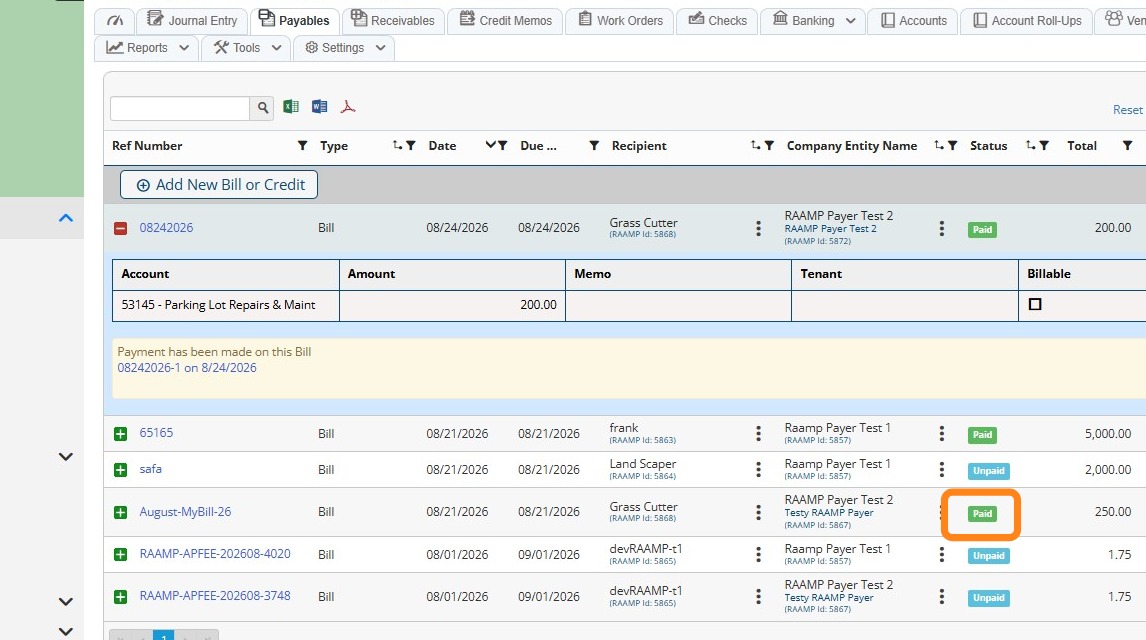
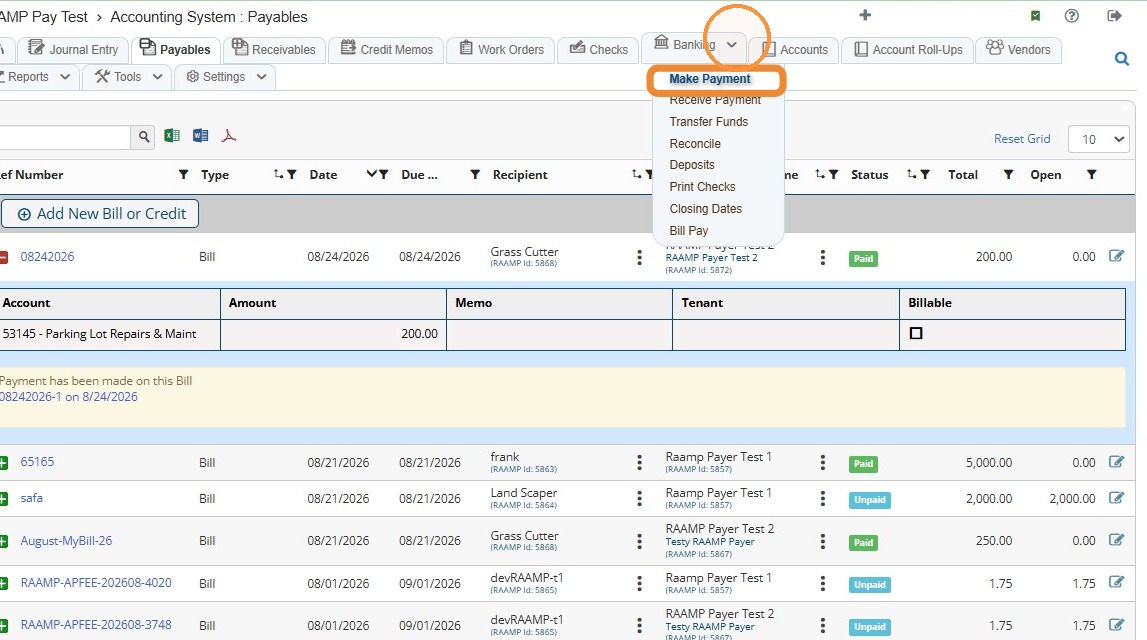
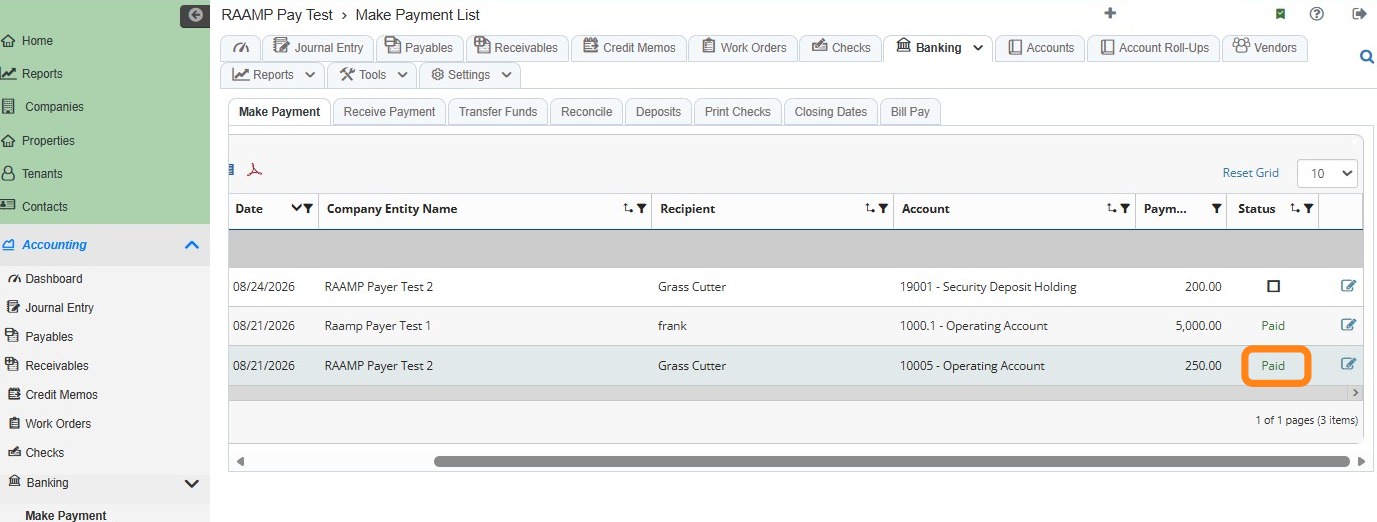
17. There are three places where you can confirm the bill is paid:
- Select Accounting > Select Payables > Locate the bill > The status will be paid.
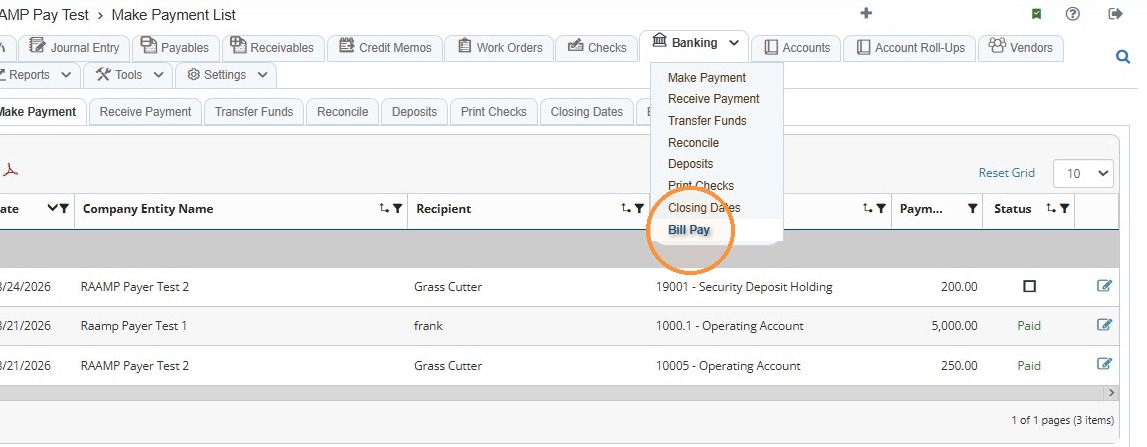
18. 2. Select Banking > Select Make Payment > Locate the payment > The status will be paid.
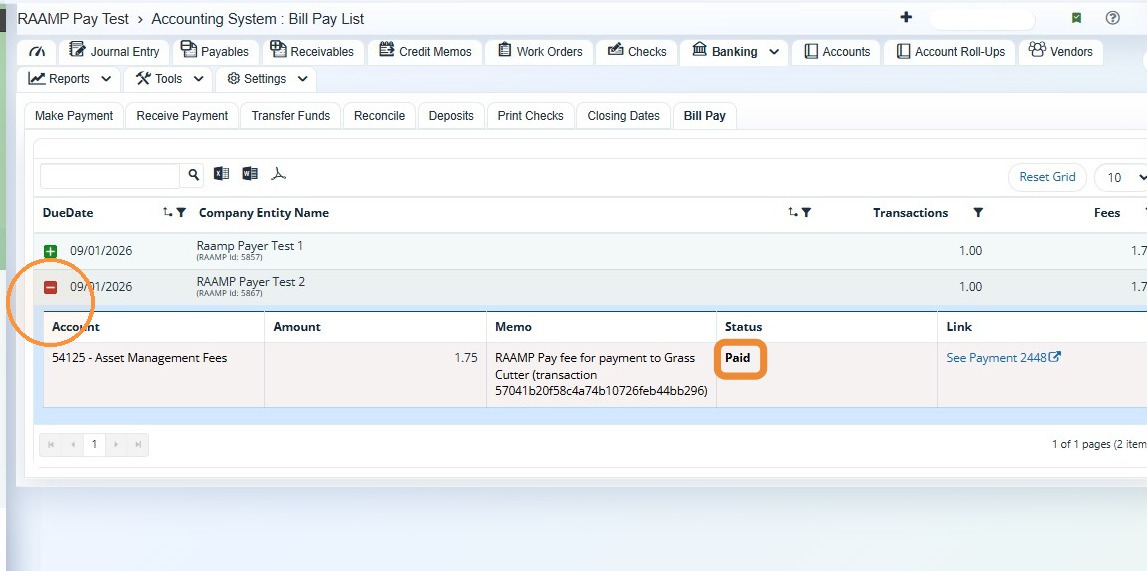
19. 3. Select Bill Pay > Locate the bill > Select the green + to expand details > The status will be paid.