Understanding the Properties Page and Tabs
This guide saves time by showing exactly where to find every property detail and perform common tasks—editing info, managing layouts/tenants, handling finances, files, insurance, and contacts—so you can complete work without hunting through menus. It highlights quick actions, tab-specific functions, and useful exports/tools to streamline property management.
Properties Overview
1. Select Properties from the navigation menu.
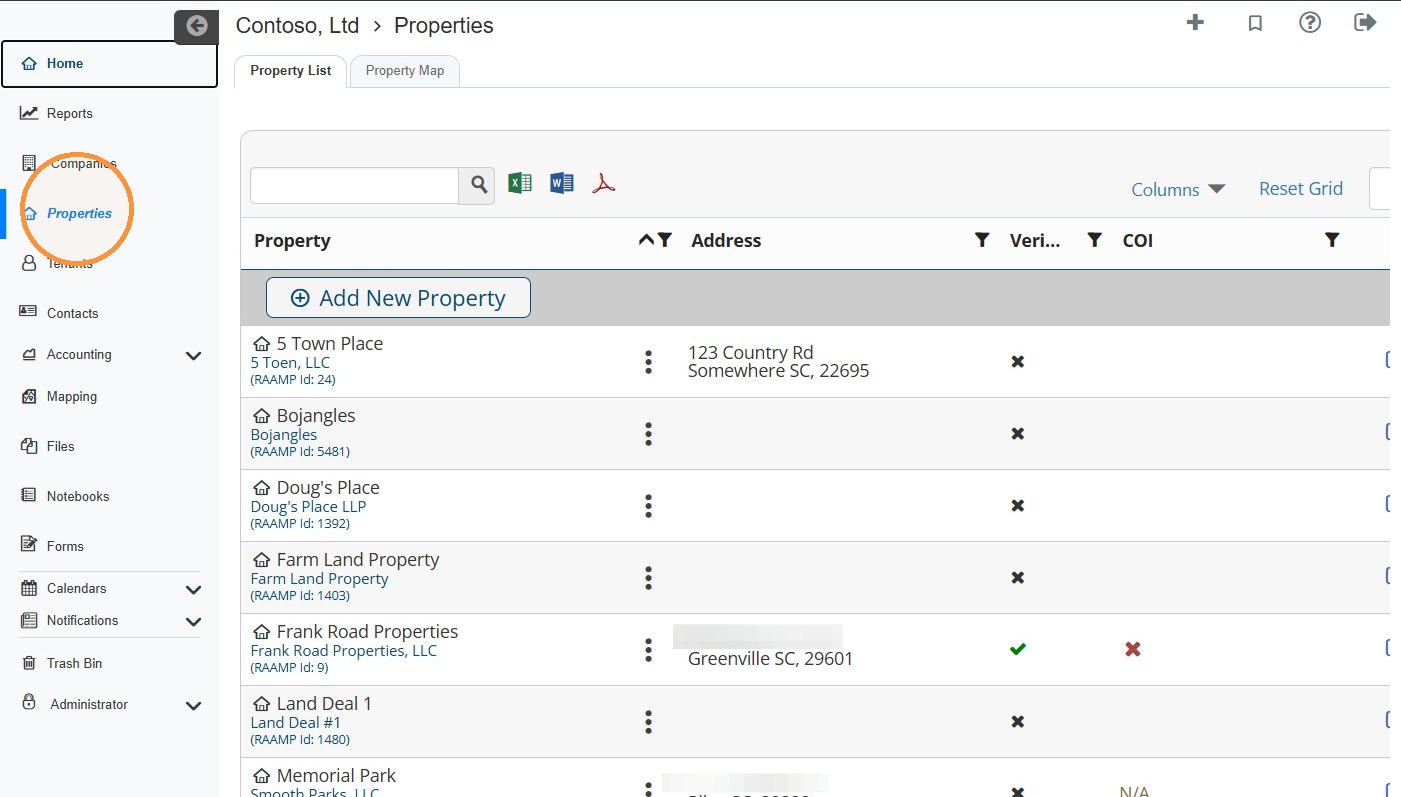
2. Properties Overview
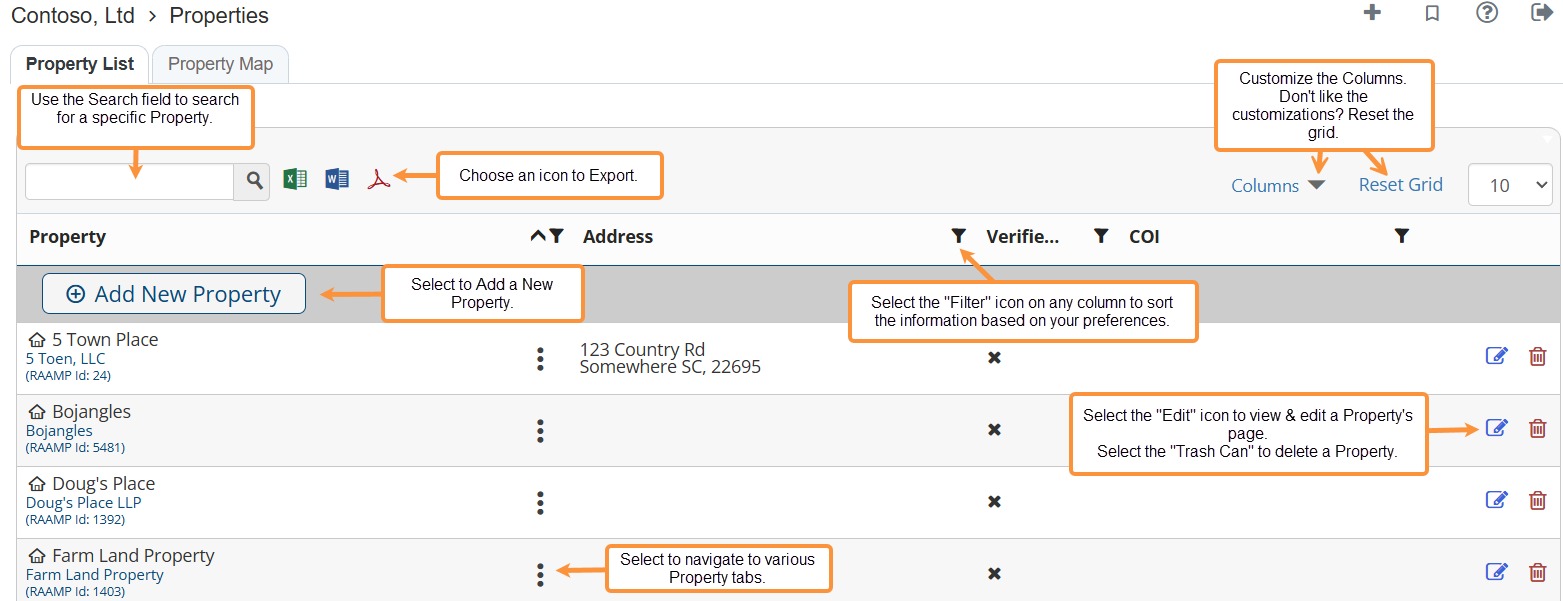
How to Access the Properties Tabs
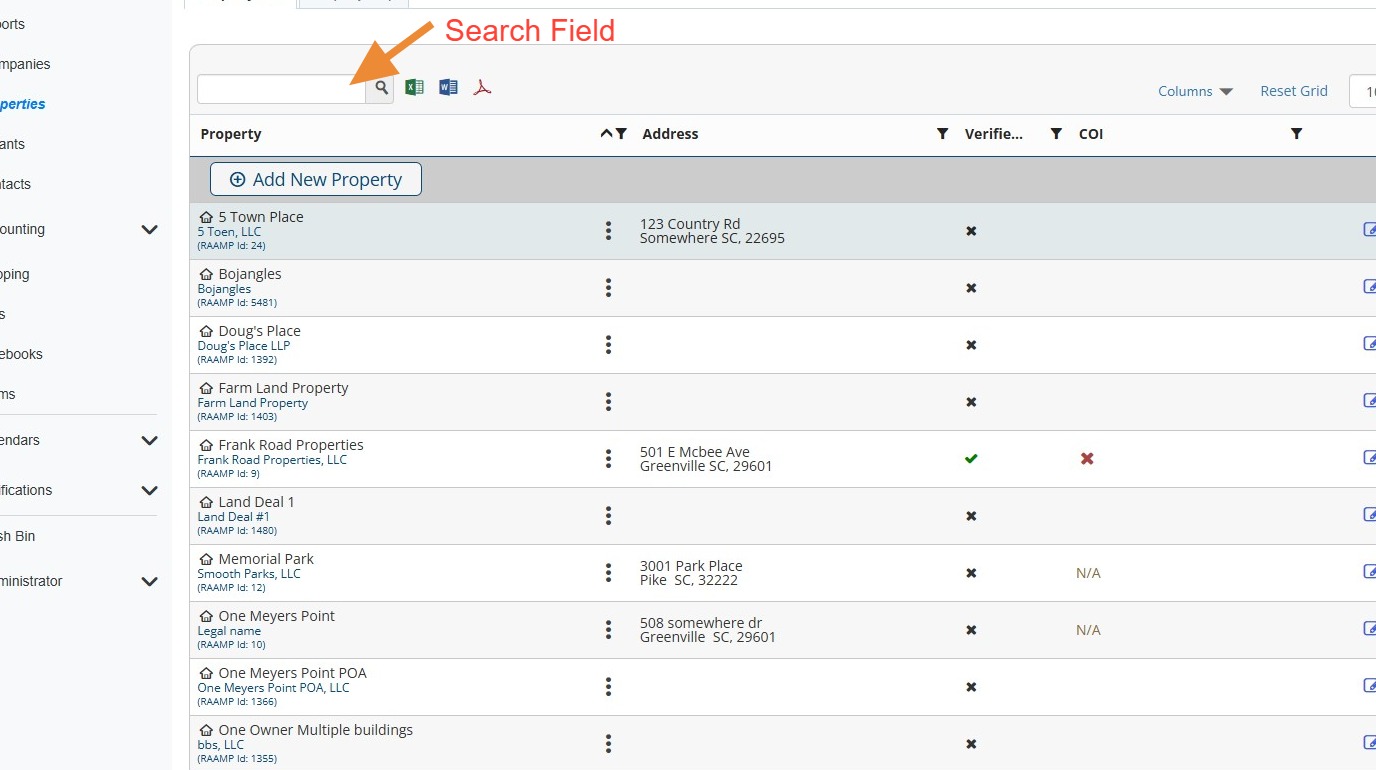
3. Locate the preferred property.\ \ NOTE: You can locate the Property quickly by searching for it.
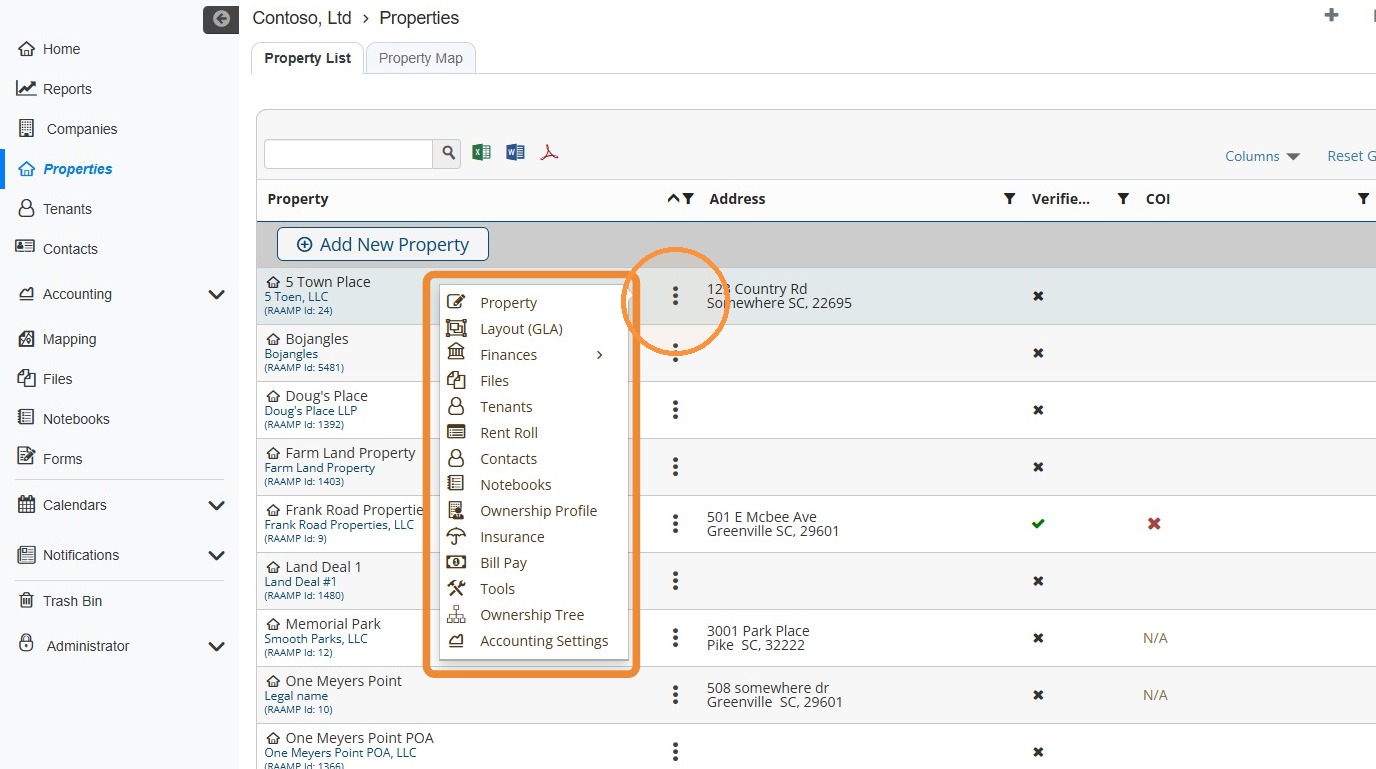
4. Select the three-dot menu to the right of the property to access the property tabs.
5. Alternatively, you can select the Edit icon.
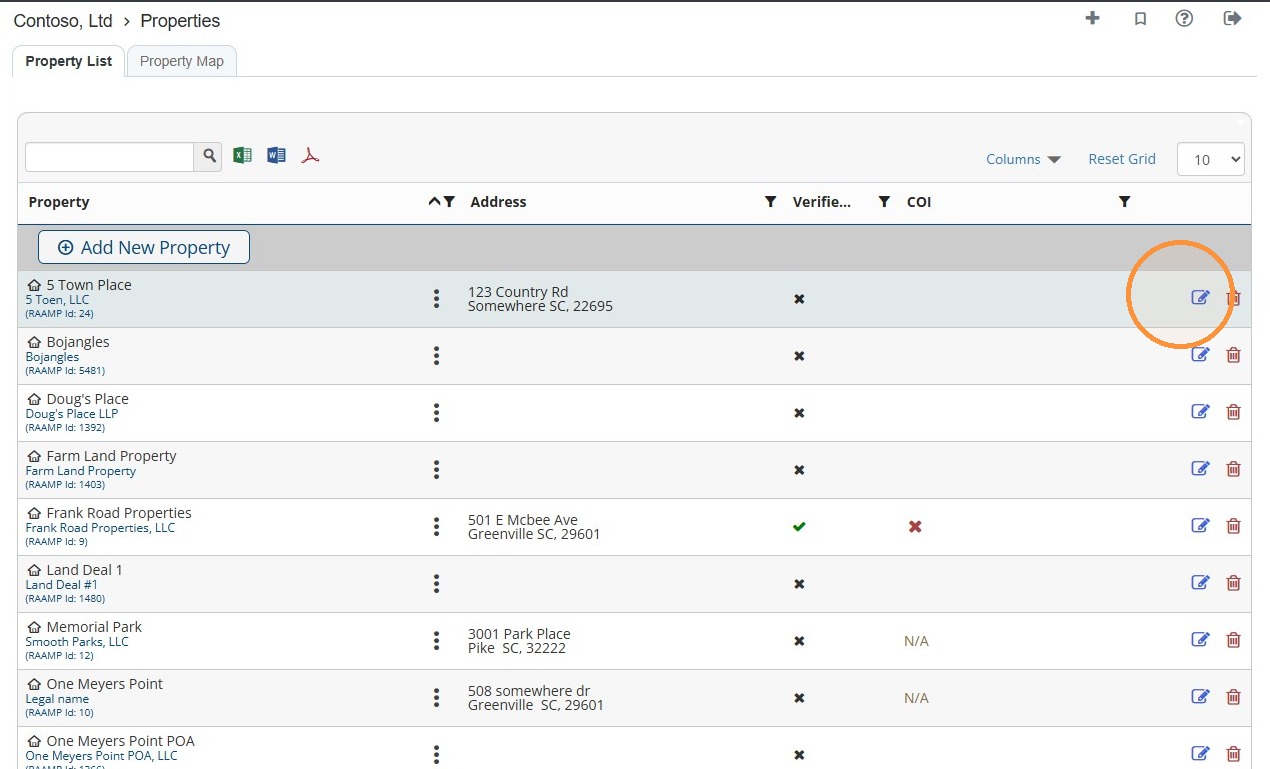
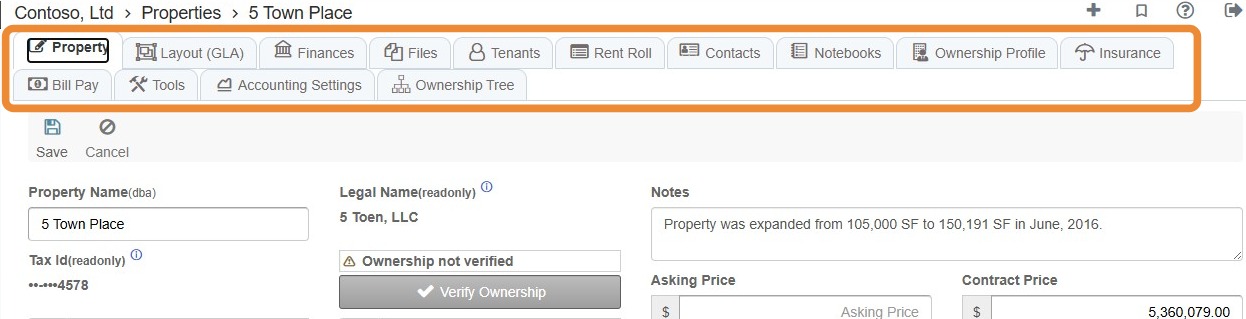
6. The Property tabs will be available across the top.
Use the tabs to navigate to specific information for the selected property.
Property Tab
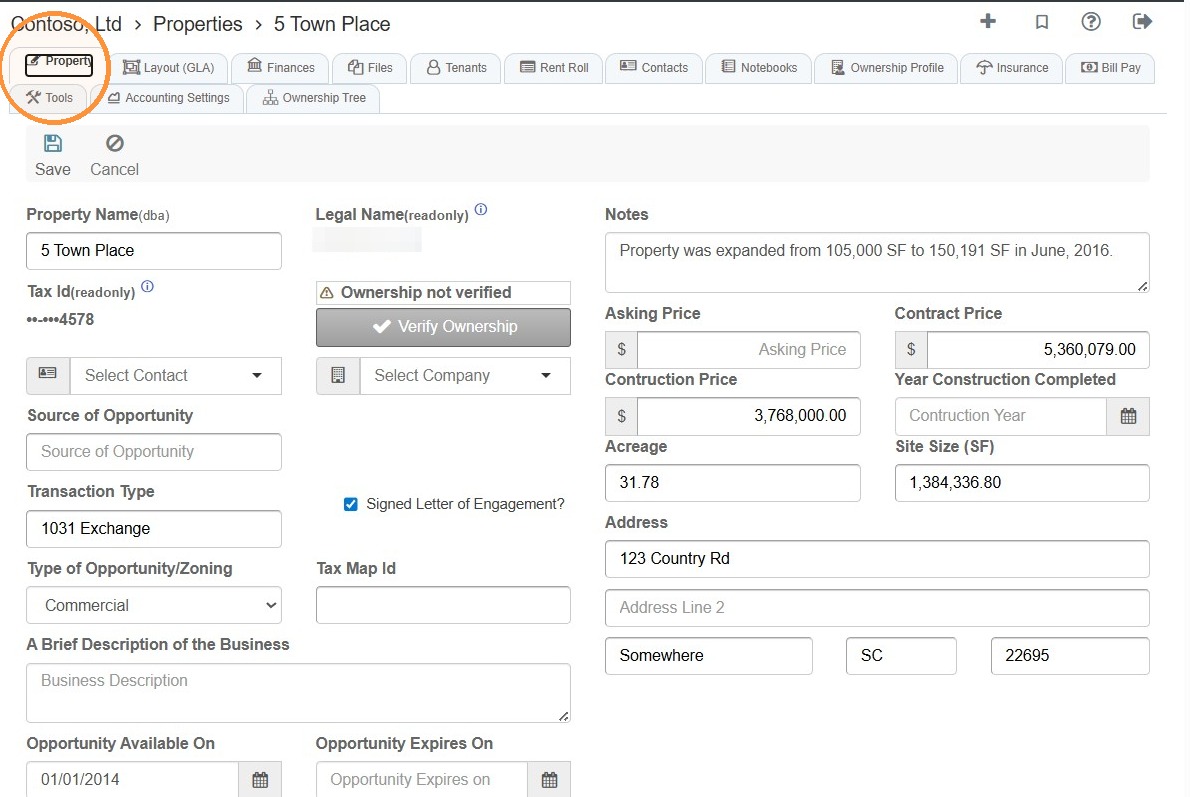
7. To edit the property's information and verify ownership, select the Property tab.
Tip: Related tutorial(s):
How to Complete Company Verification and Agreement for Franchise Use
Layout (GLA) Tab
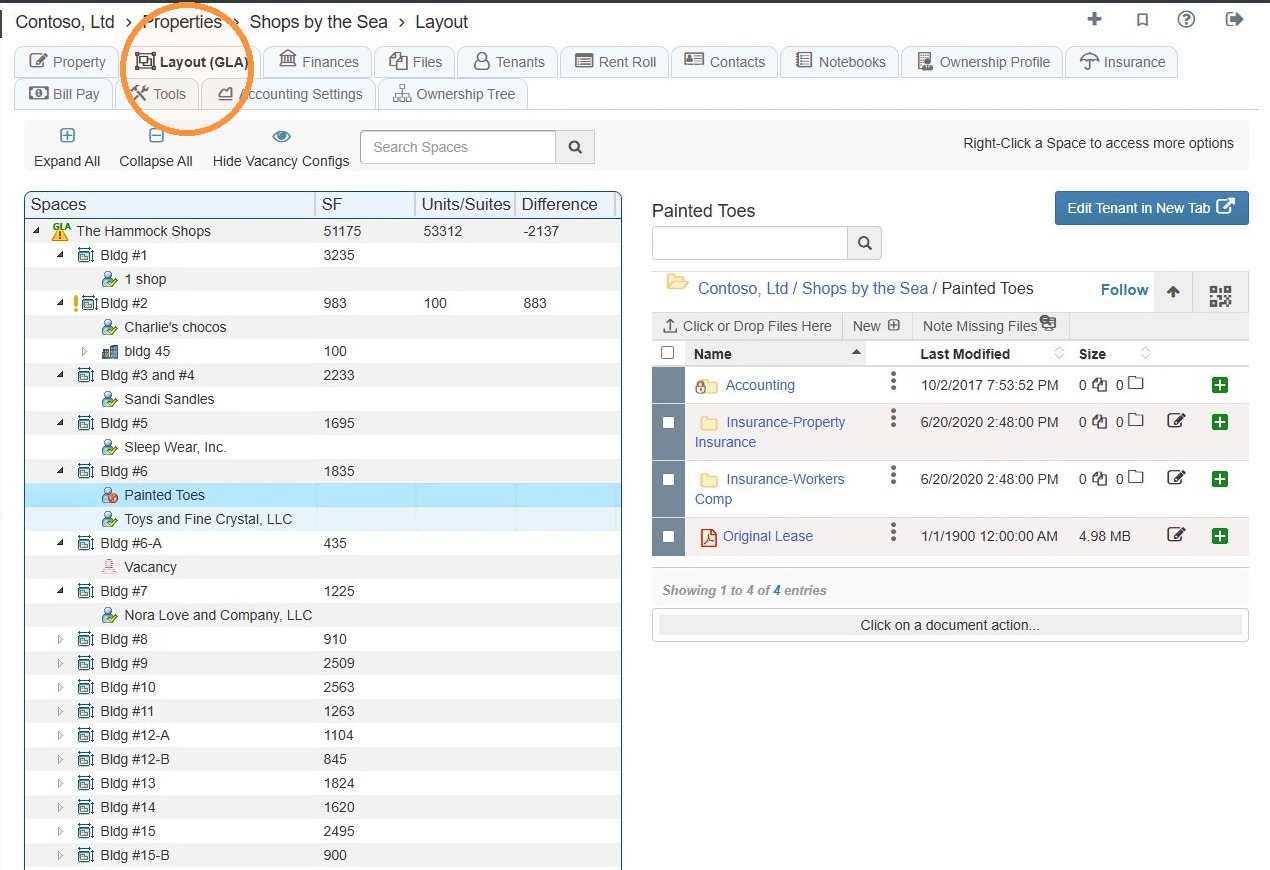
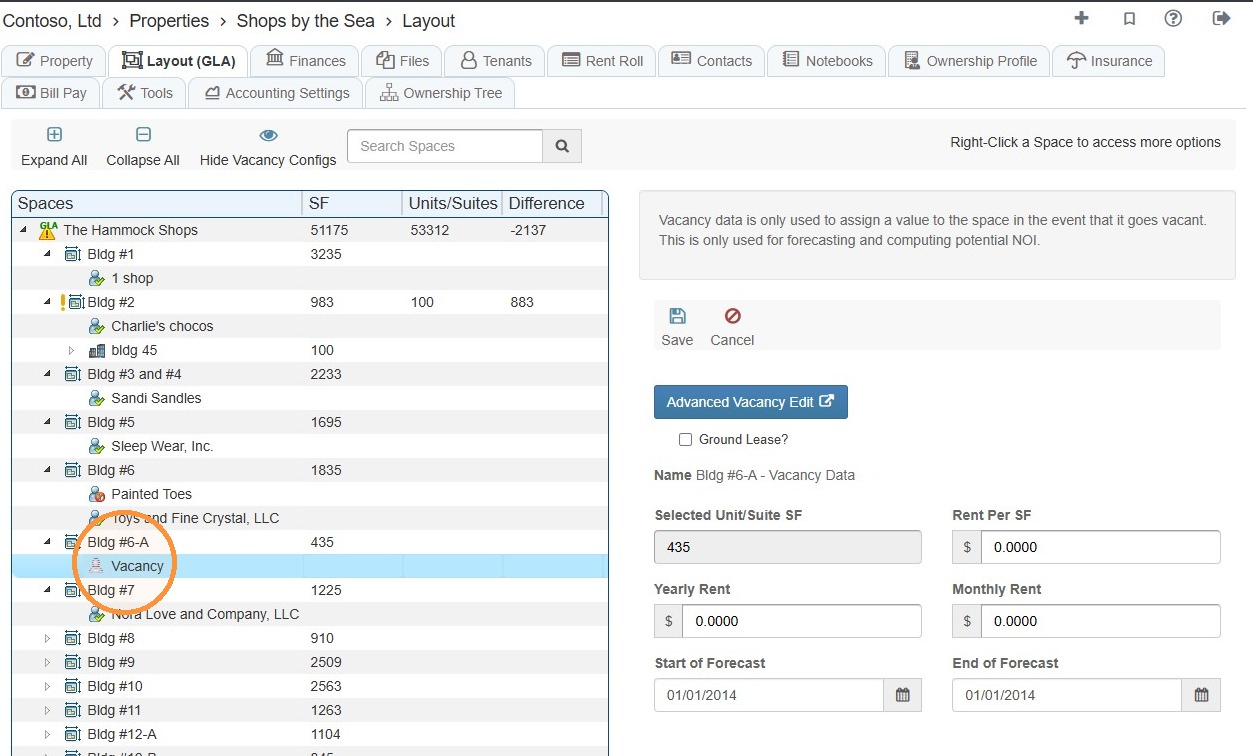
8. Select the Layout (GLA) tab.\ \ On this tab, you will see the property's layout tree.
You can also add/edit spaces and tenants on this tab.
Tip: Related tutorial(s):
9. Select the Arrow node to expand and view the Property/Spaces layout tree.
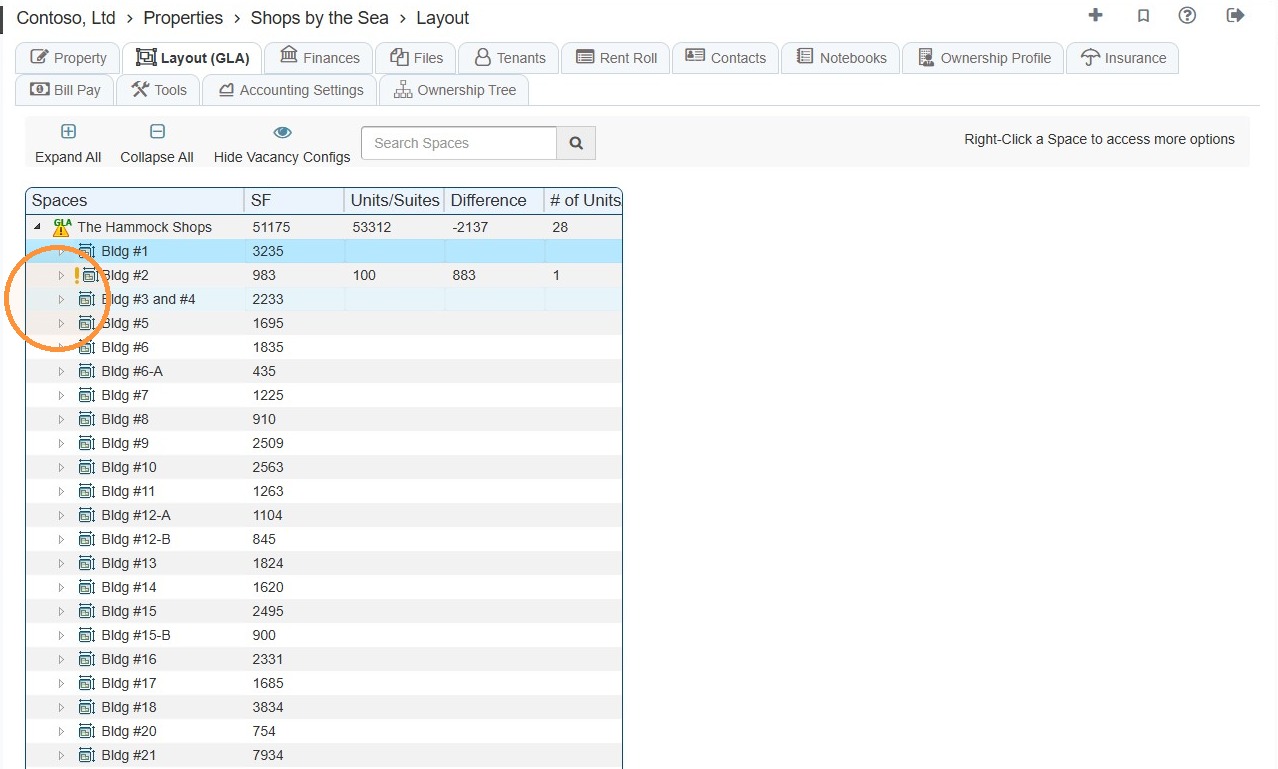
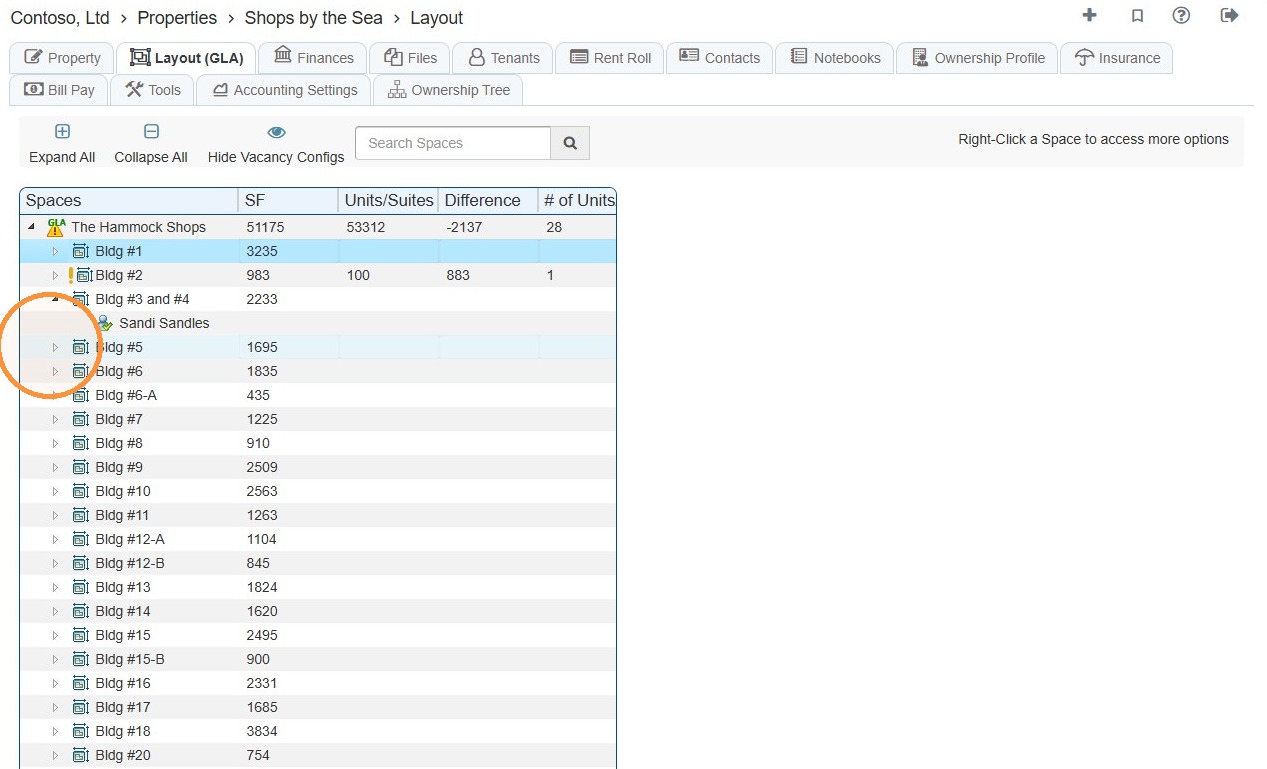
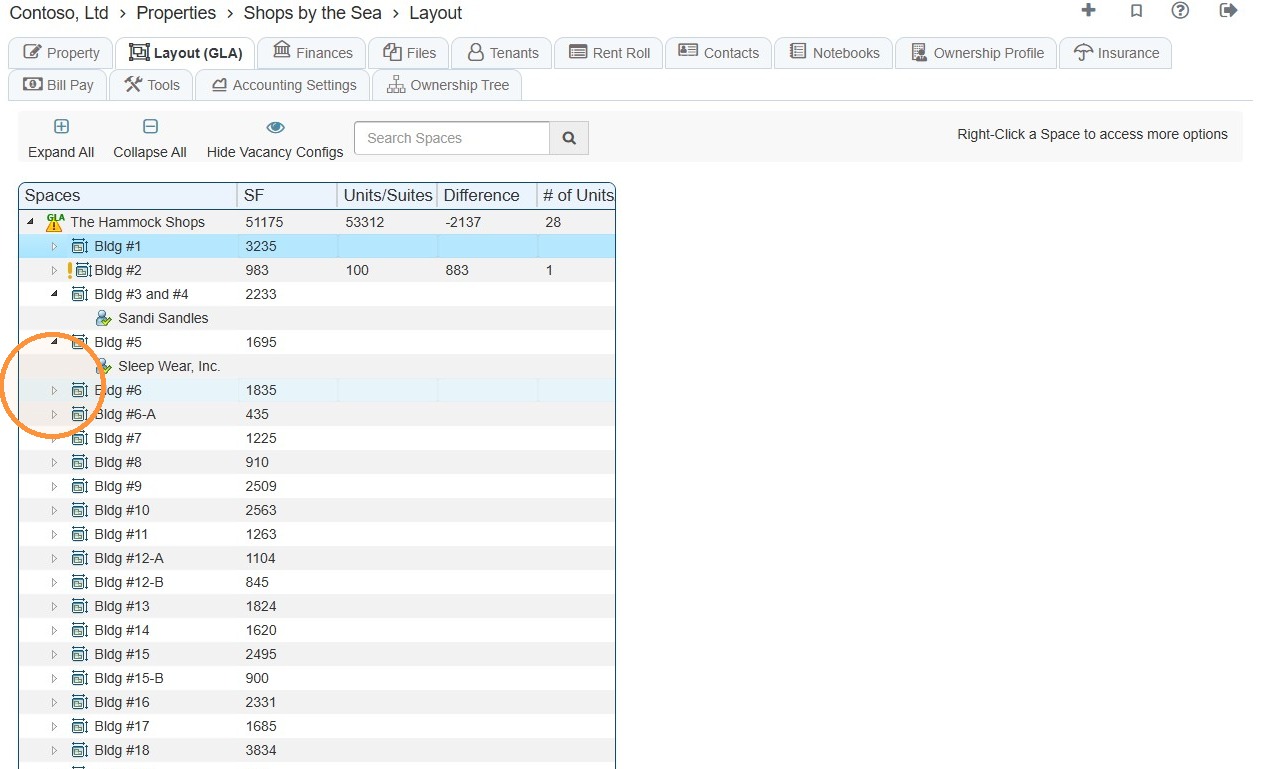
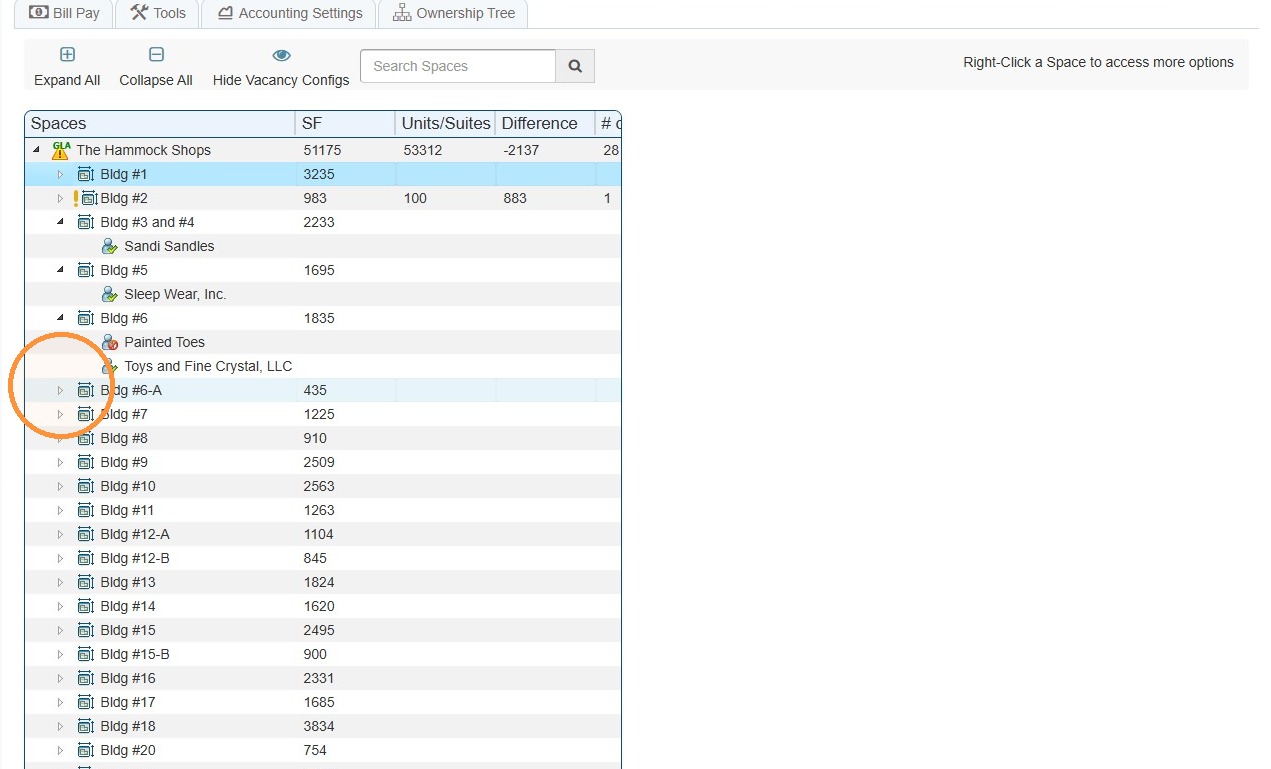
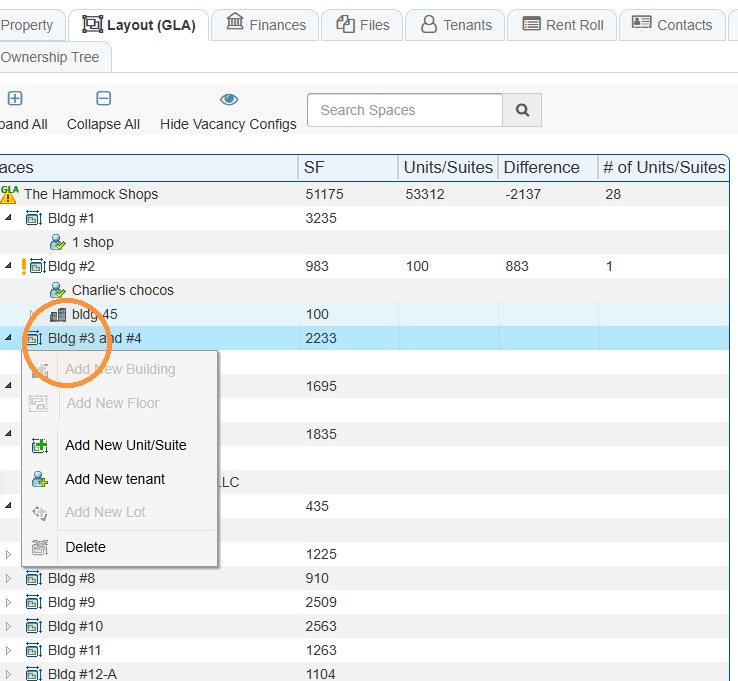
10. Right-click a space to add New Unit/Suite, New Tenants, or delete.
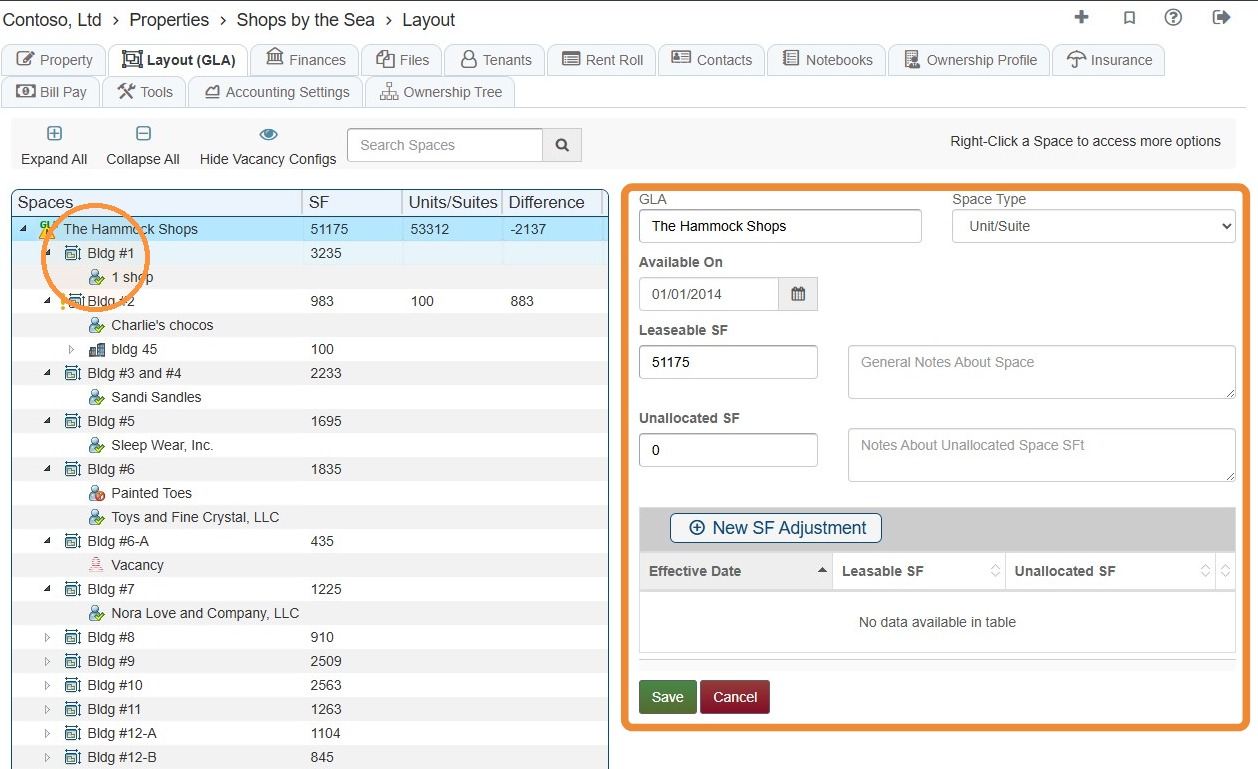
11. Selecting any Space will bring up the Space's edit interface.
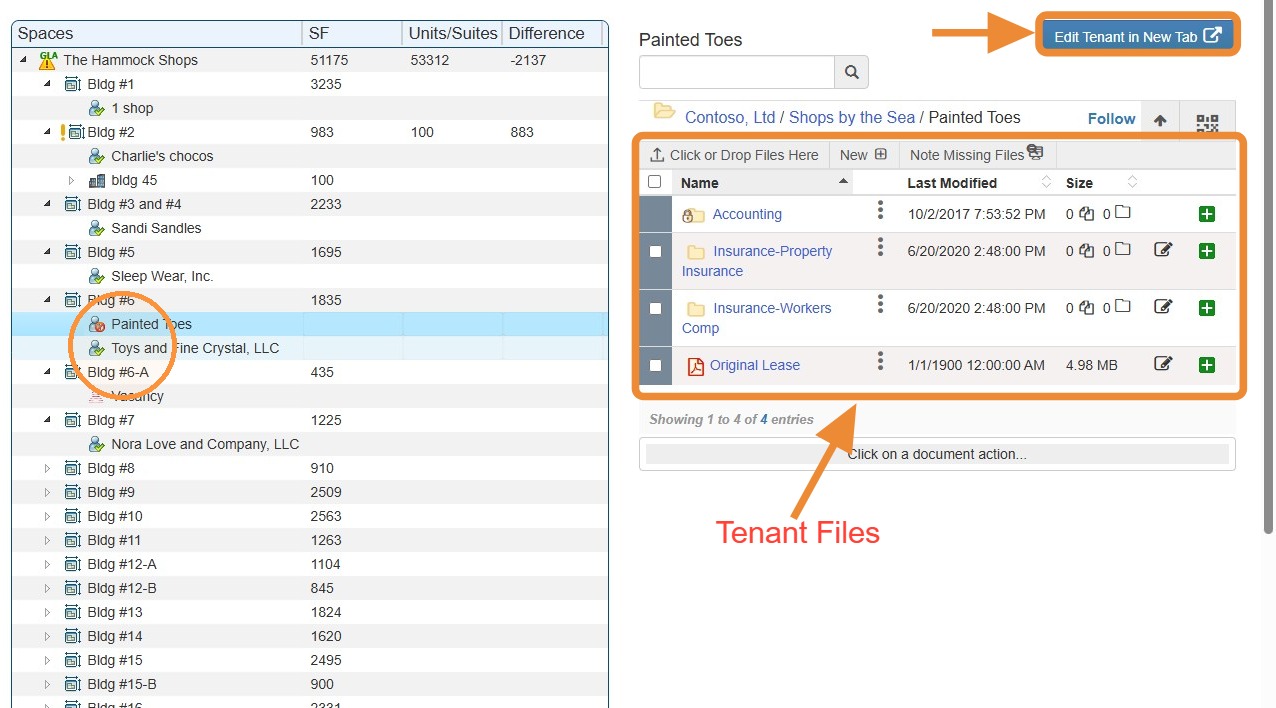
12. You can select any Tenant to access their files or edit their information.
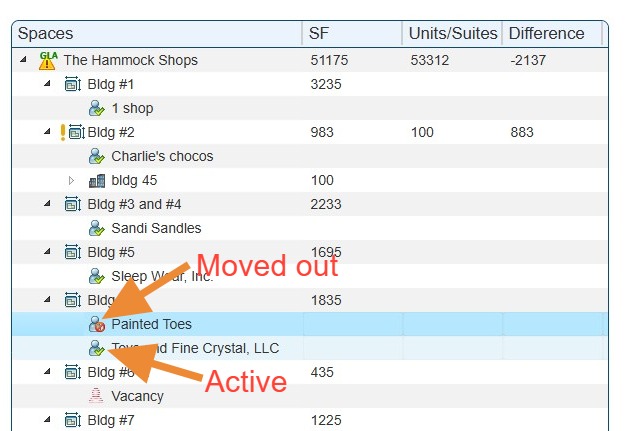
13. Tenants will show as Active or Moved Out.
14. Vacancy is used for forecasting potential income.
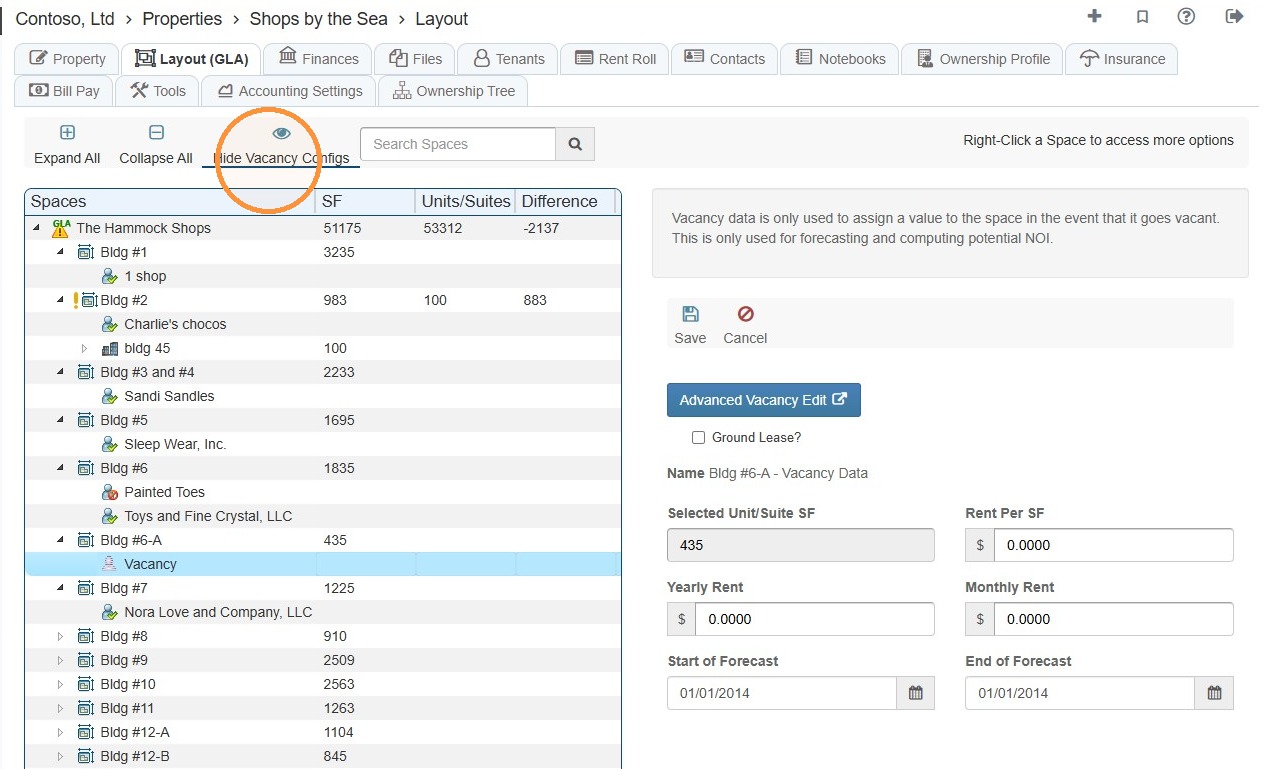
15. Select Hide Vacancy Configs to hide the Vacancies.
Finances Tab
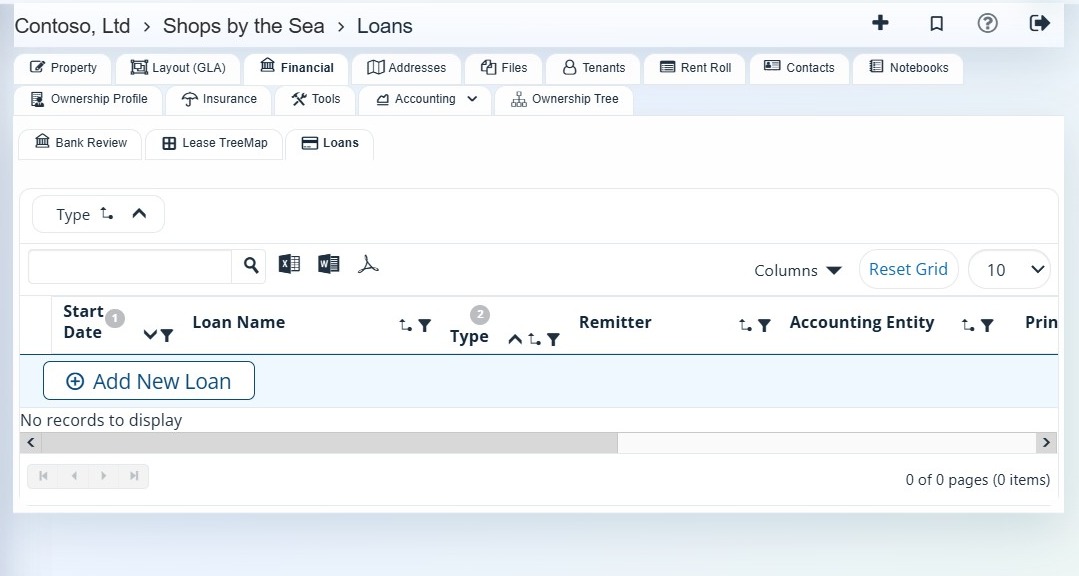
16. Select the Financial tab > Choose the option you'd like to view: Bank Review, Lease TreeMap, Loans.
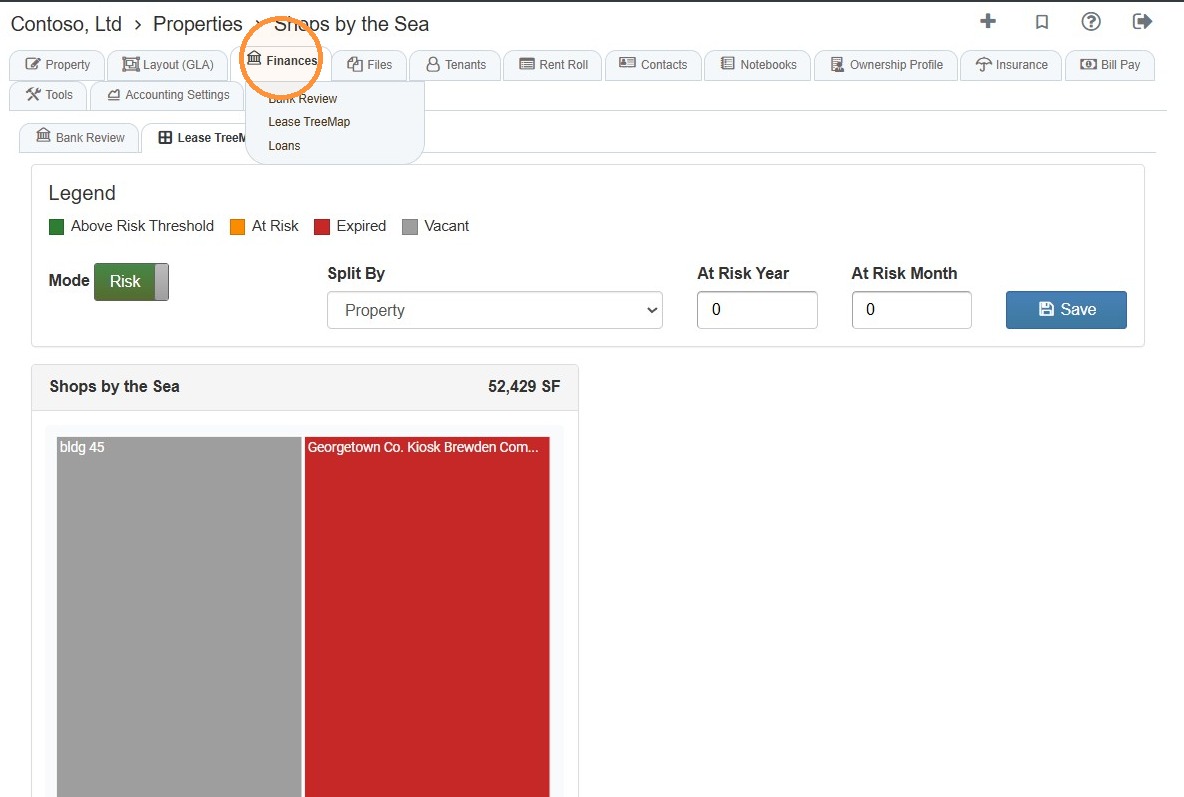
17. You can navigate between the property's Finances tab via the highlighted tabs.

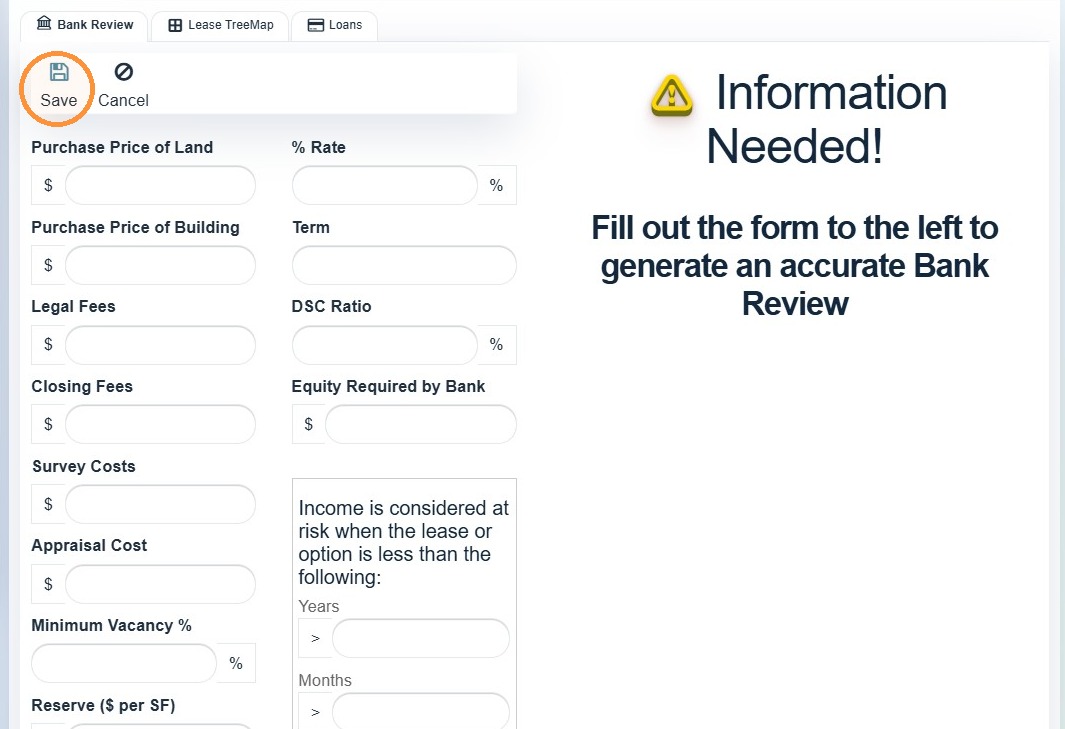
18. Bank Review - Complete the information > Select Save.
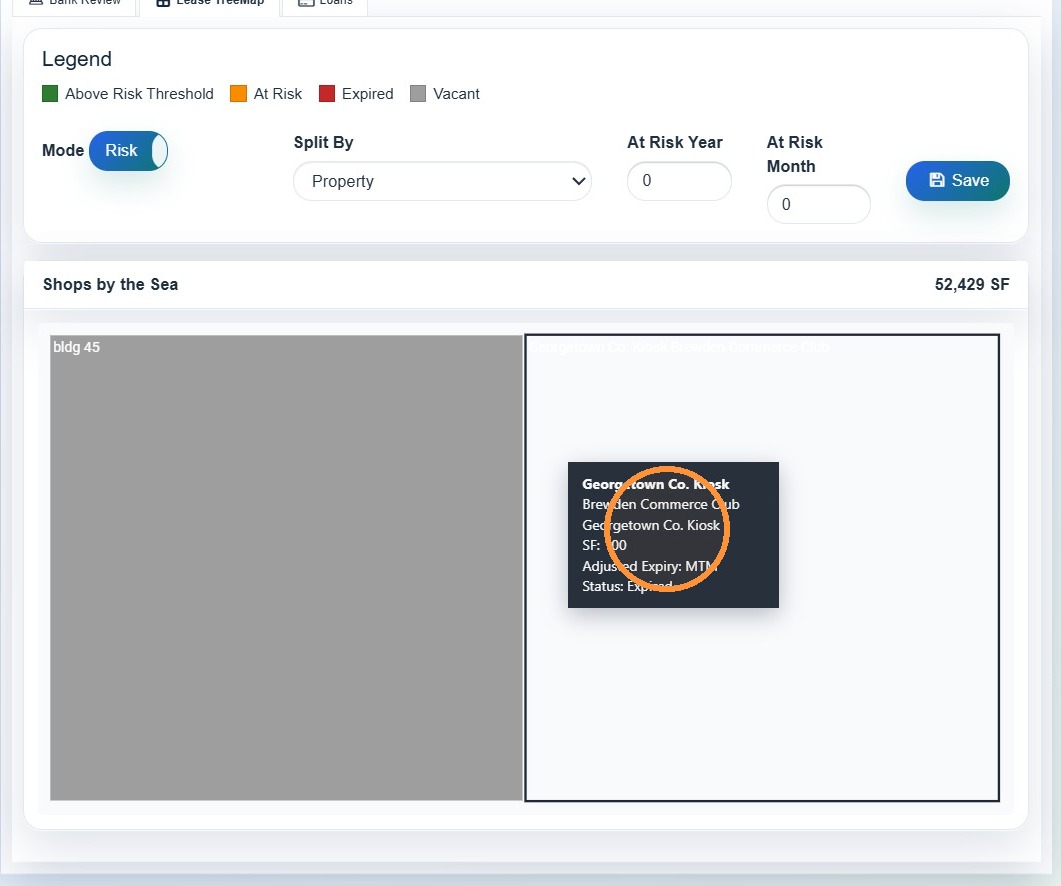
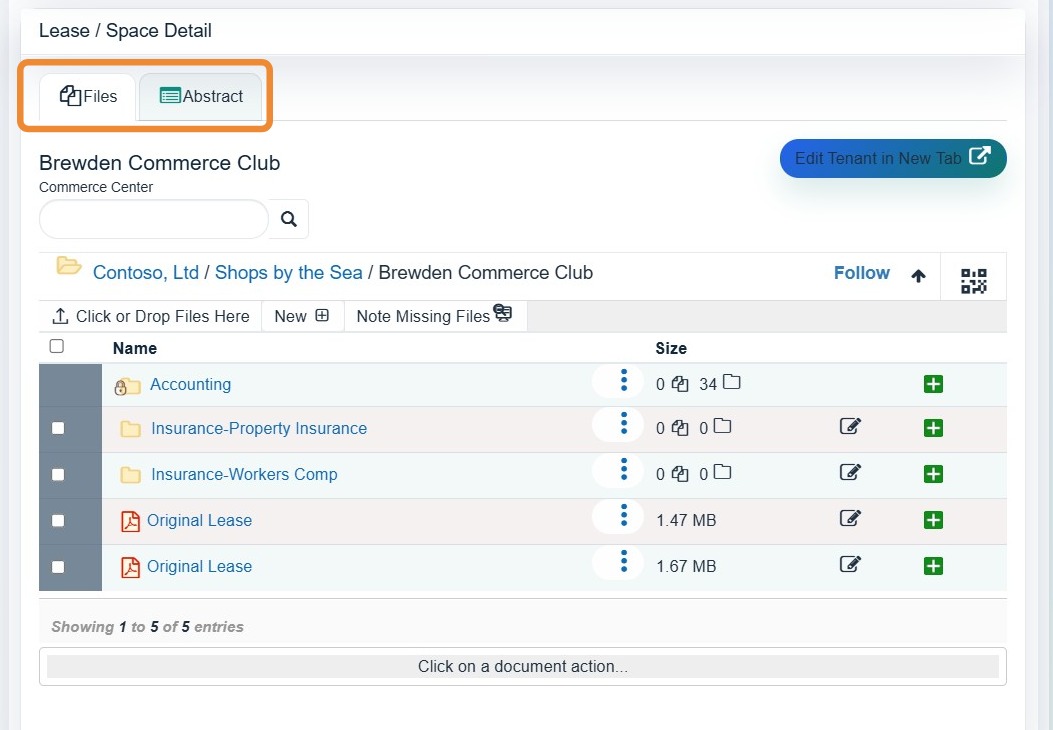
19. Lease Treemap - View a map of the property > Select a property to view its Files and Lease Abstract.
20. Loans - View and/or Add New Loans
Need to add a new loan? See How to Create a New Loan and Record Initial Journal Entry.
Files Tab
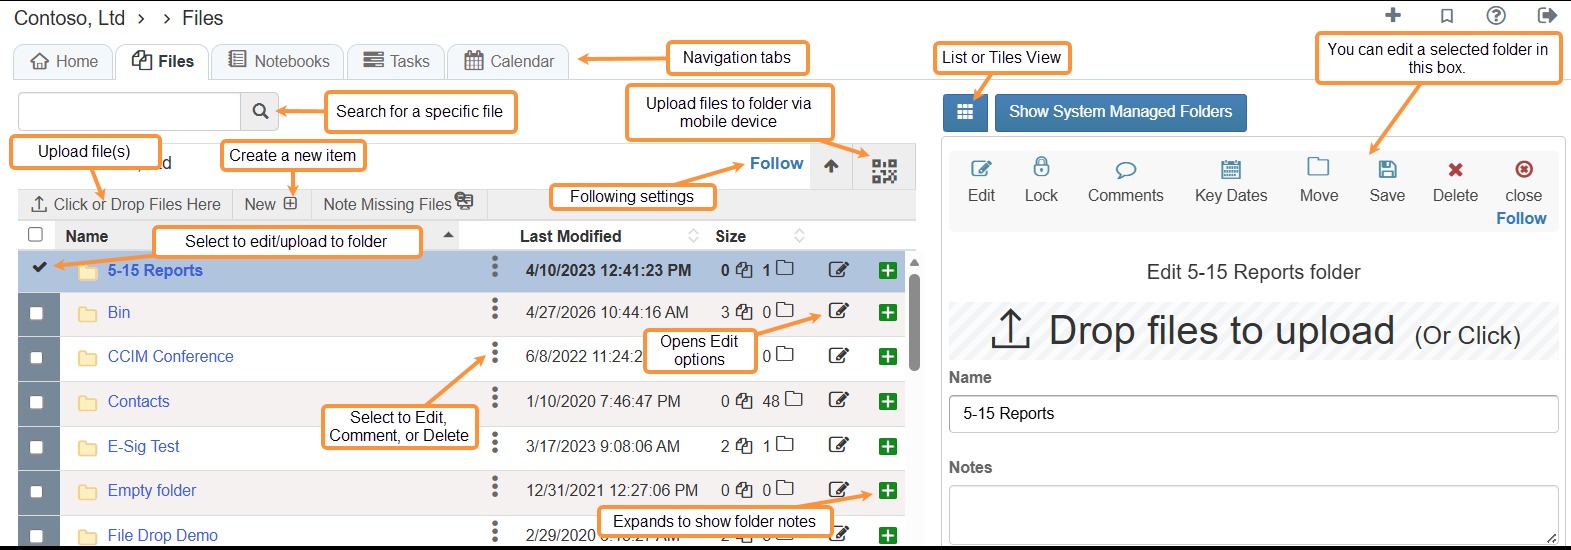
21. Select the Files tab to view all files for the property.
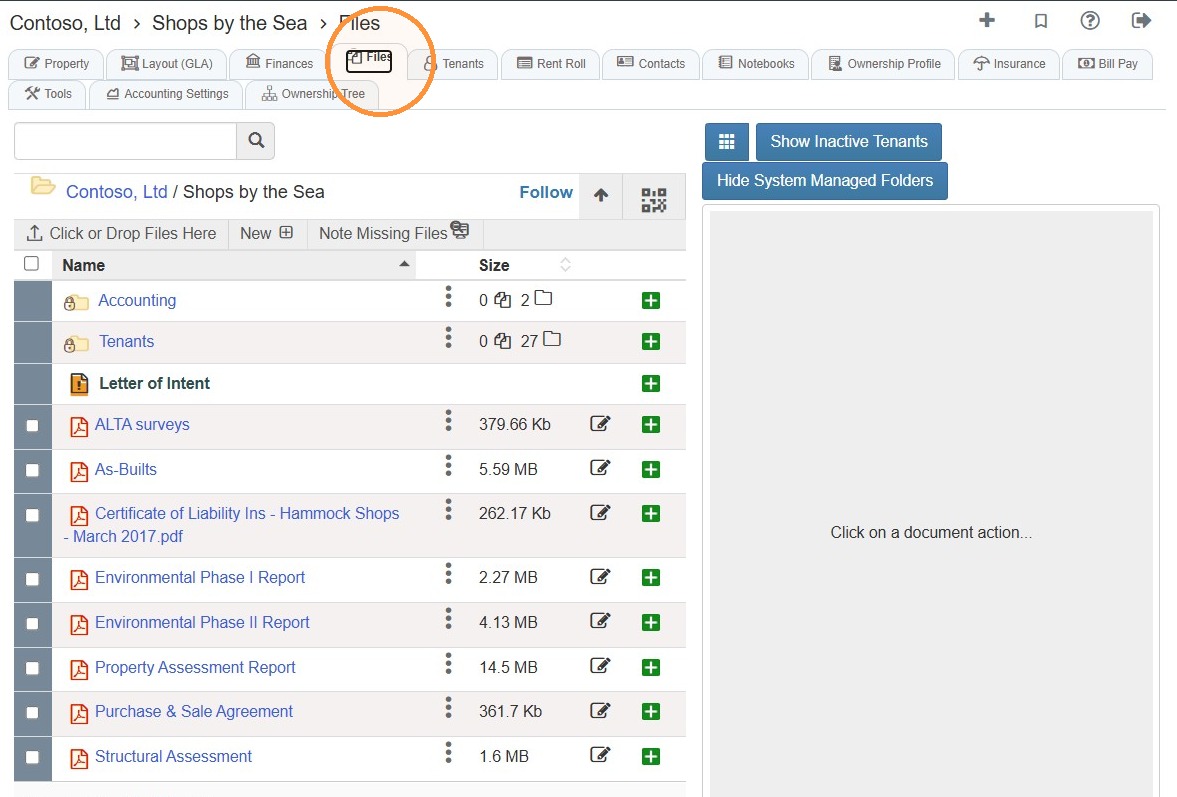
22. Files Overview
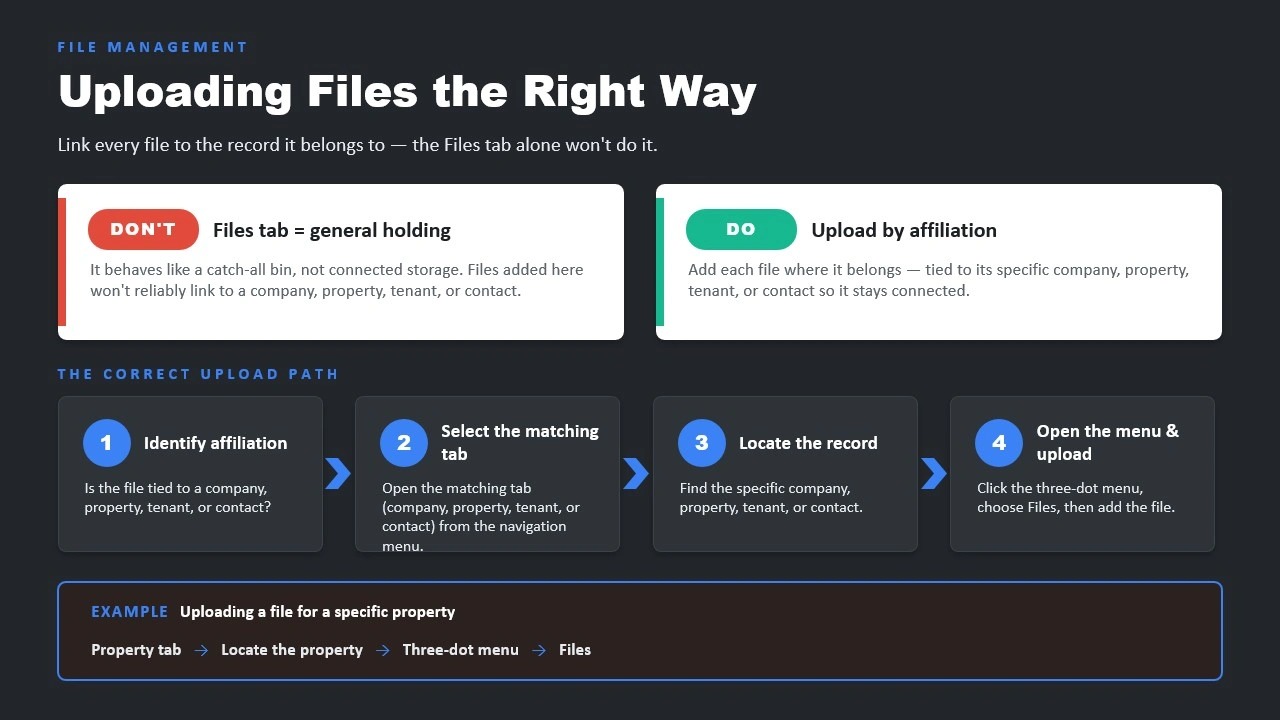
Tip: Remember to upload files by affiliation - tied to its specific company, property, tenant, or contact so it stays connected.
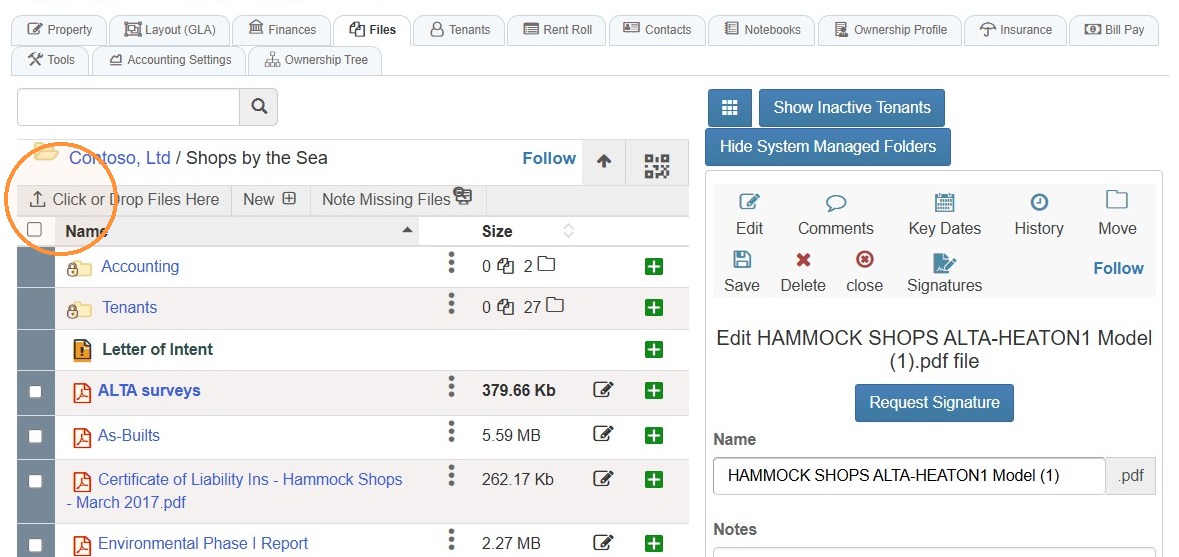
23. To upload a new file for the property, select Click or Drop Files Here.
NOTE: You can also drag and drop a file from your computer to the files interface.**
24. To edit a file, select the file or the file's edit icon.
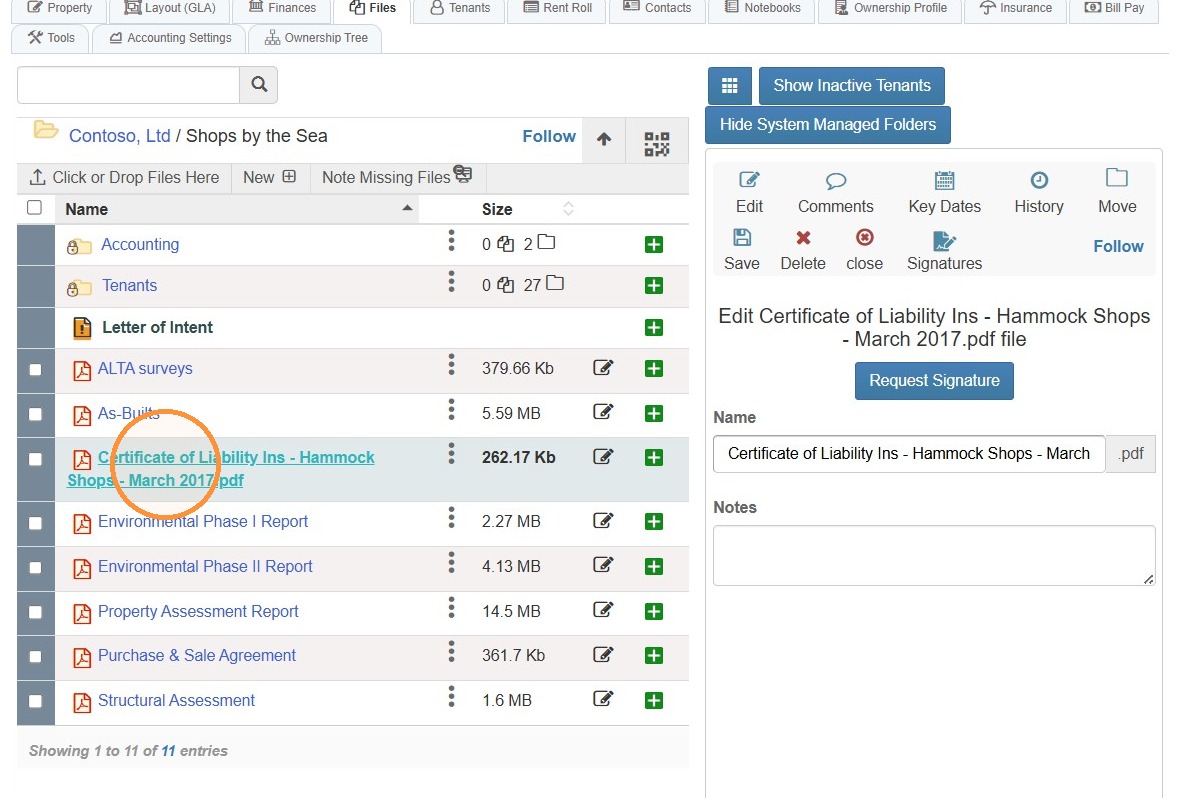
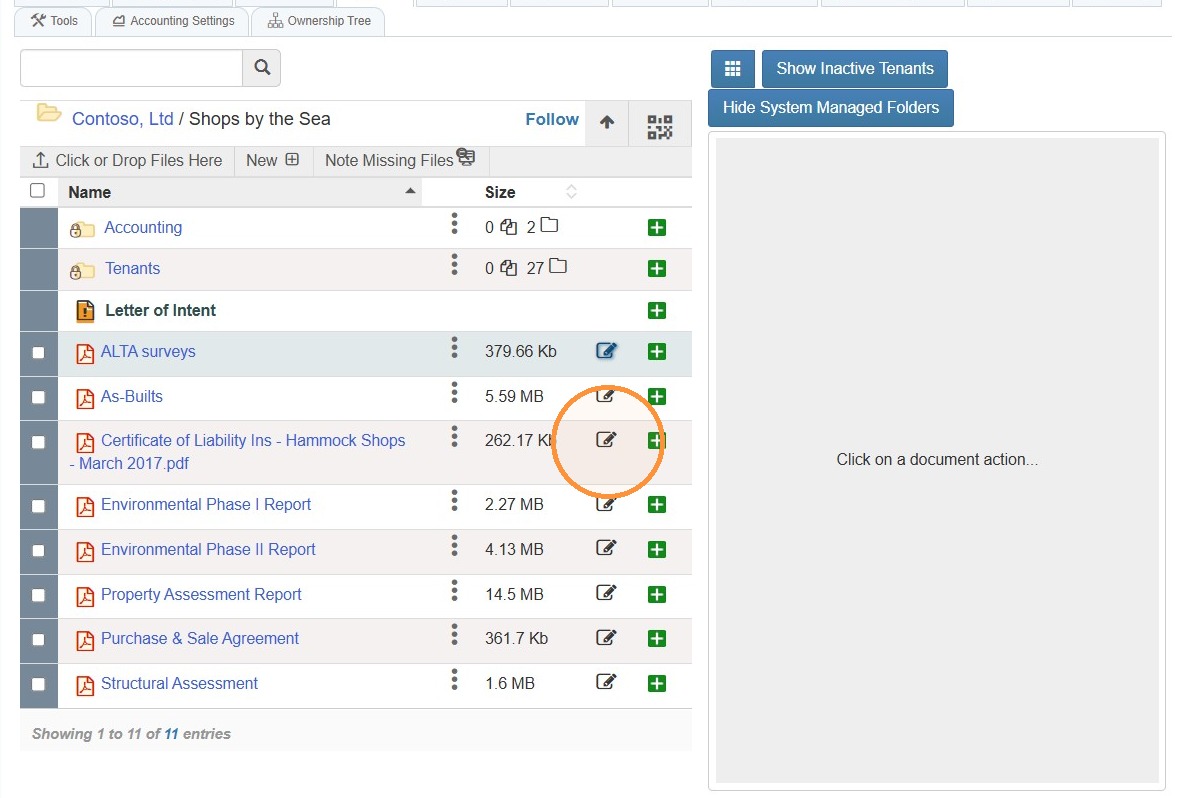
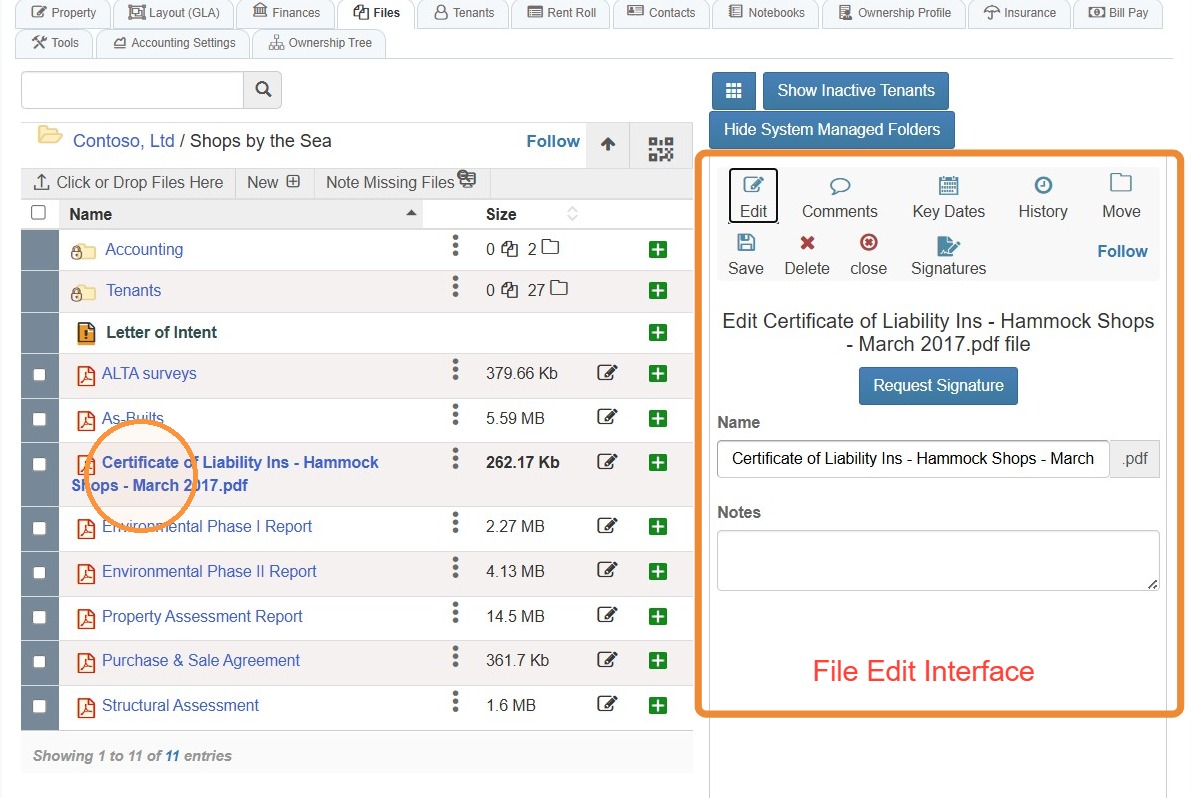
25. Once a file is selected, the file's edit interface will open.
From here, you can complete various tasks like requesting a signature, adding notes, reviewing the file history, etc.
Tip: Related Tutorial(s):
How to Add, Delete, & Manage Access Options for File Folders\ How to Follow a Folder & Receive Notifications\ How to Note Missing Files\ How to Upload Missing Files and Supporting Files\ How to Add a Key Date to a File\ How to Share Files\ How to Upload Files from a Phone Camera/Photos\ How to Upload File Revisions and Preserve Prior Versions\ How to Create and Send Signature Requests\ How to Set Signing Order
Tenants Tab
26. To view all tenants for this property, select the Tenants tab.
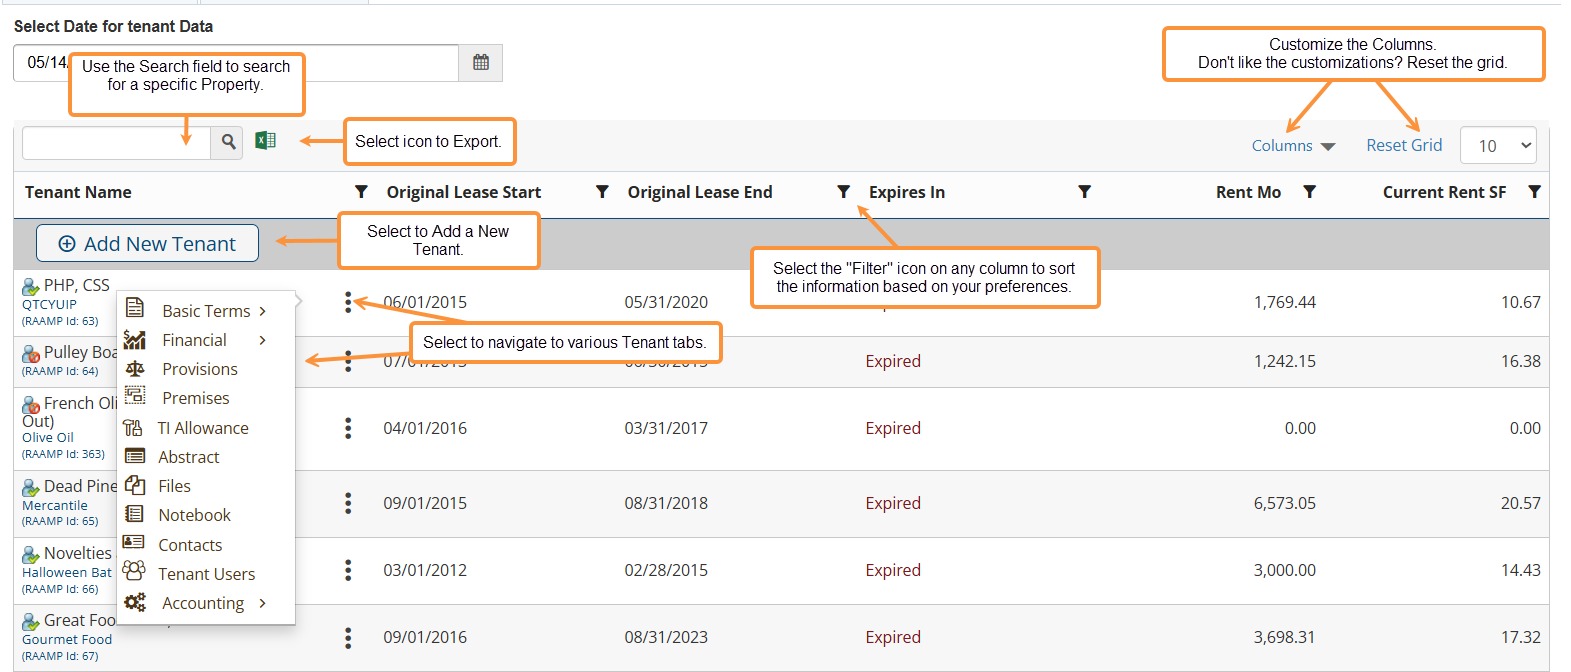
You can add a new tenant or view/edit information for existing tenants.
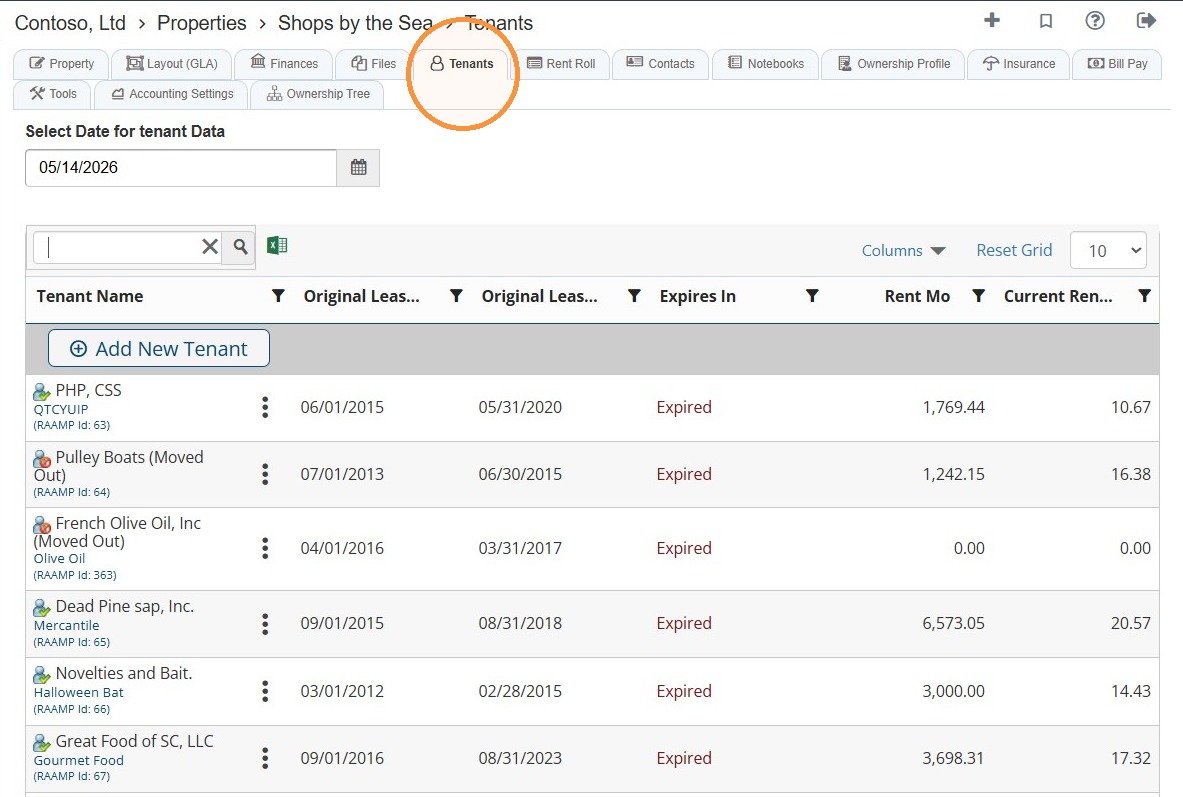
27. Tenant tab overview
Rent Roll Tab
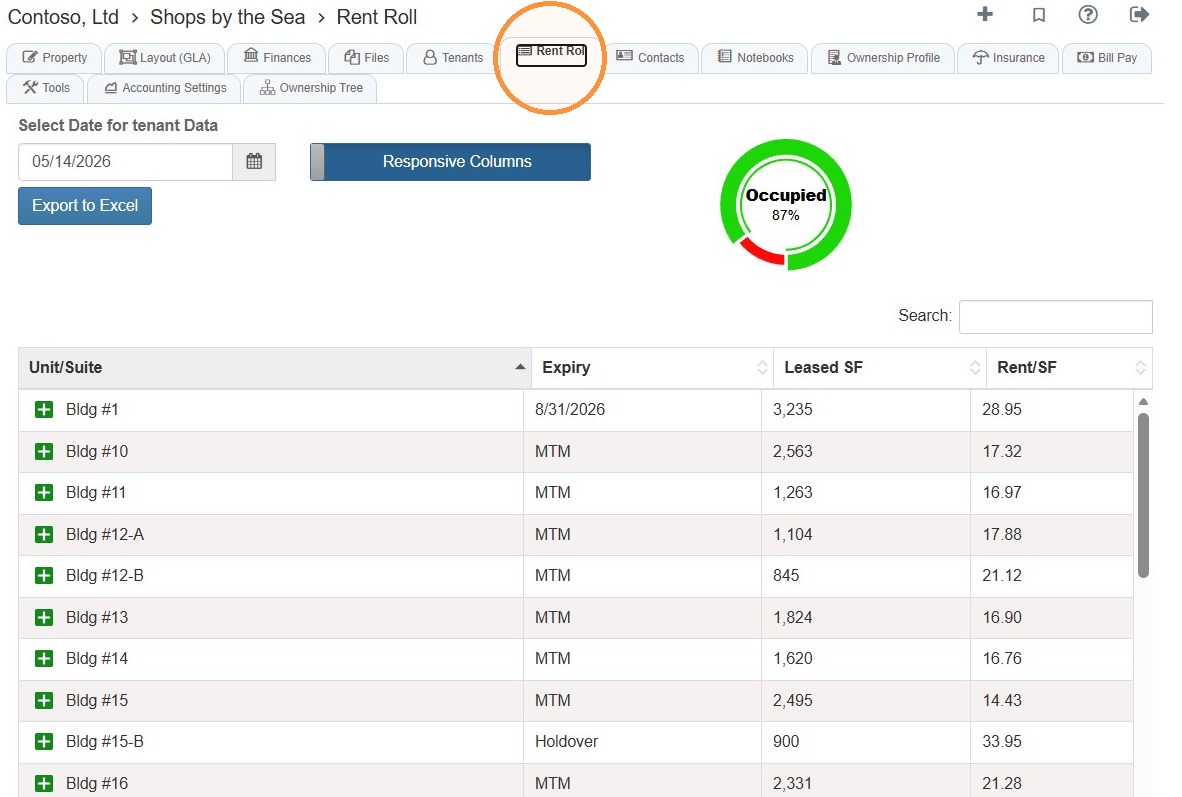
28. To view all rental units in the property, select the Rent Roll tab.
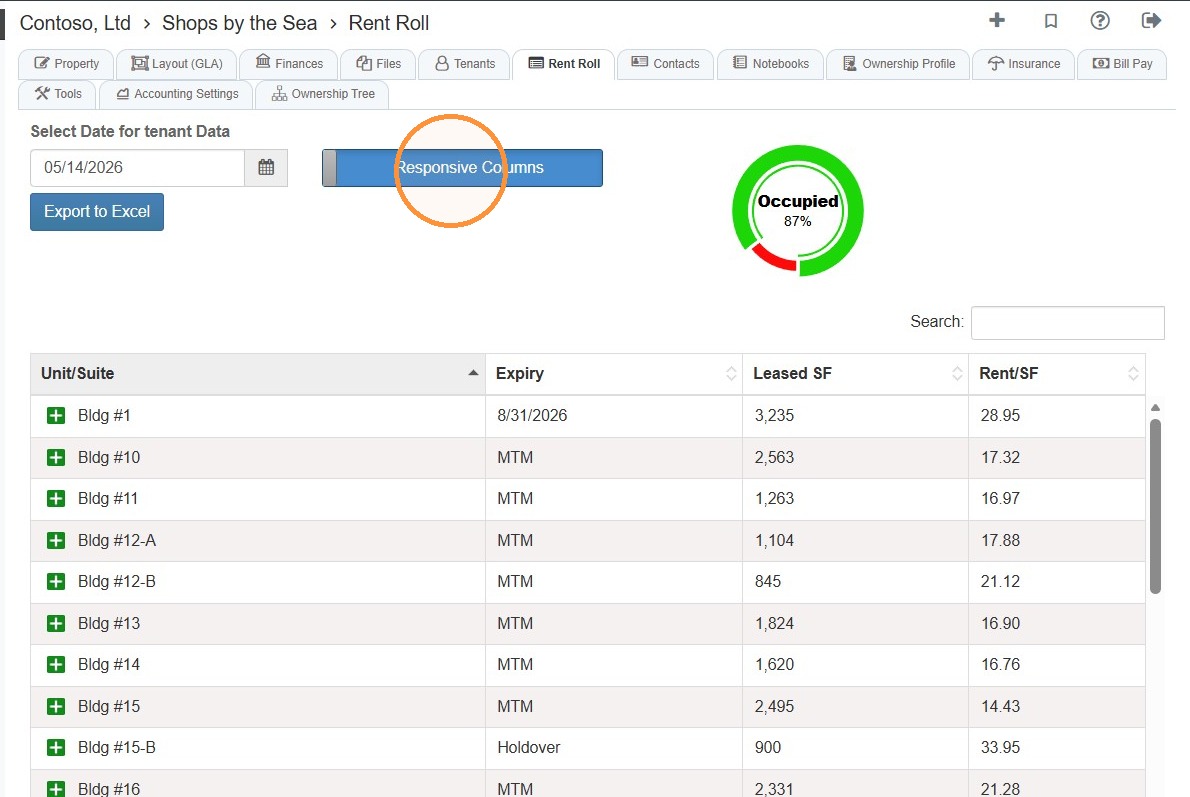
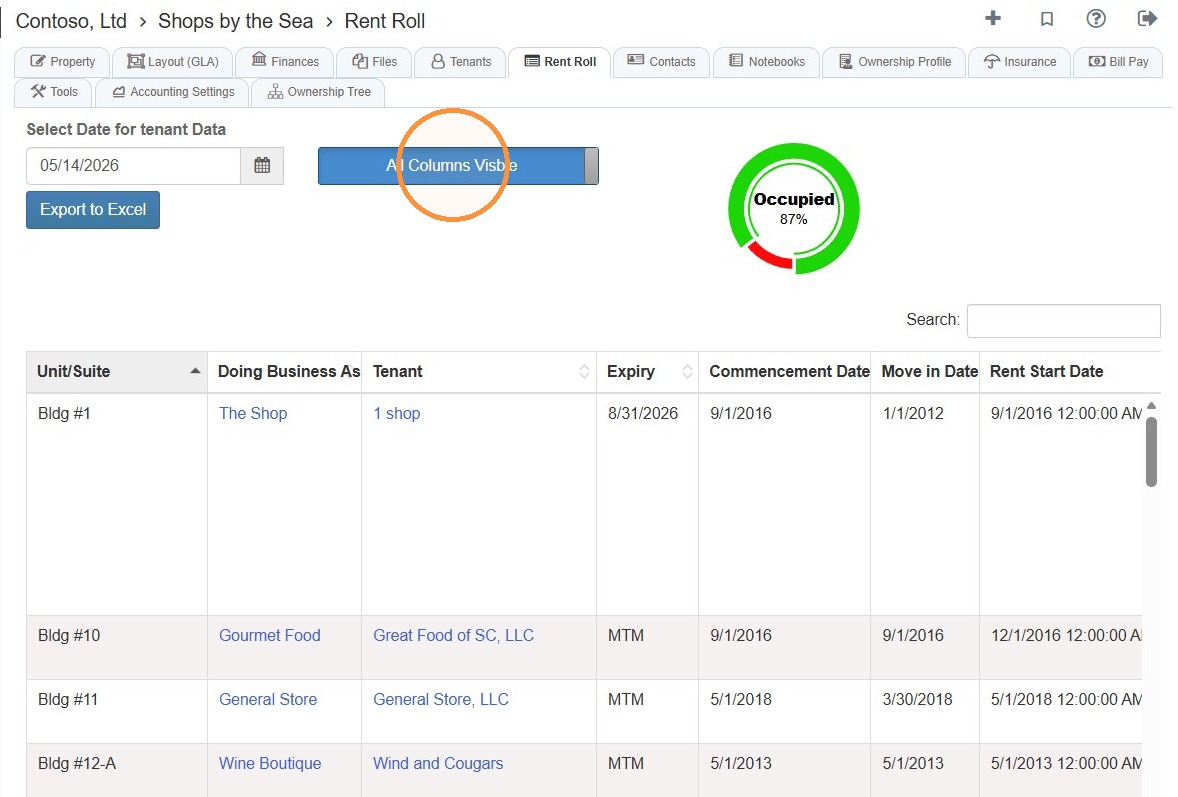
29. Toggle the columns view by selecting Responsive Columns or All Columns Visible.
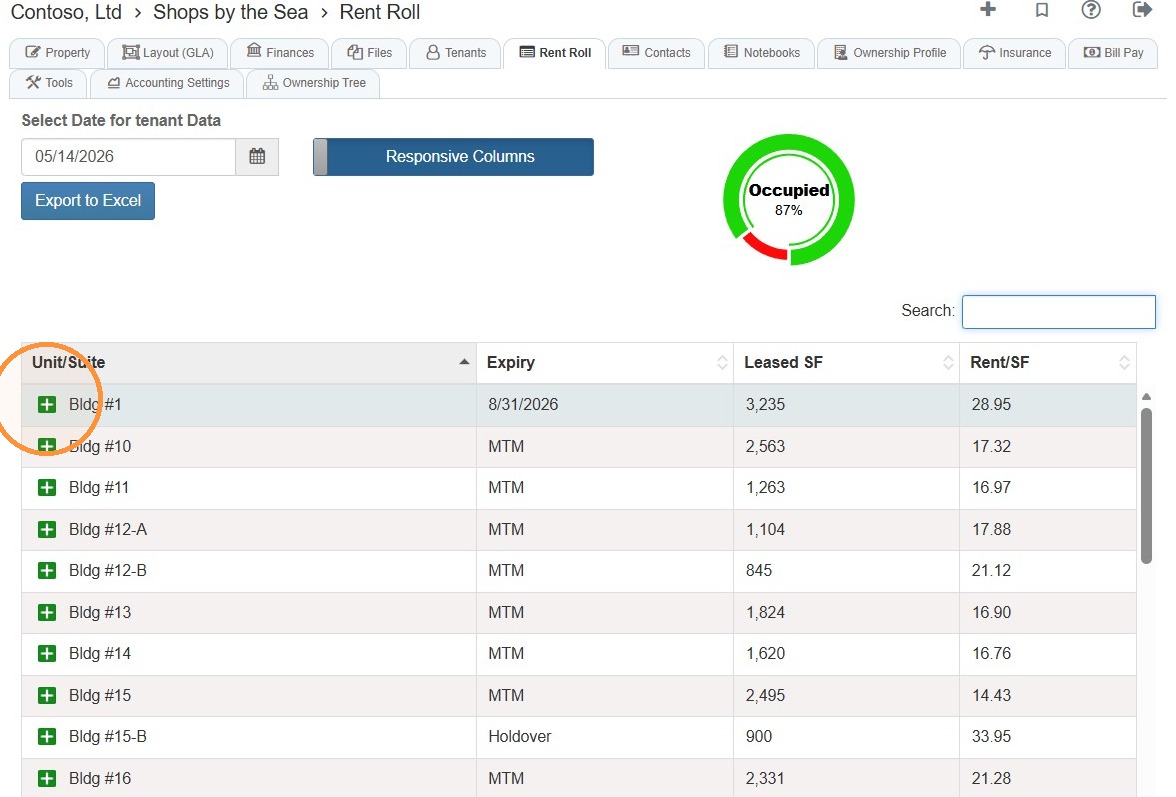
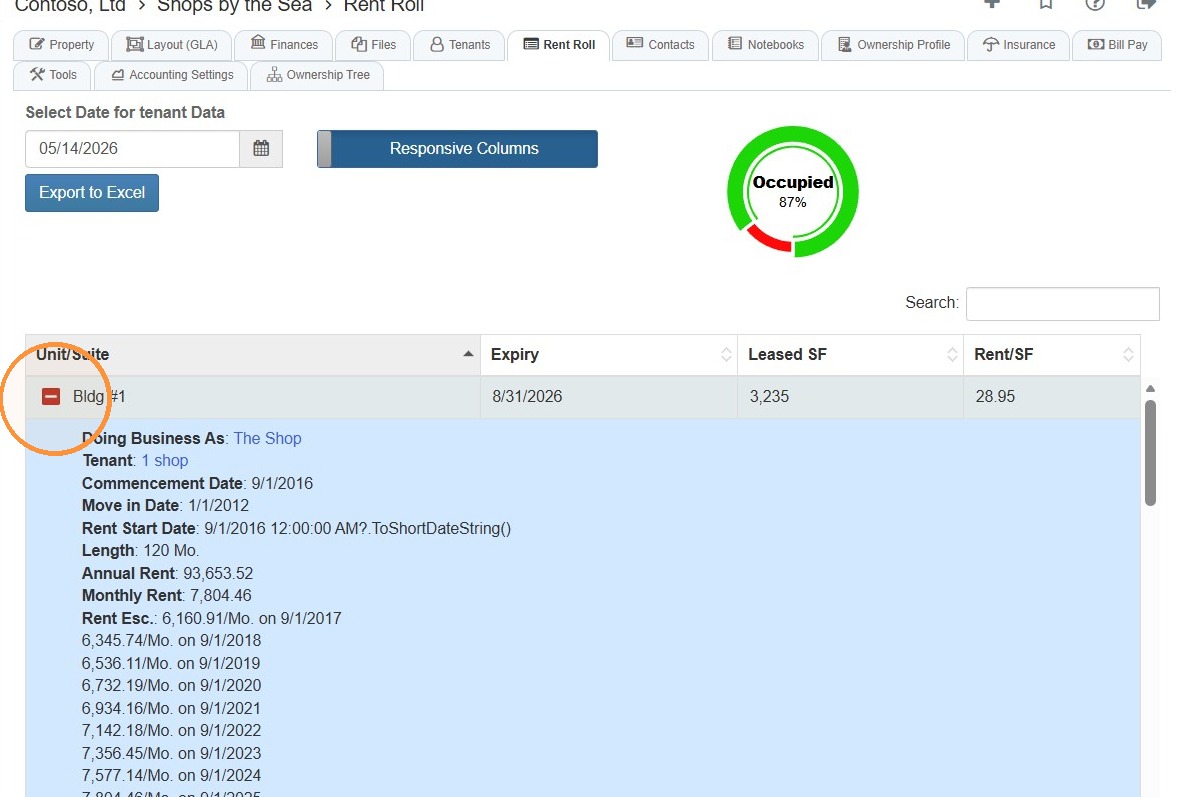
30. Select the green + icon to view more information for that unit/suite.\ \ Select the red - icon to collapse the information.
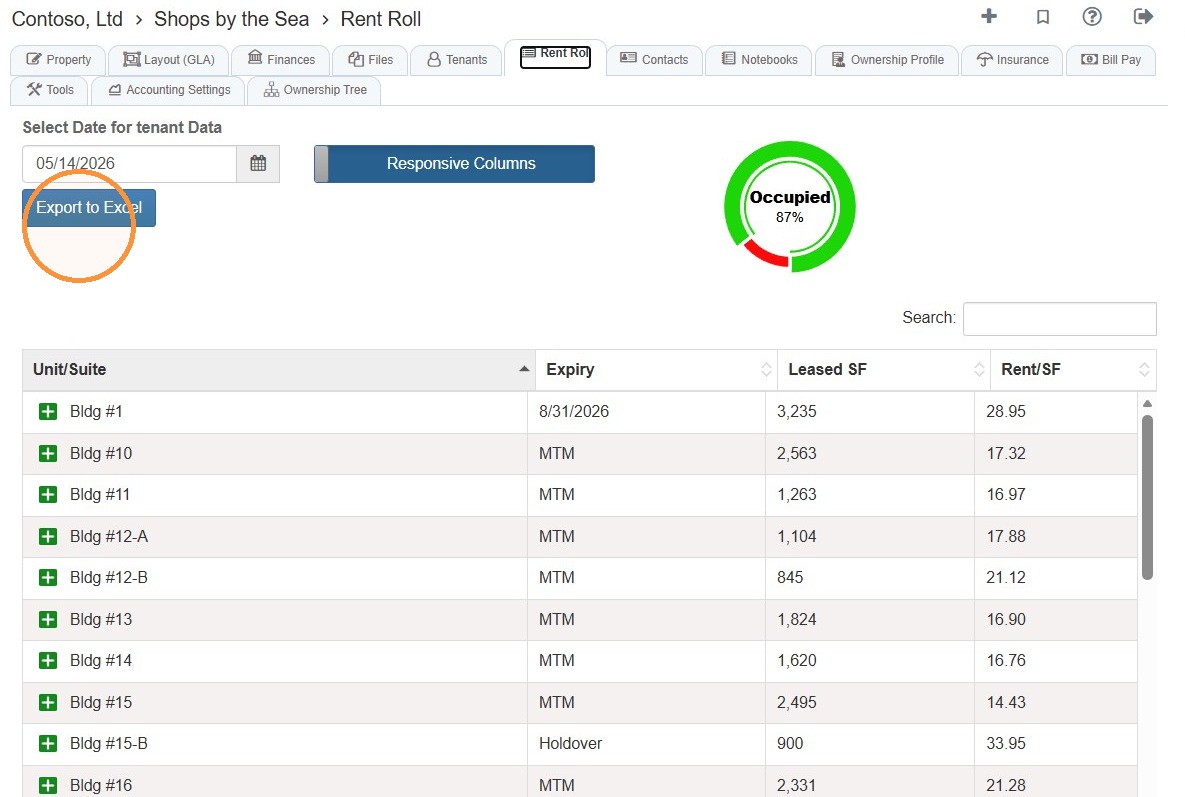
31. To export, select Export to Excel.
Contacts Tab
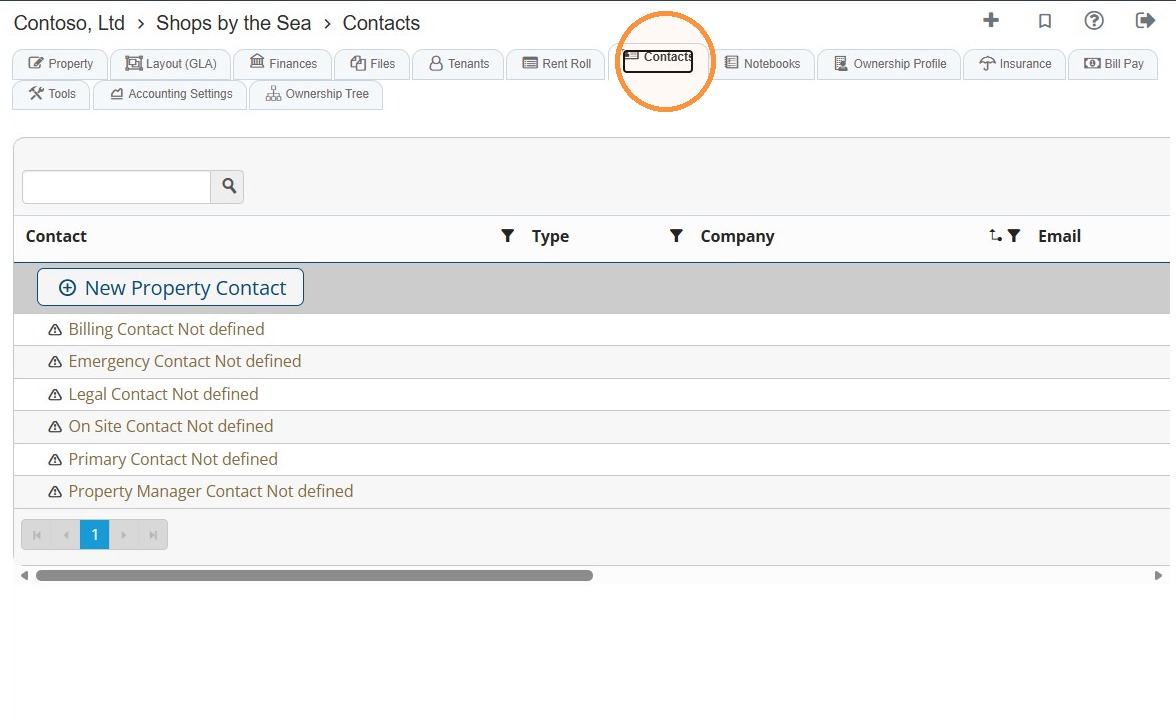
32. To view or add property contacts, select the Contacts tab.
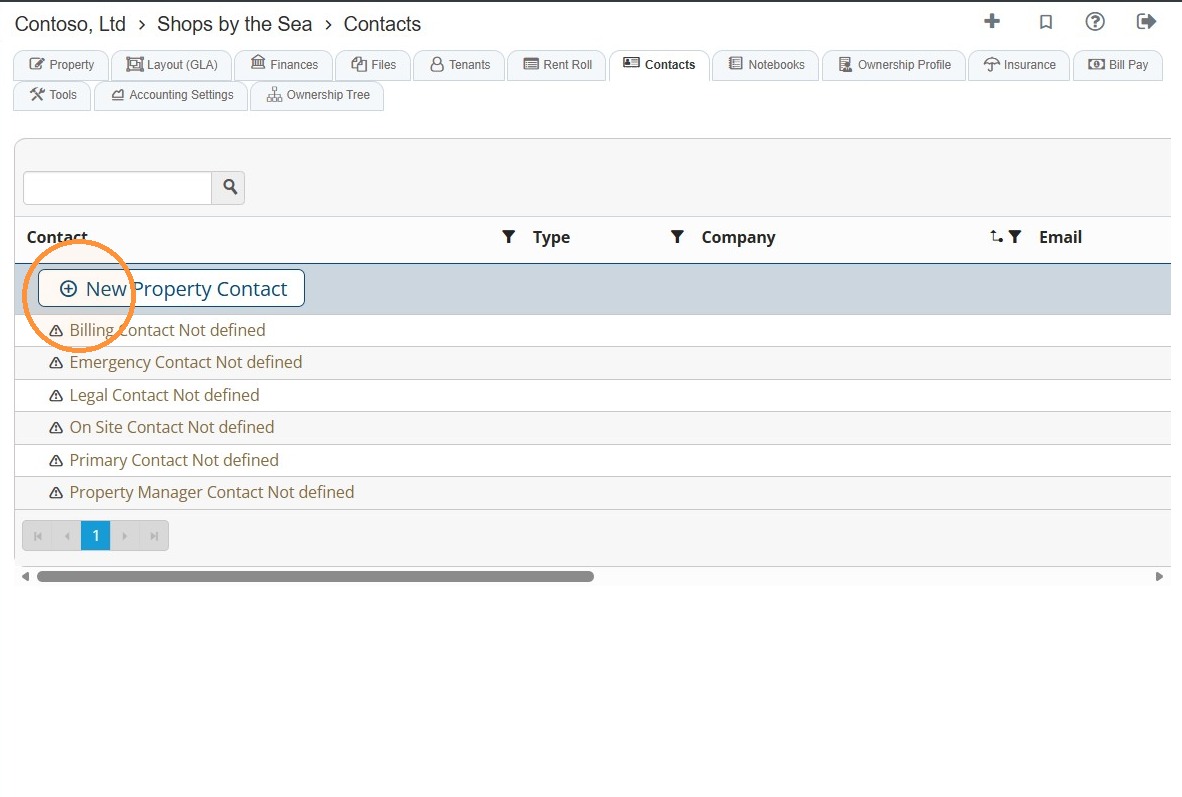
33. Select New Property Contact to add a new contact and follow the steps.
Notebooks Tab
34. Select the Notebooks tab.
The Notebooks tab allows you to schedule important dates, tasks, and notifications specific to the property.
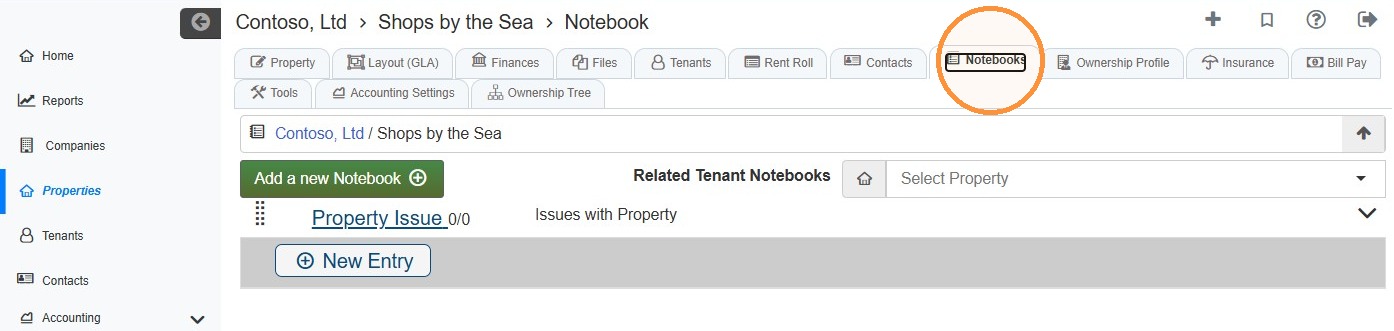
35. Notebook Overview
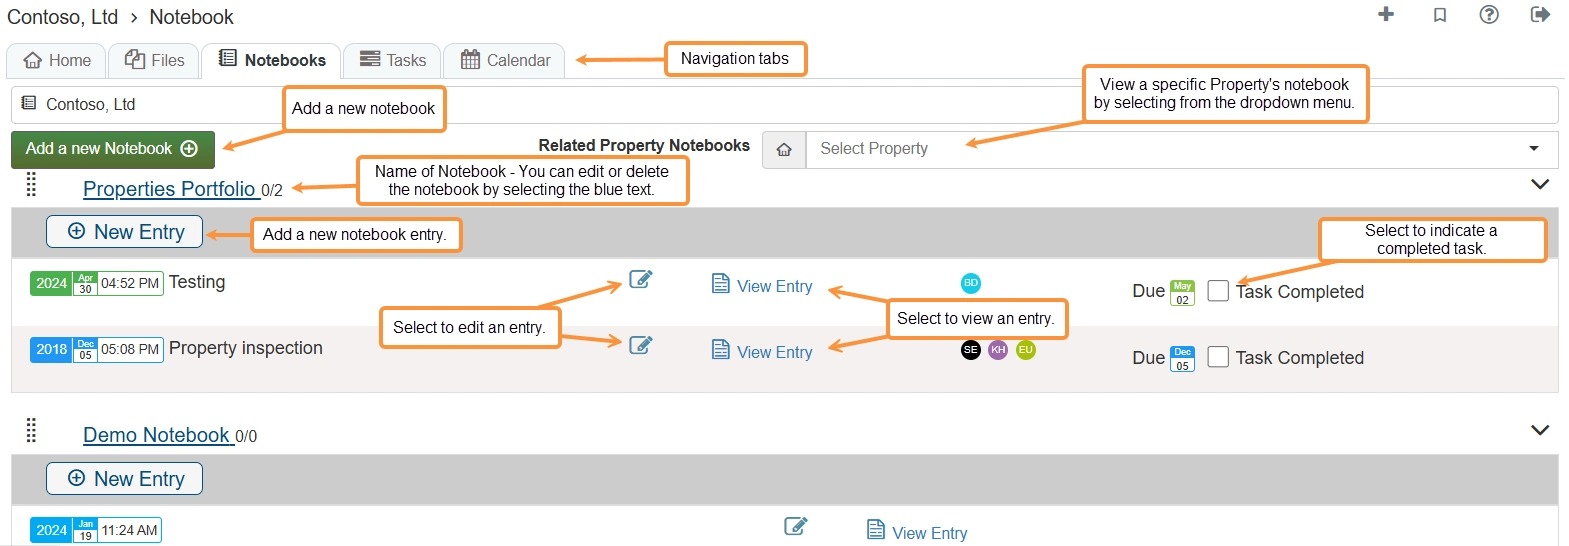
Tip: To learn more about creating Notebooks and Tasks, see How to Create a Notebook, Entry, and Task and How to Create Dependent/Linked Tasks.
Ownership Profile Tab
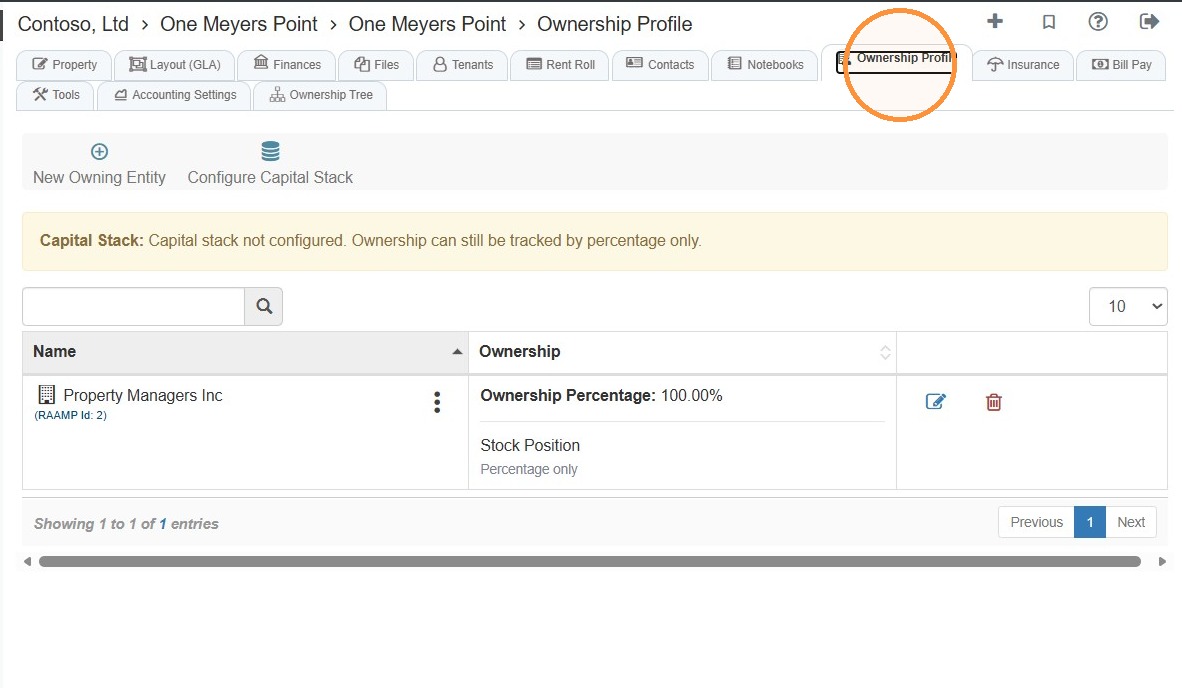
36. Select the Ownership Profile tab.
This tab provides a summary/snapshot of the ownership status, and you can configure the property's capital stack.
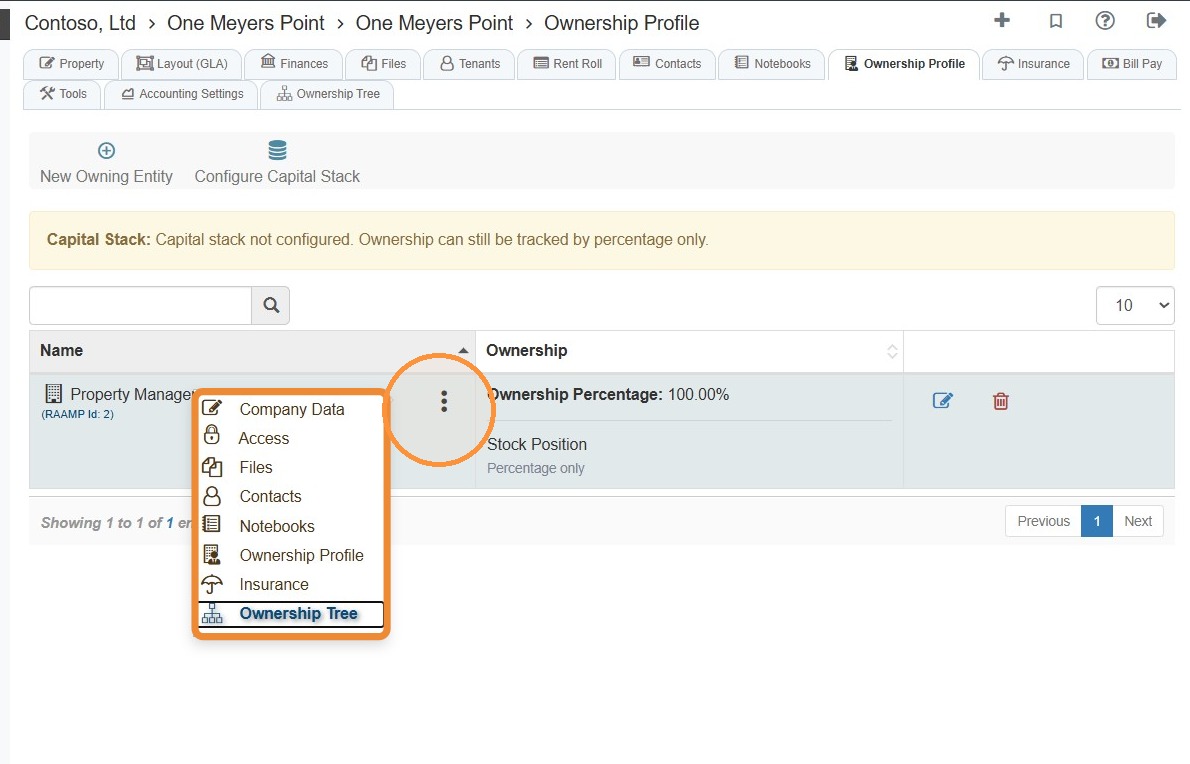
37. Select the three-dot menu to view options.
Insurance Tab
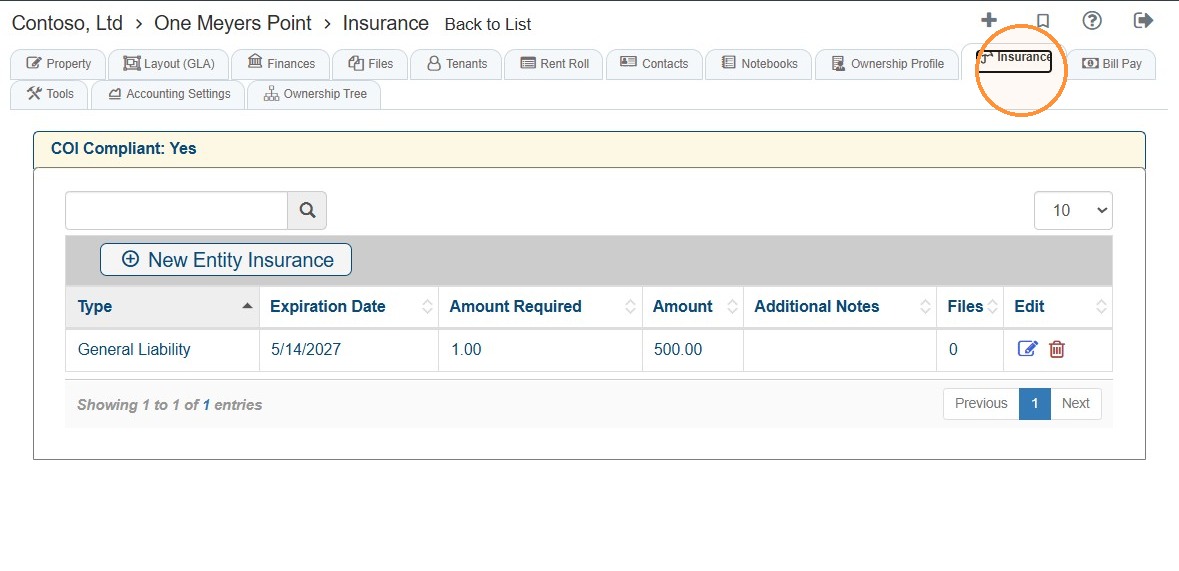
38. To view a list of the property's entity insurance, select the Insurance tab.
You can also add new entity insurance here.
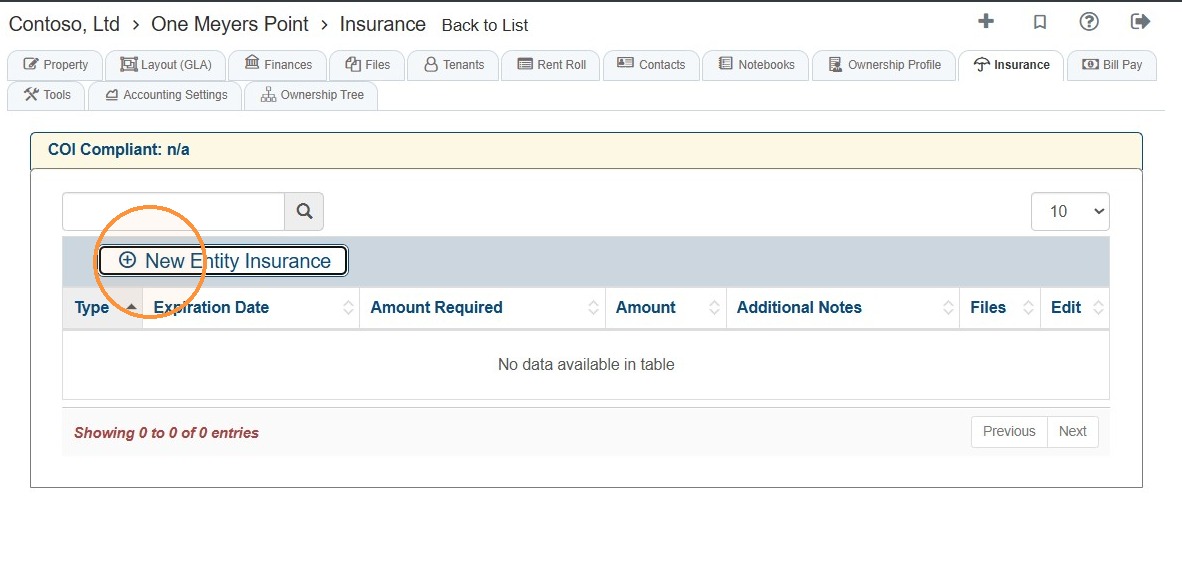
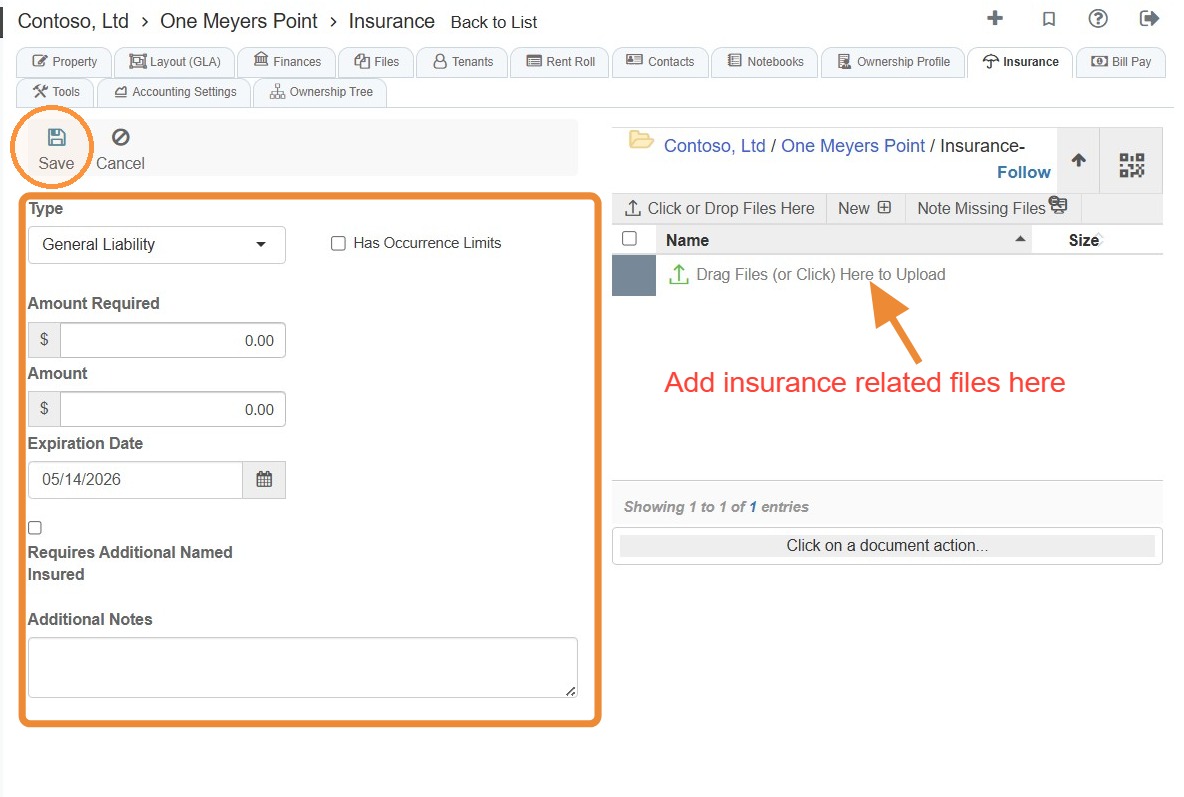
39. To add entity insurance, select the New Entity Insurance tab > Enter the required information and/or upload related files > Select Save.
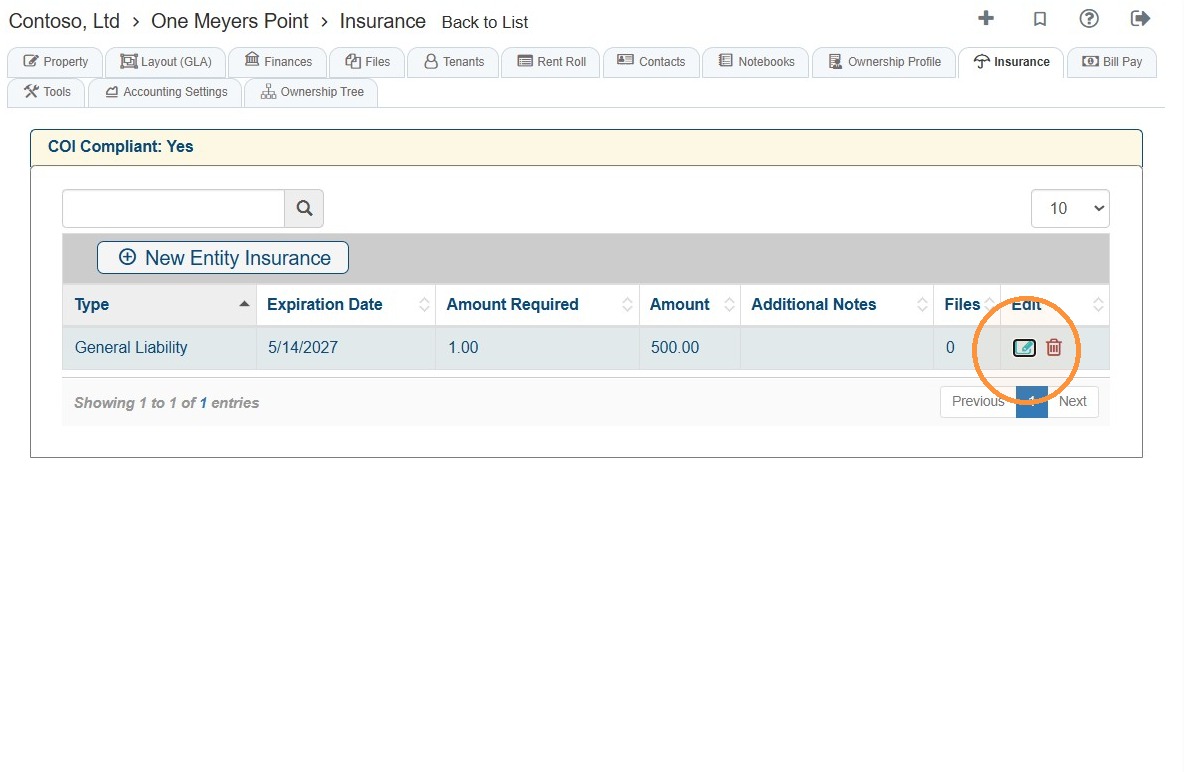
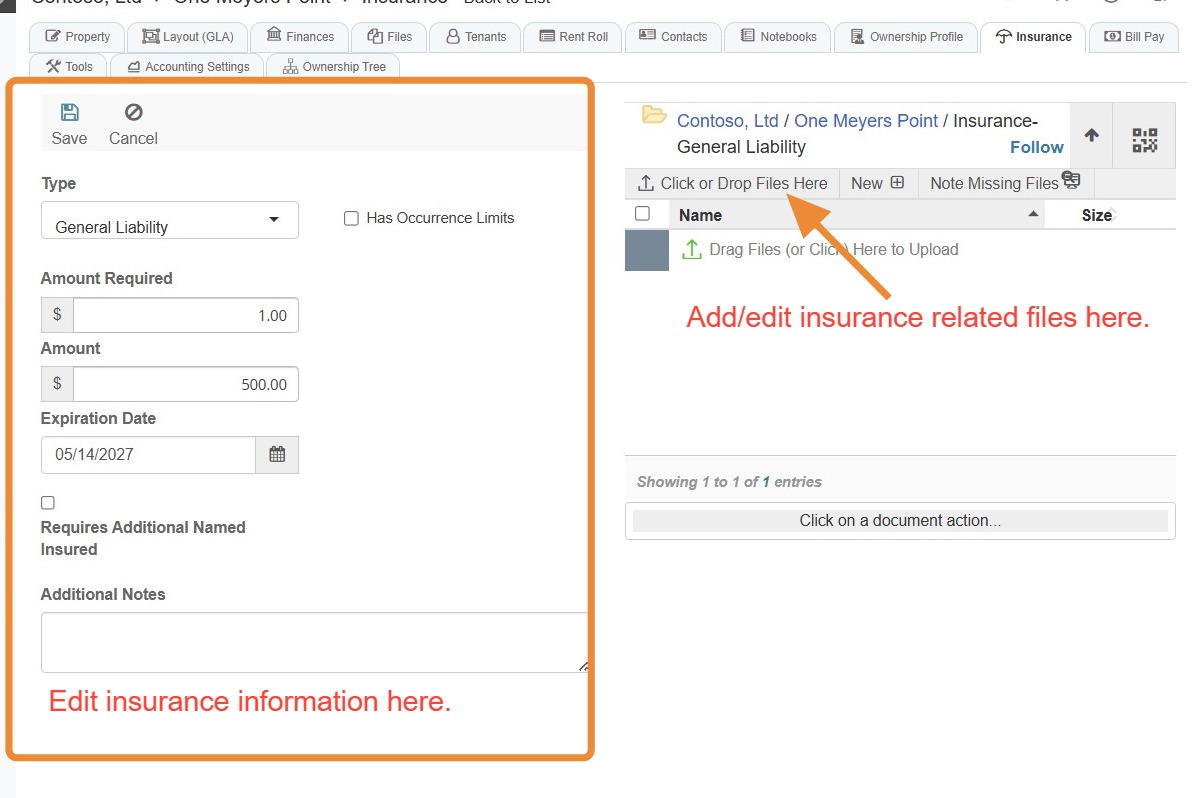
40. Select the Edit icon to update the insurance information and/or to upload files related to the insurance.
Tools Tab
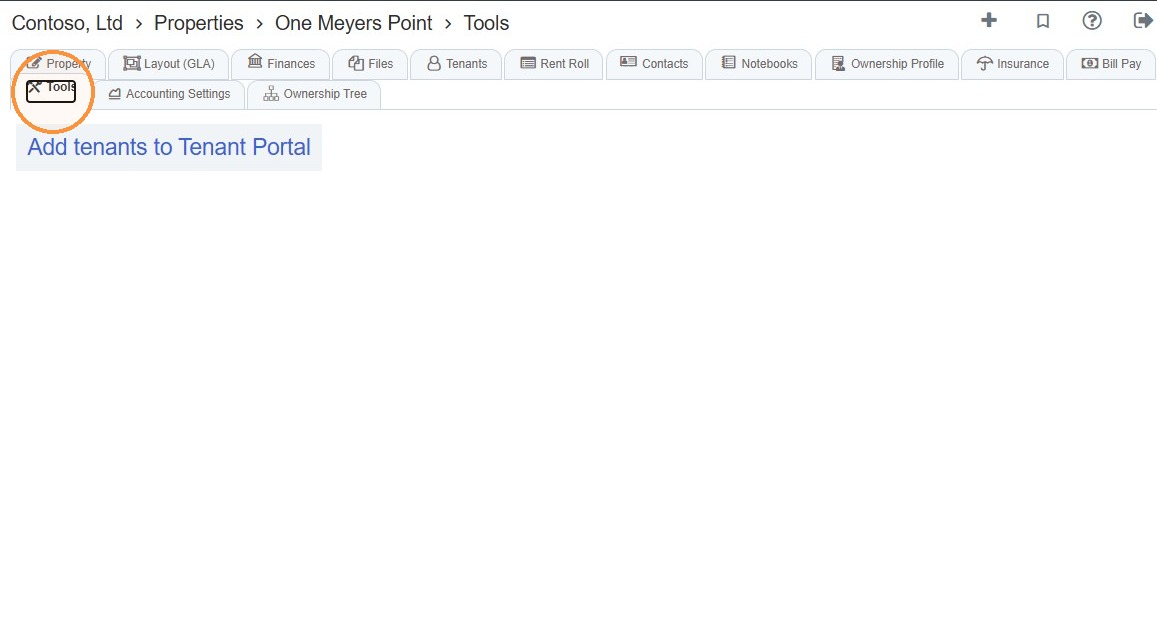
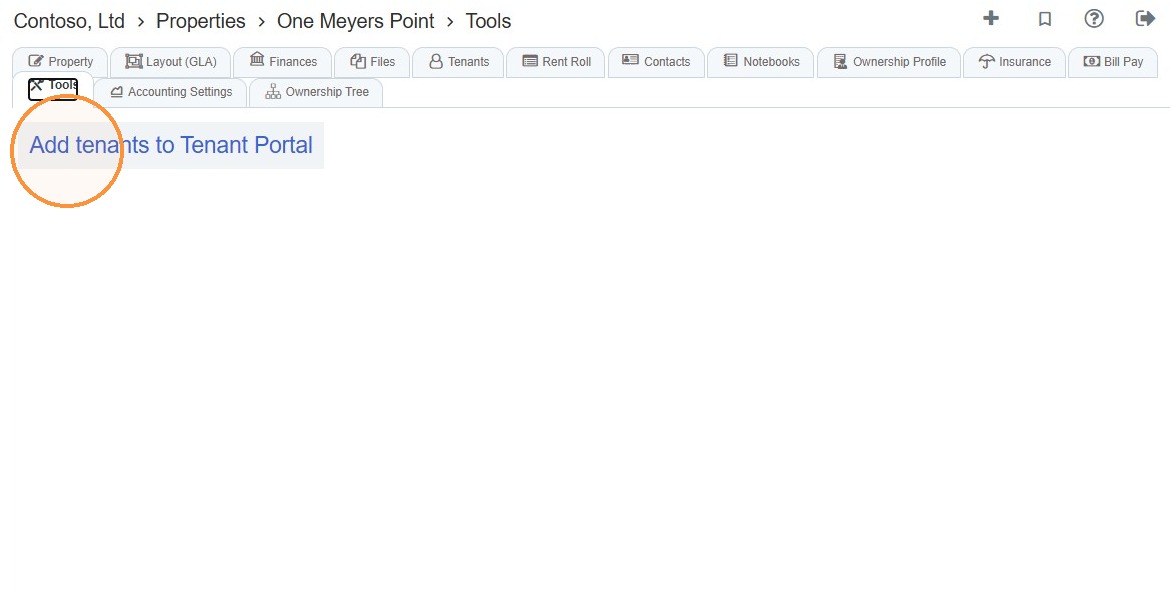
41. Use the Tools tab to add property tenants to the Tenant Portal.
Select the Tools tab > Add tenants to Tenant Portal.
Accounting Settings Tab
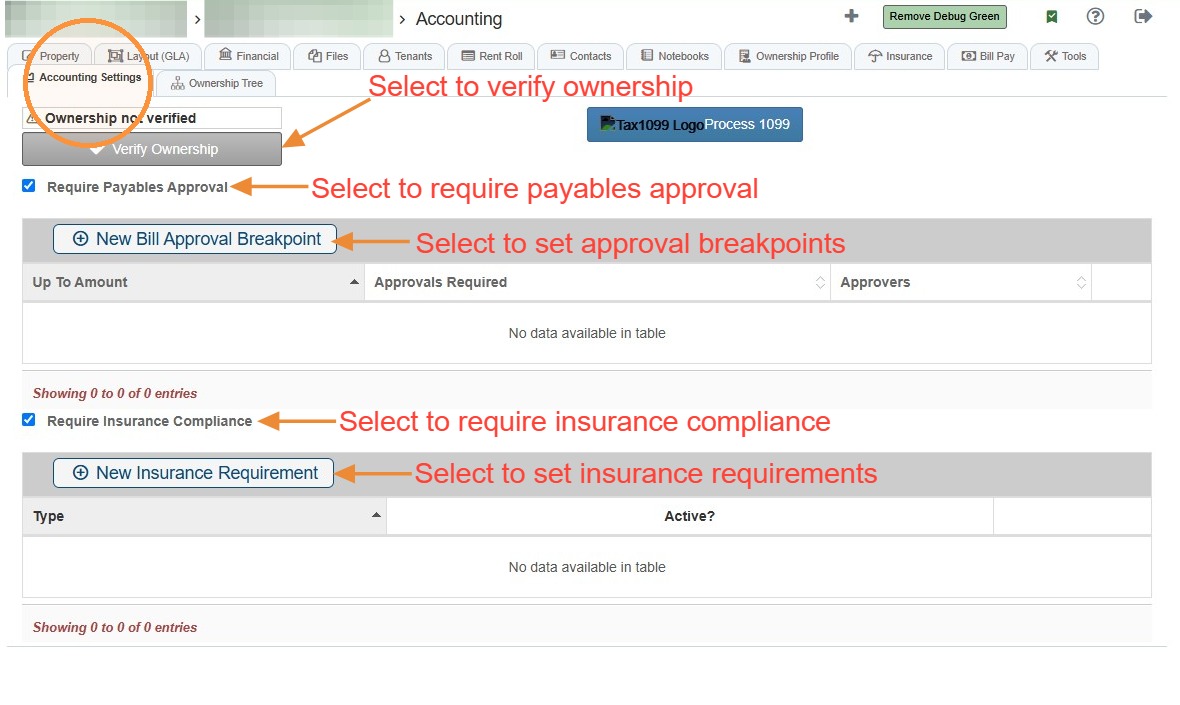
42. To verify ownership or to add new/edit insurance, select the Accounting Settings tab.
Tip: Related Tutorial(s):
How to Verify Ownership and Agreement for Franchise Use\ How to Enable Payables Approval and Approve Payables
Ownership Tree Tab
Tip: The Ownership Profile Tab needs to be completed for the Ownership Tree to populate.
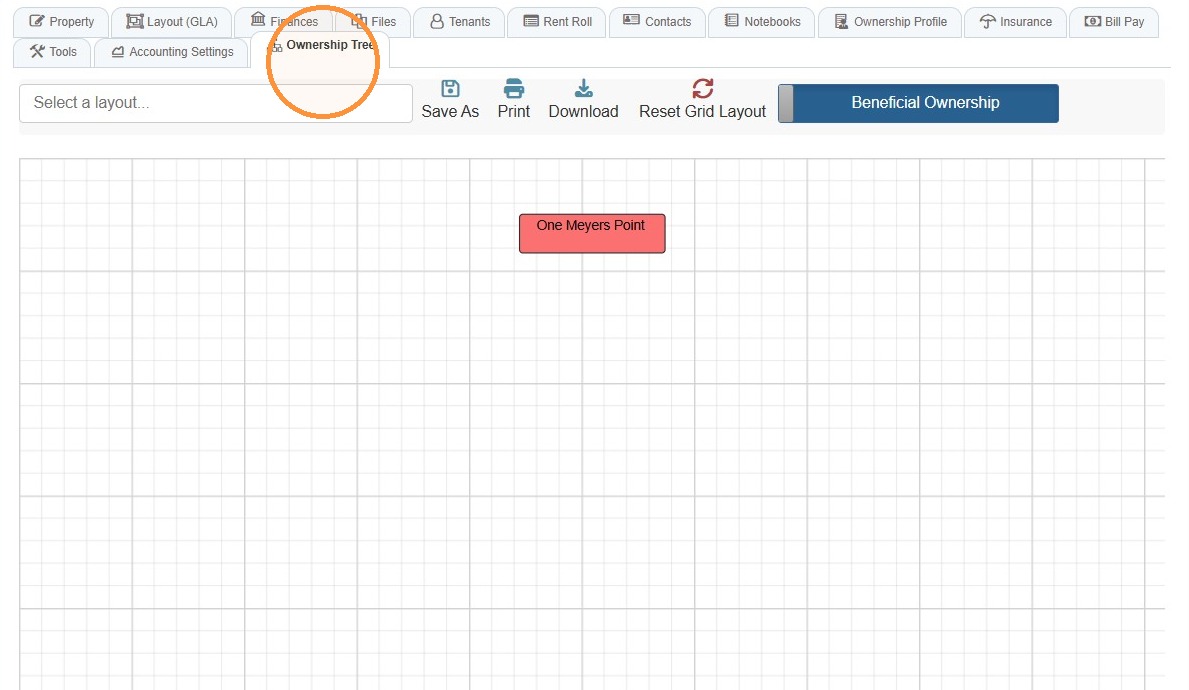
43. Select the Ownership Tree tab.
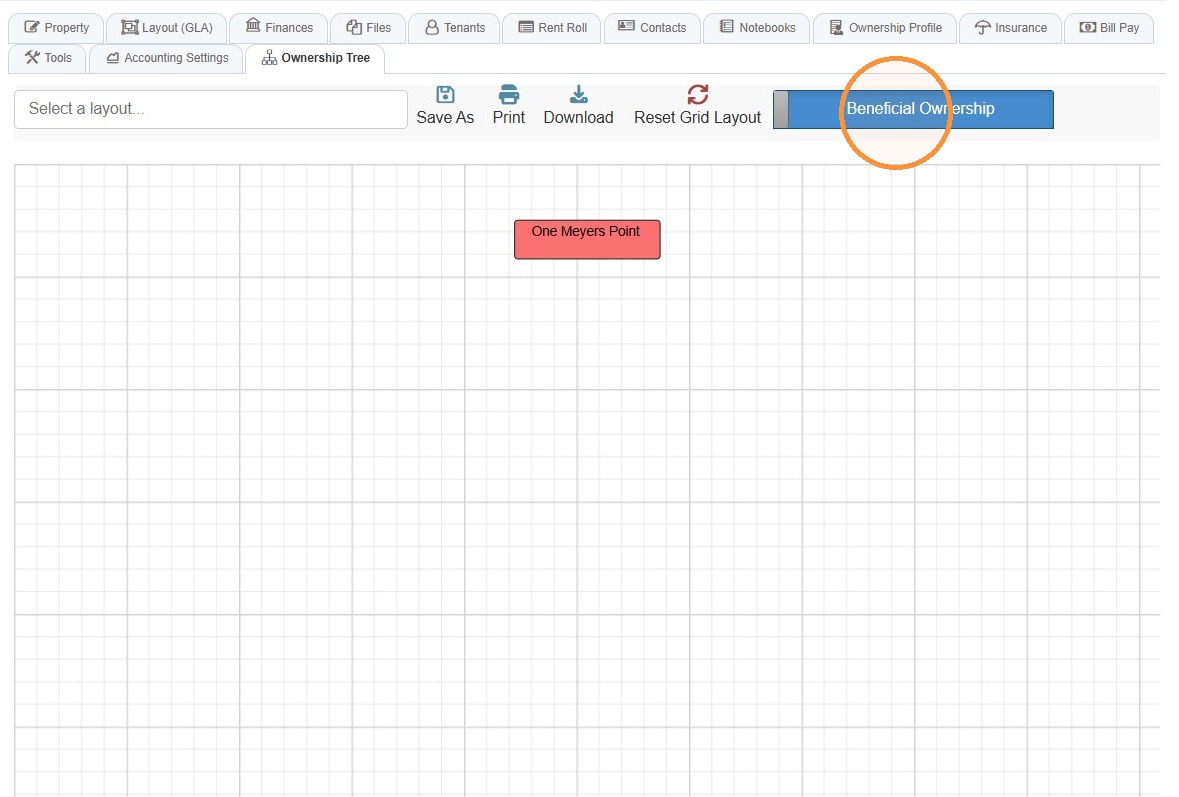
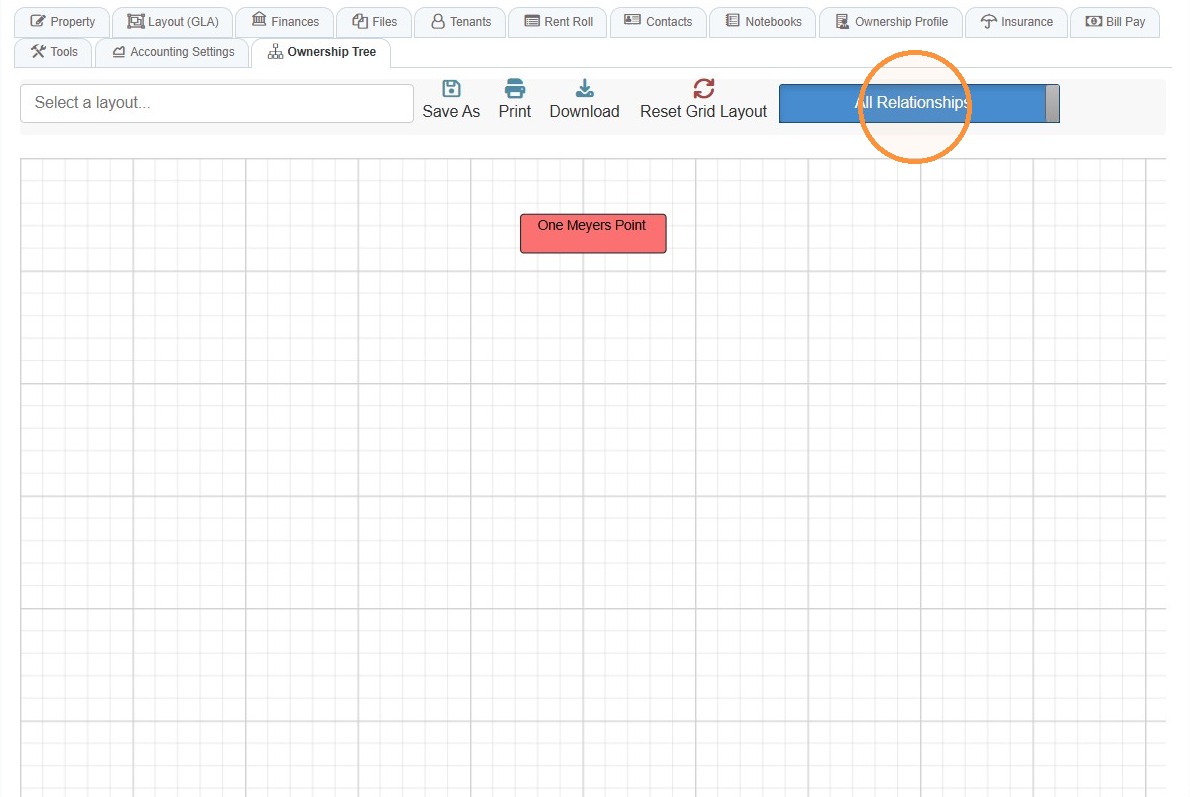
Toggle the view between Beneficial Ownership and All Relationships.
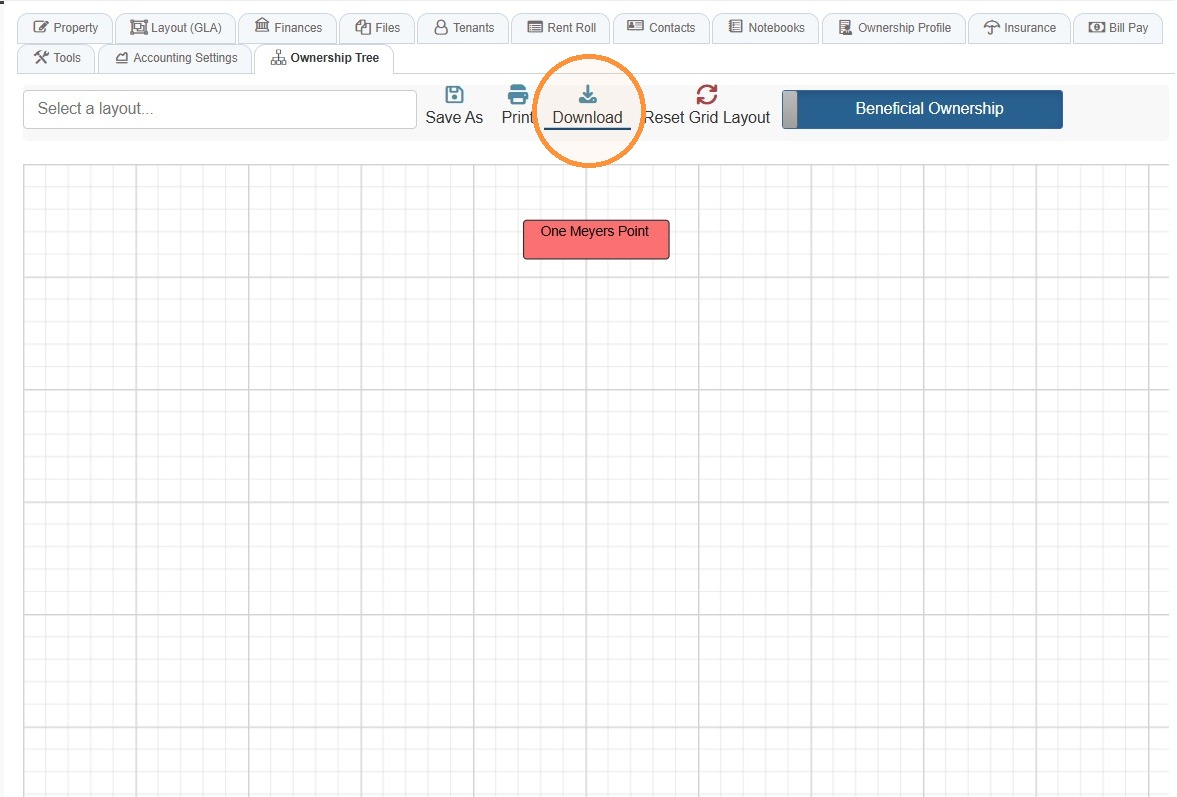
44. Select Download to export the diagram.
Related Tutorial(s):