How to Bulk Import Vendor Data
This guide shows how to quickly download the vendor import Excel template, format your vendor data to the required structure, and upload the completed file so the system can process it. It explains where to find the template, how to submit the finished file, and that you'll receive a Vendor Upload Results file with processing outcomes. Follow it to save time and avoid manual entry or formatting errors.
How to Download the Template
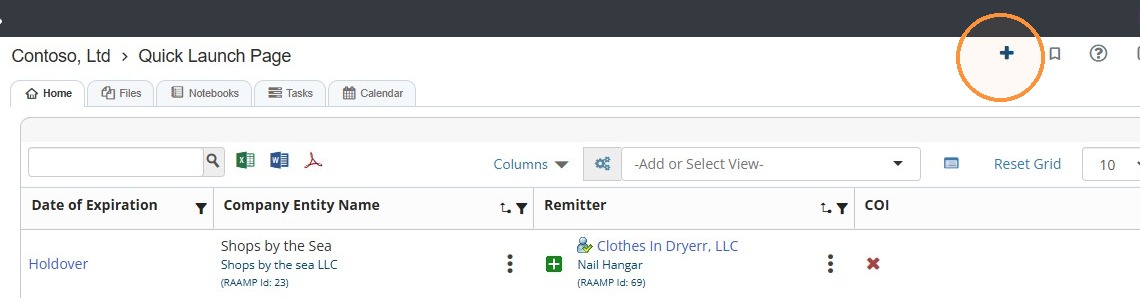
1. From Home, select the + icon in the top right corner of the screen.
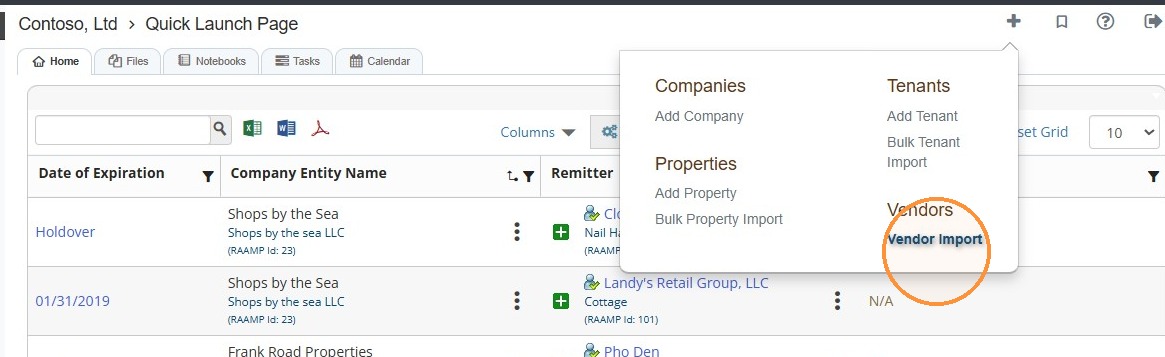
2. Select Vendor Import.
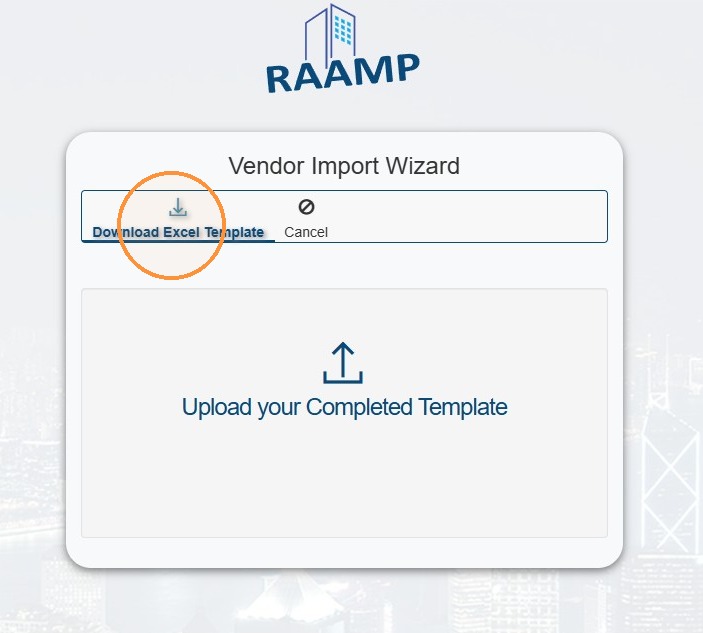
3. Select the Download Excel Template.
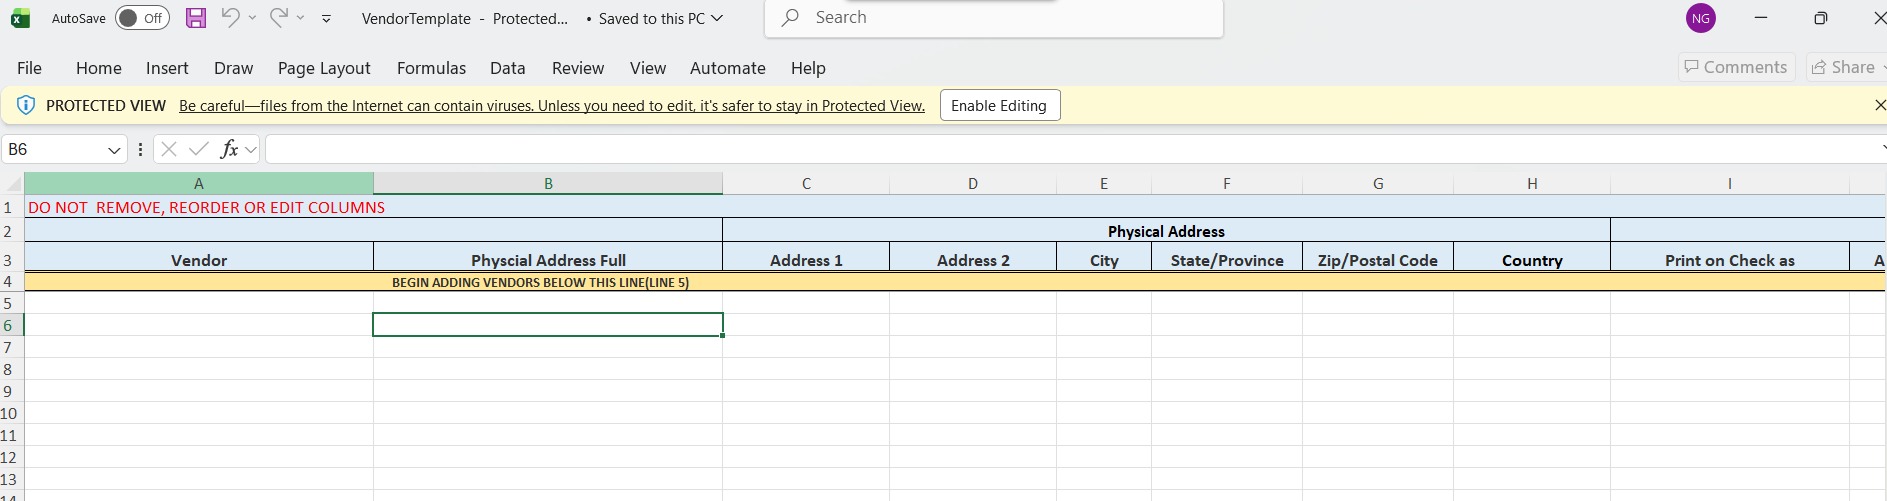
4. You should be able to access the template in your computer's Downloads folder.
Format your data based on the template.
Tip: In RAAMP, a vendor is a person or business that provides goods or services and may receive payments. However, you don't always need to create a vendor record to pay someone.
In RAAMP, you can use existing companies, properties, tenants, and contacts for both billing and payments. You don't always need a separate vendor record.
Important: Before creating or importing a vendor, check whether the company, property, tenant, or contact already exists in RAAMP to prevent duplicate records.
How to Import Template
5. When you are done cleaning up and formatting the vendor template, select the + icon in the top right corner of the screen.
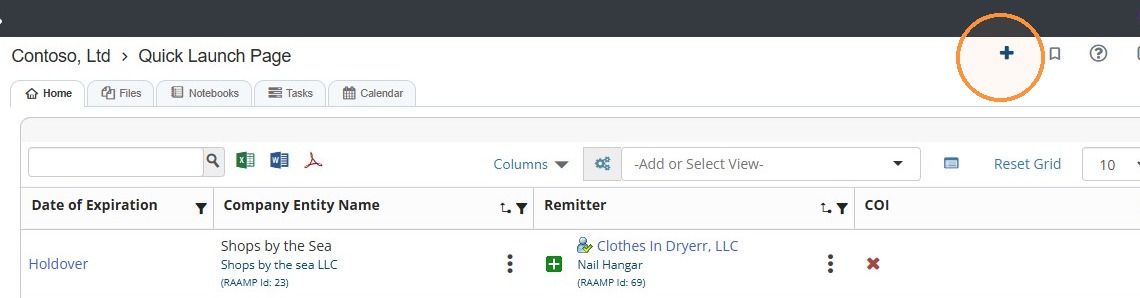
6. Select Vendor Import.
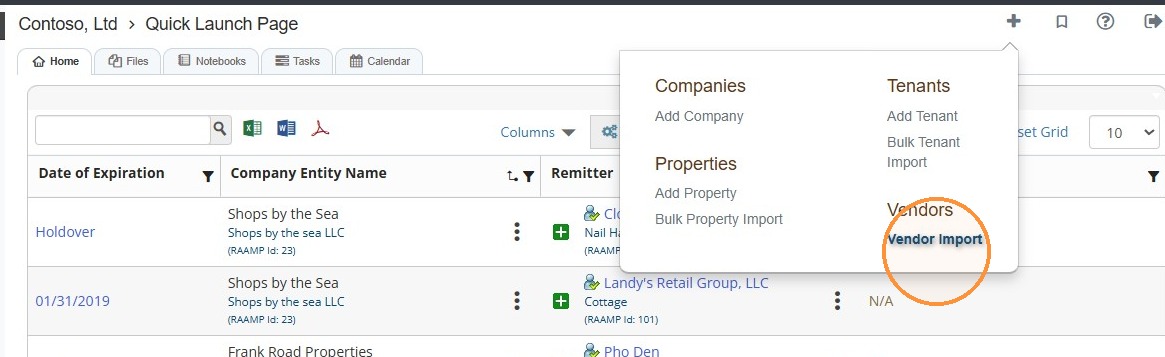
7. Select Upload your Completed Template.
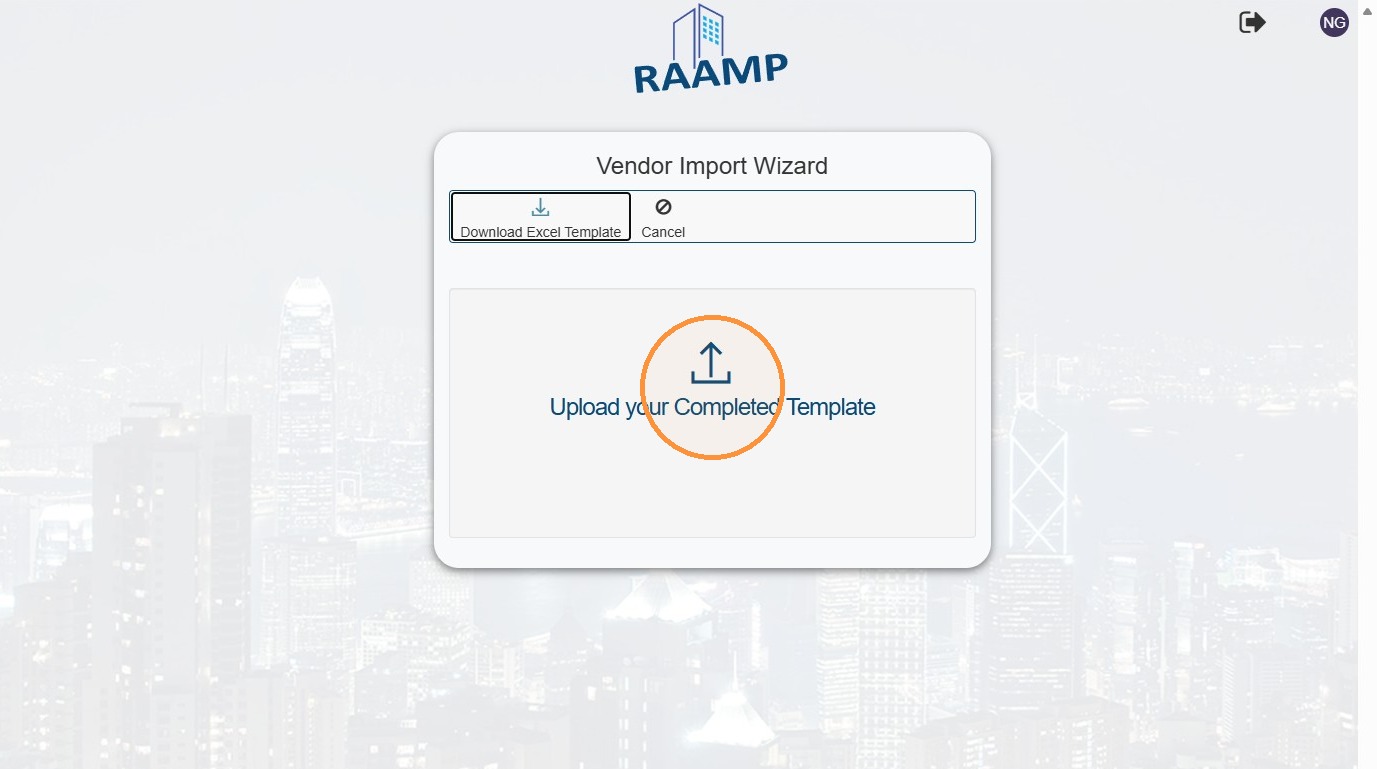
8. Select the file from your computer.
Once processed, you'll receive a Vendor Upload Completed message > Select the Vendor List hyperlink to view the vendor list.
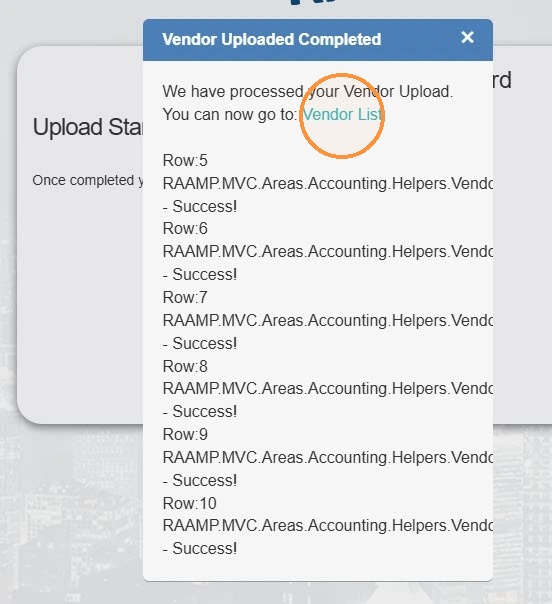
9. Vendor List Overview
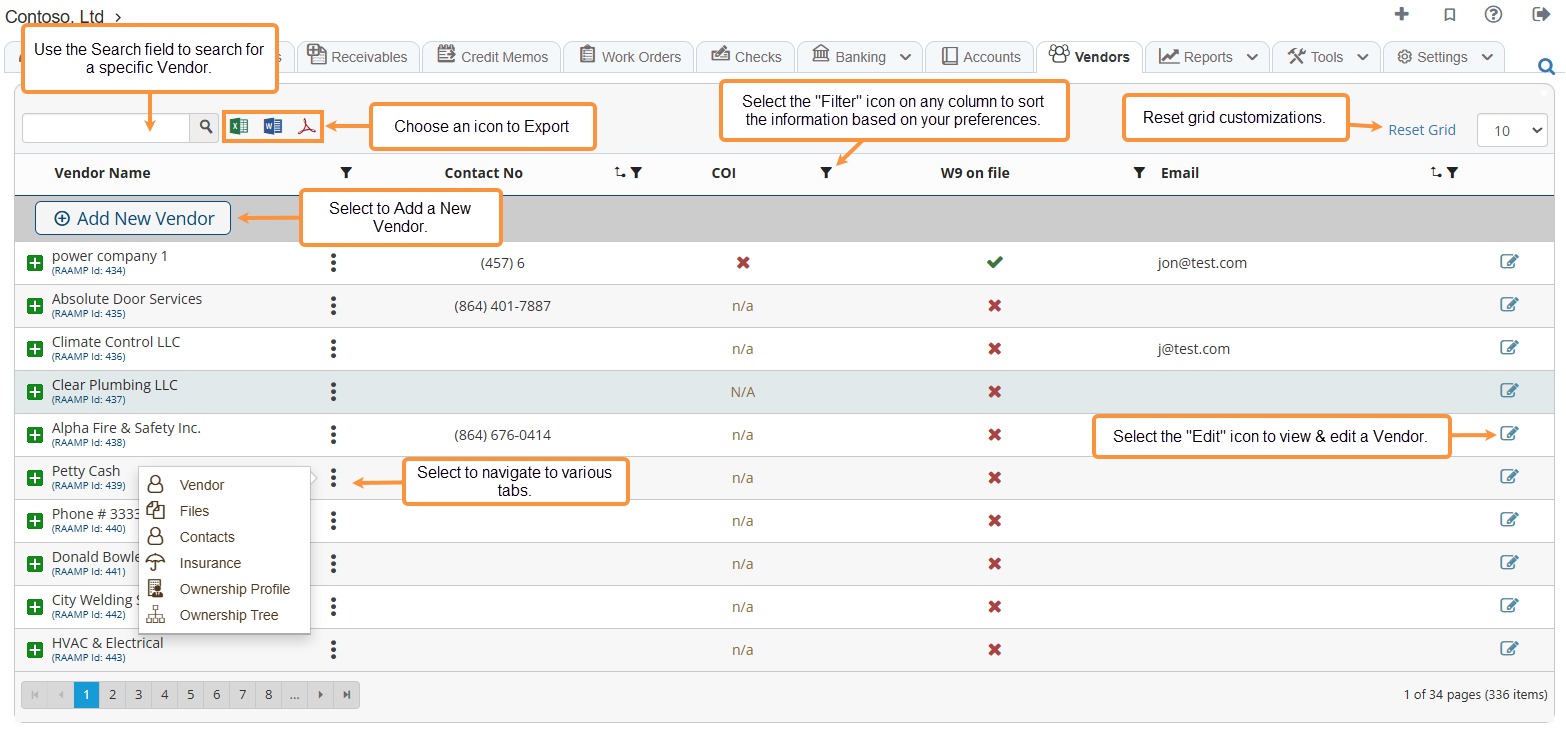
Vendor Specific Tabs
10. Once the vendor is created, you can navigate between various tabs for that vendor.
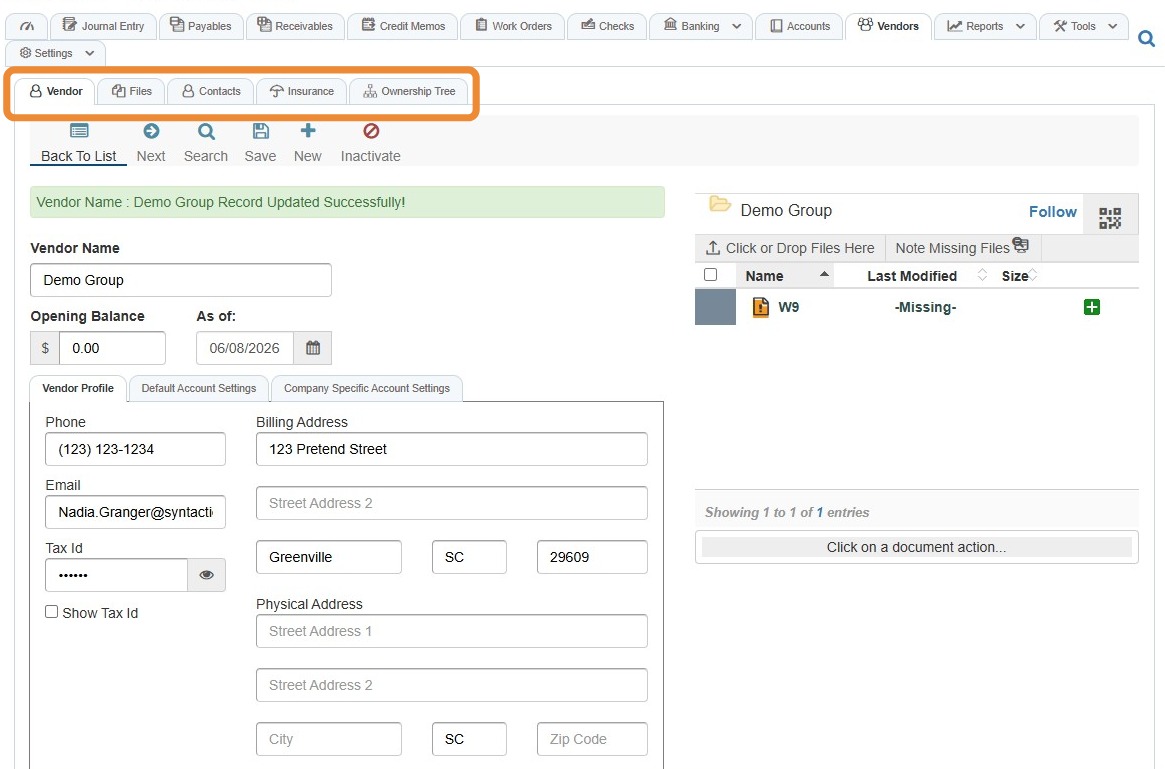
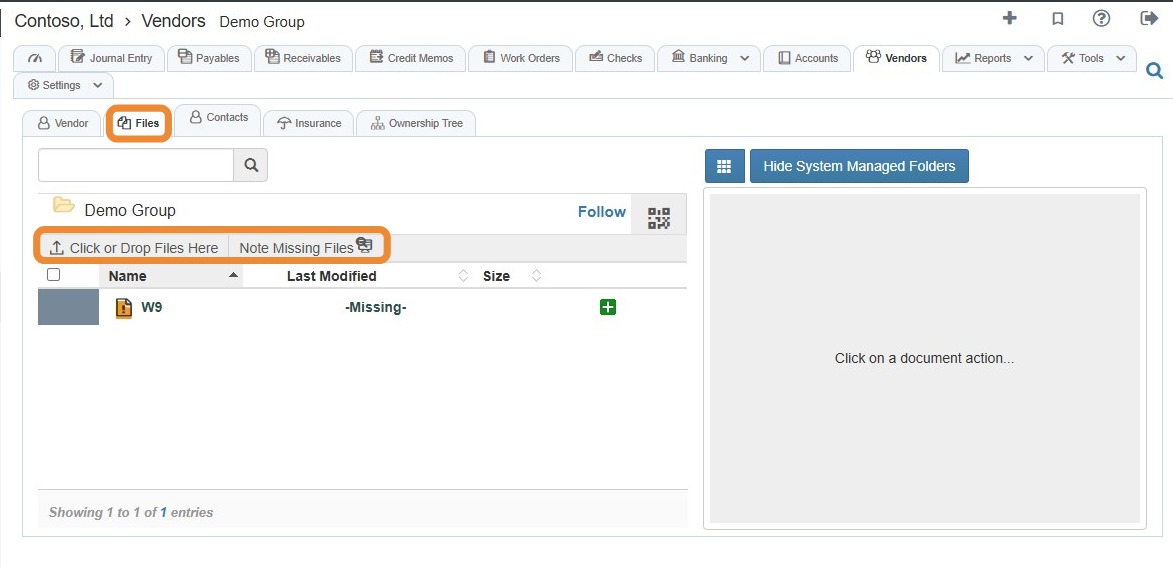
11. Files Tab: Allows you to upload and view vendor-related files such as the vendor's W9.
You can also note missing files.
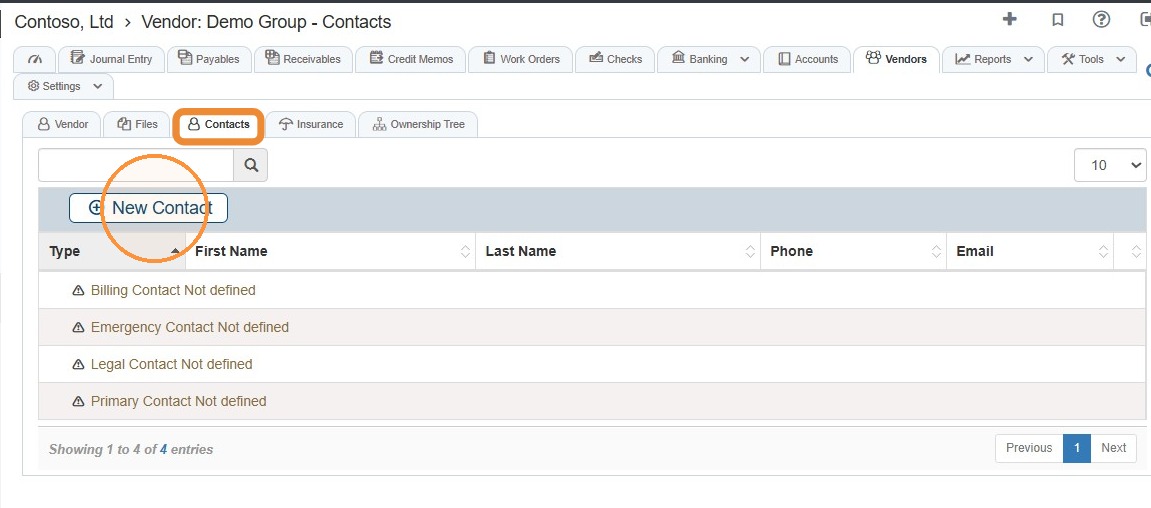
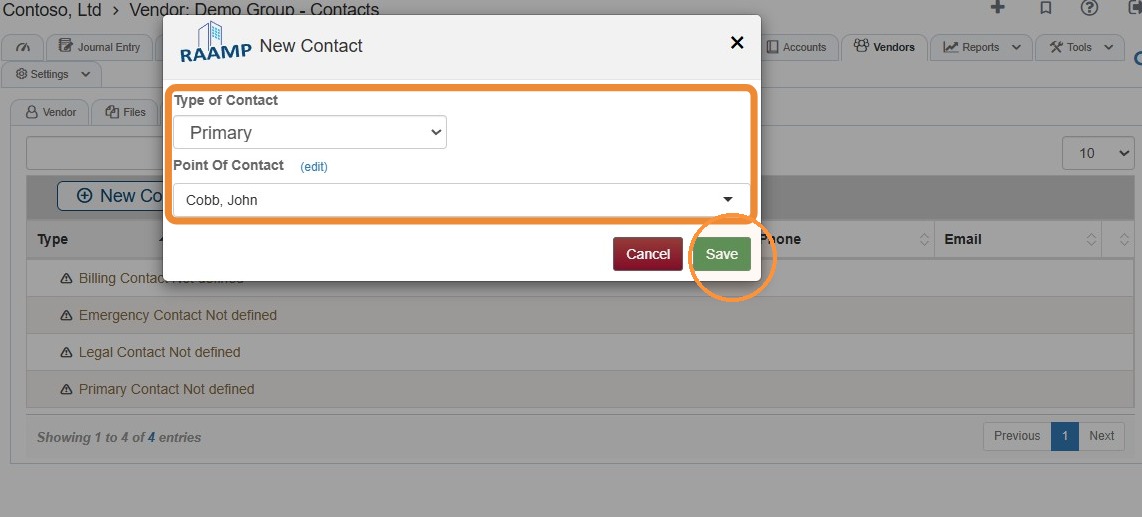
12. Contacts Tab: Allows you to view and add vendor-specific contacts.
Select New Contact > Complete the contact information > Select Save.
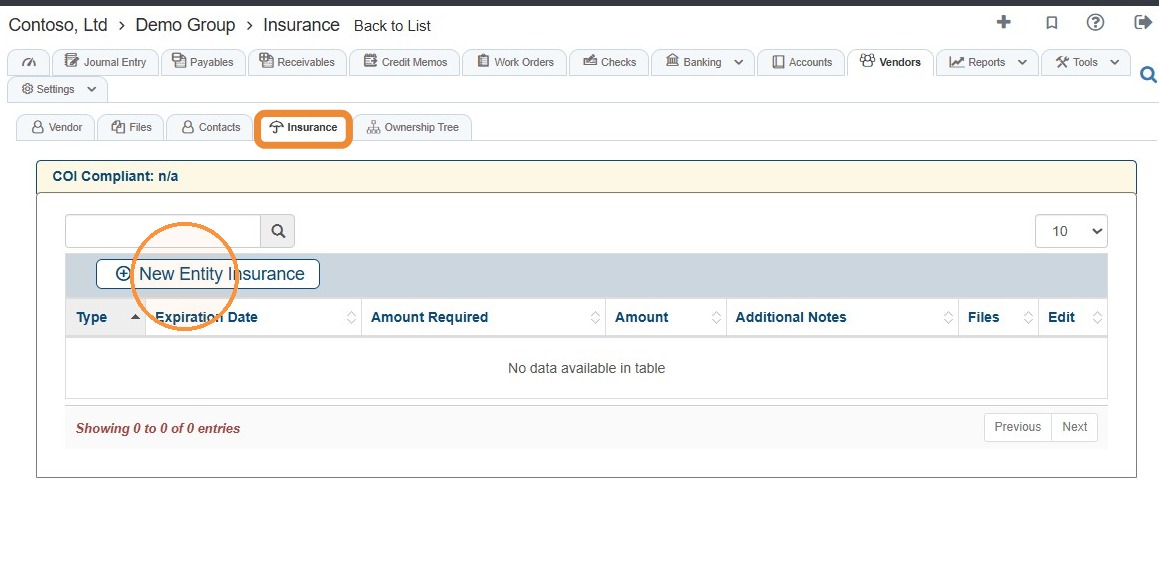
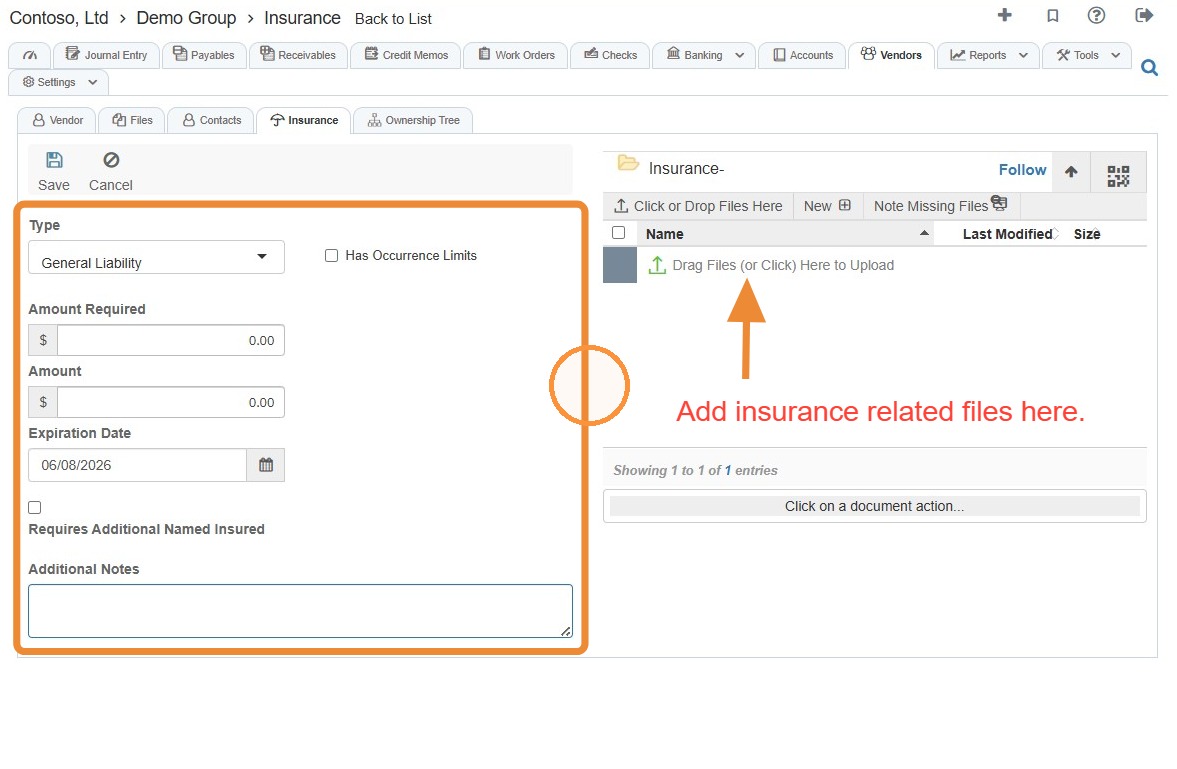
13. Insurance Tab: Allows you to view and add vendor-specific insurance information.
Select New Entity Insurance > Complete the insurance information and upload related files > Select Save.
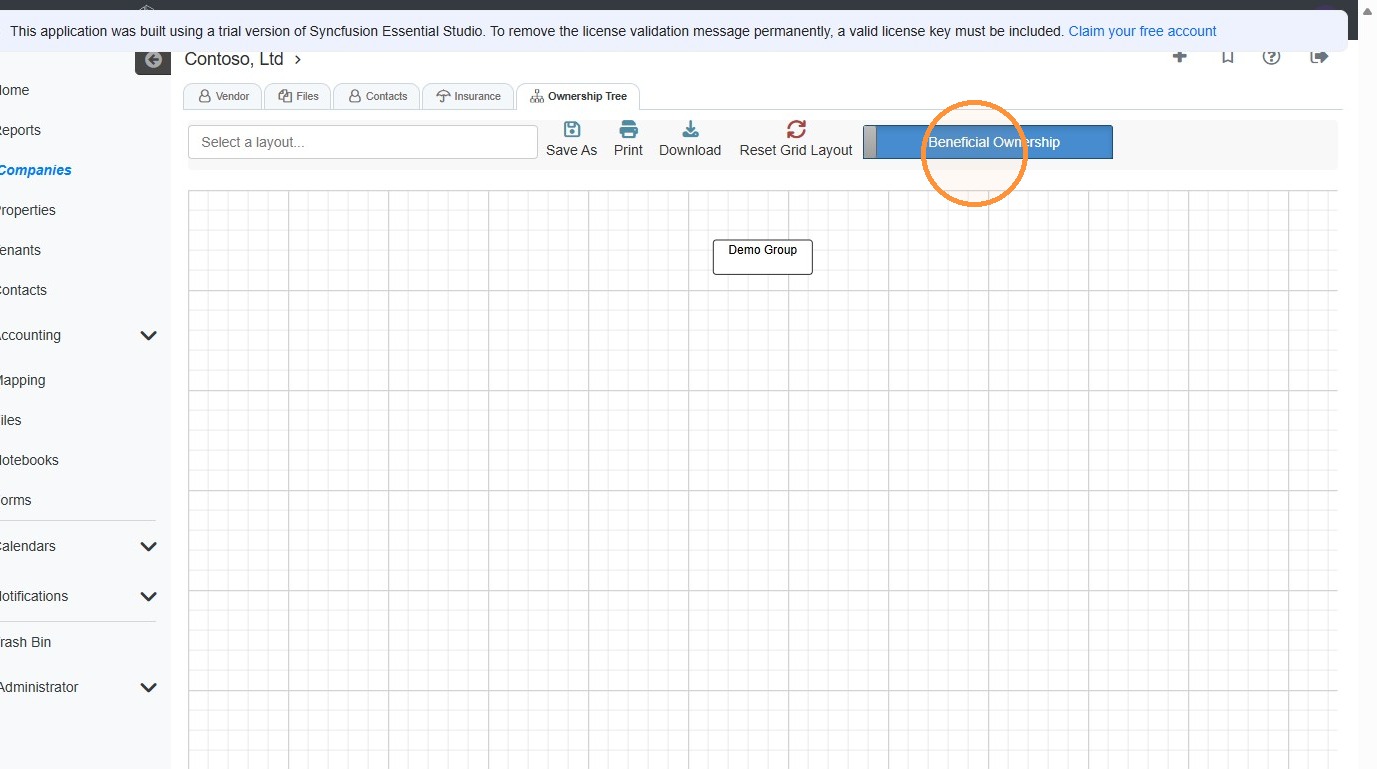
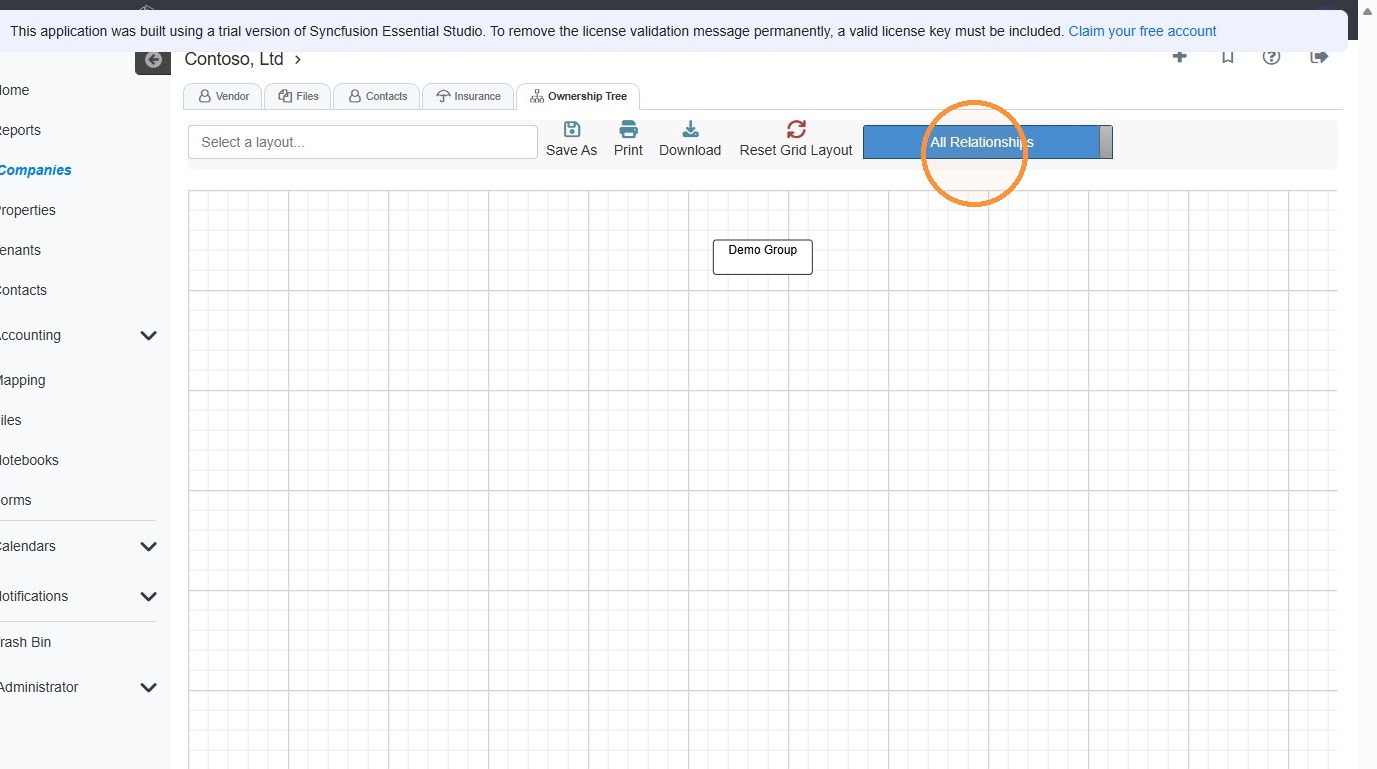
14. Ownership Tree Tab: Allows you to see a visual representation of a company’s ownership structure.
You can toggle between Beneficial Ownership and All Relationships.
Related Tutorial(s)