Understanding the Companies Page & Tabs
This guide shows how to quickly access a company’s tabs and use each one to manage core details—company data, access permissions, files, contacts, notebooks, ownership, insurance, accounting, revenue, and ownership tree. It explains efficient ways to search, edit, upload and restrict access so information stays organized and linked to the right property or contact. View it to streamline company administration and find related tutorials for each task.
Companies Overview
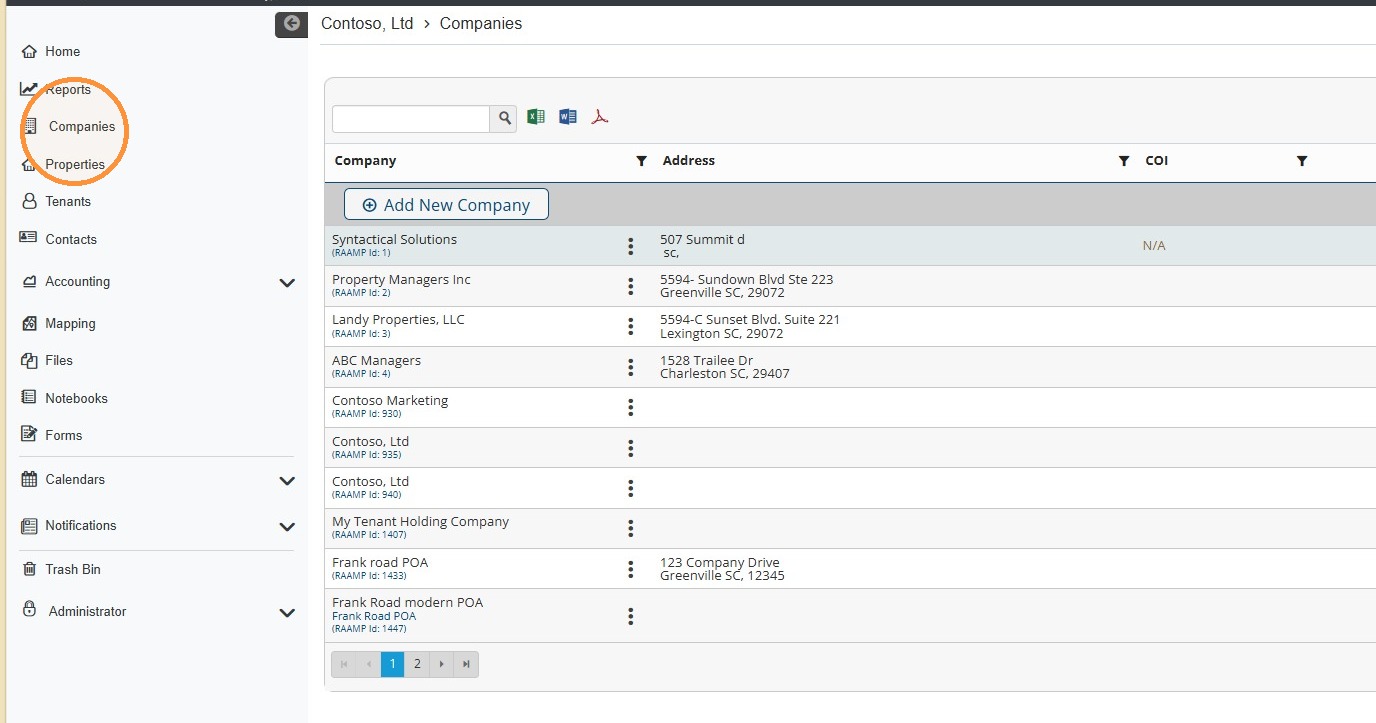
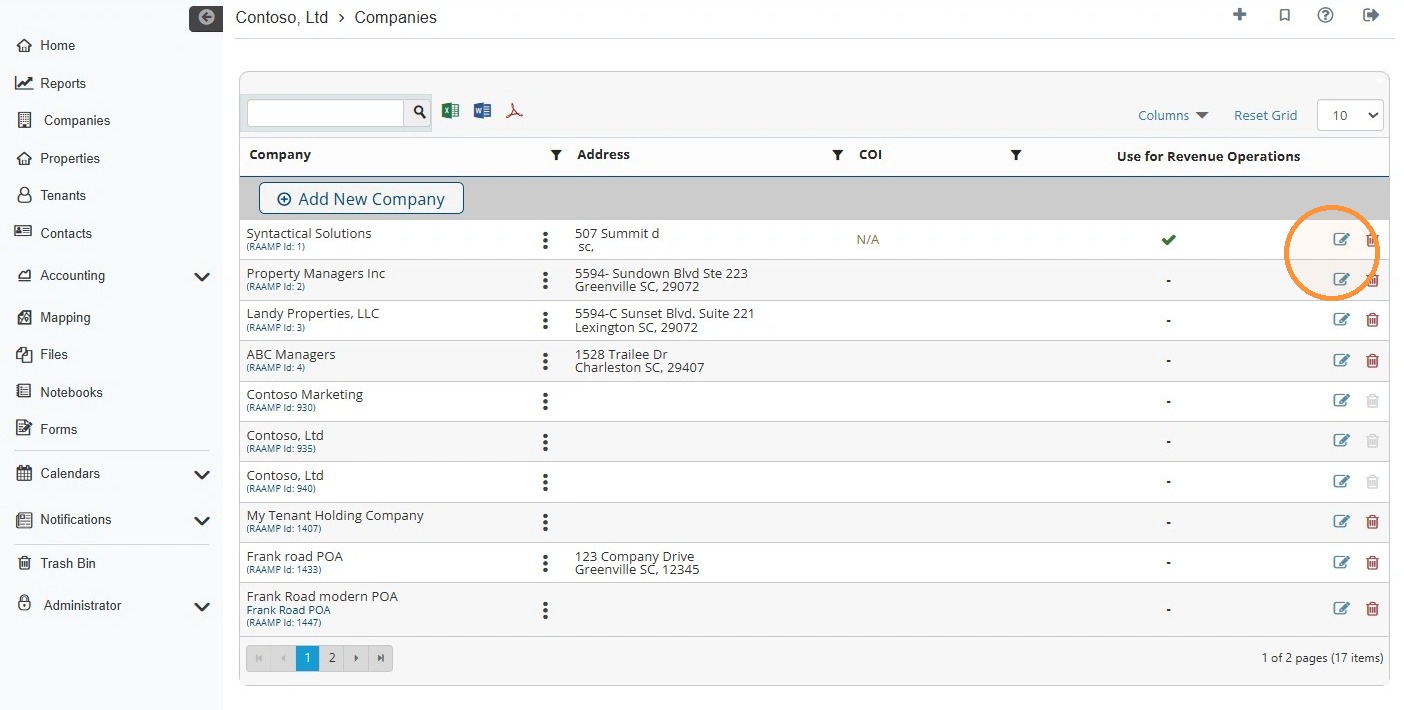
1. Select Companies from the navigation menu.
2. Companies Overview
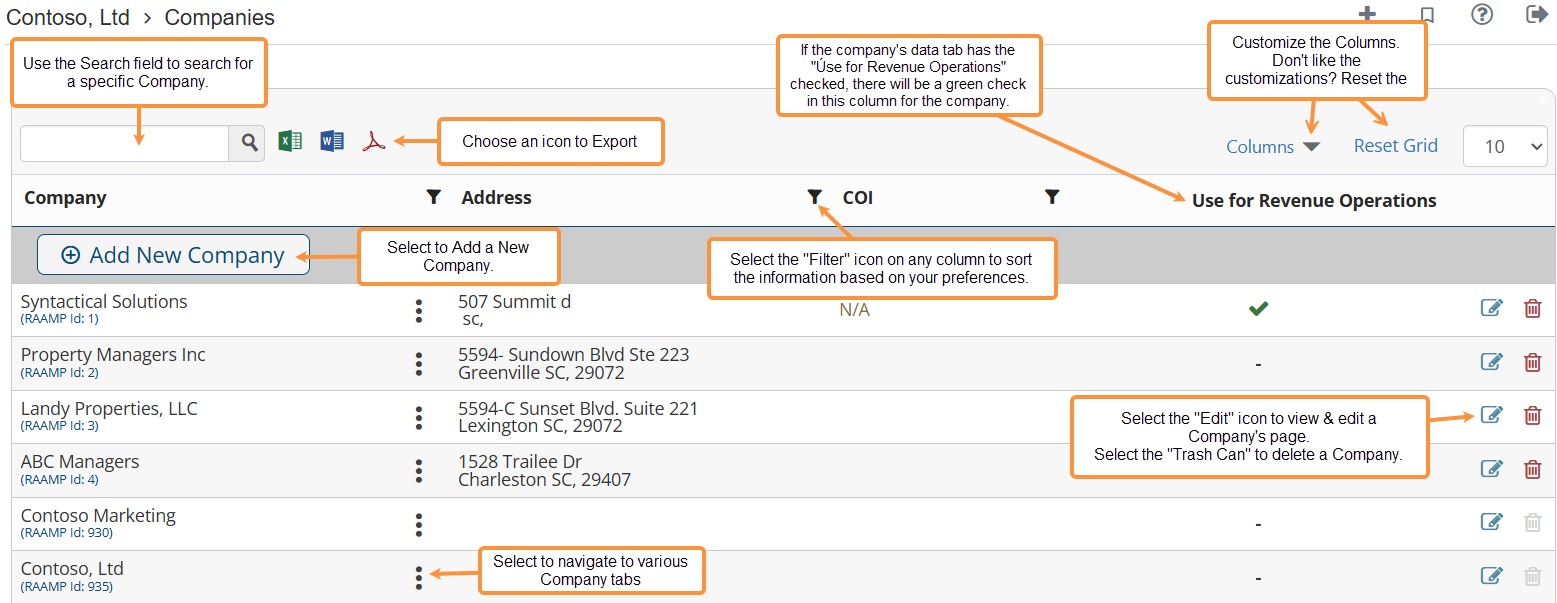
How to Navigate the Companies Tabs
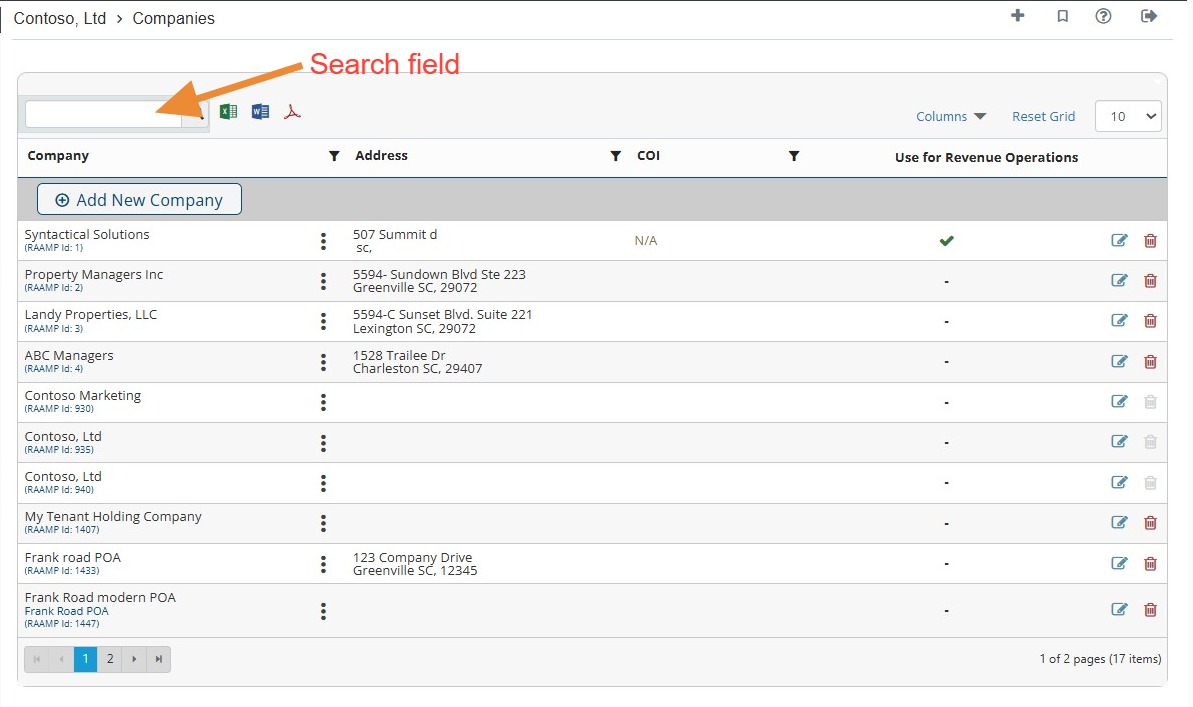
3. Locate the preferred company.\ \ NOTE: You can locate the company quickly by searching for it.
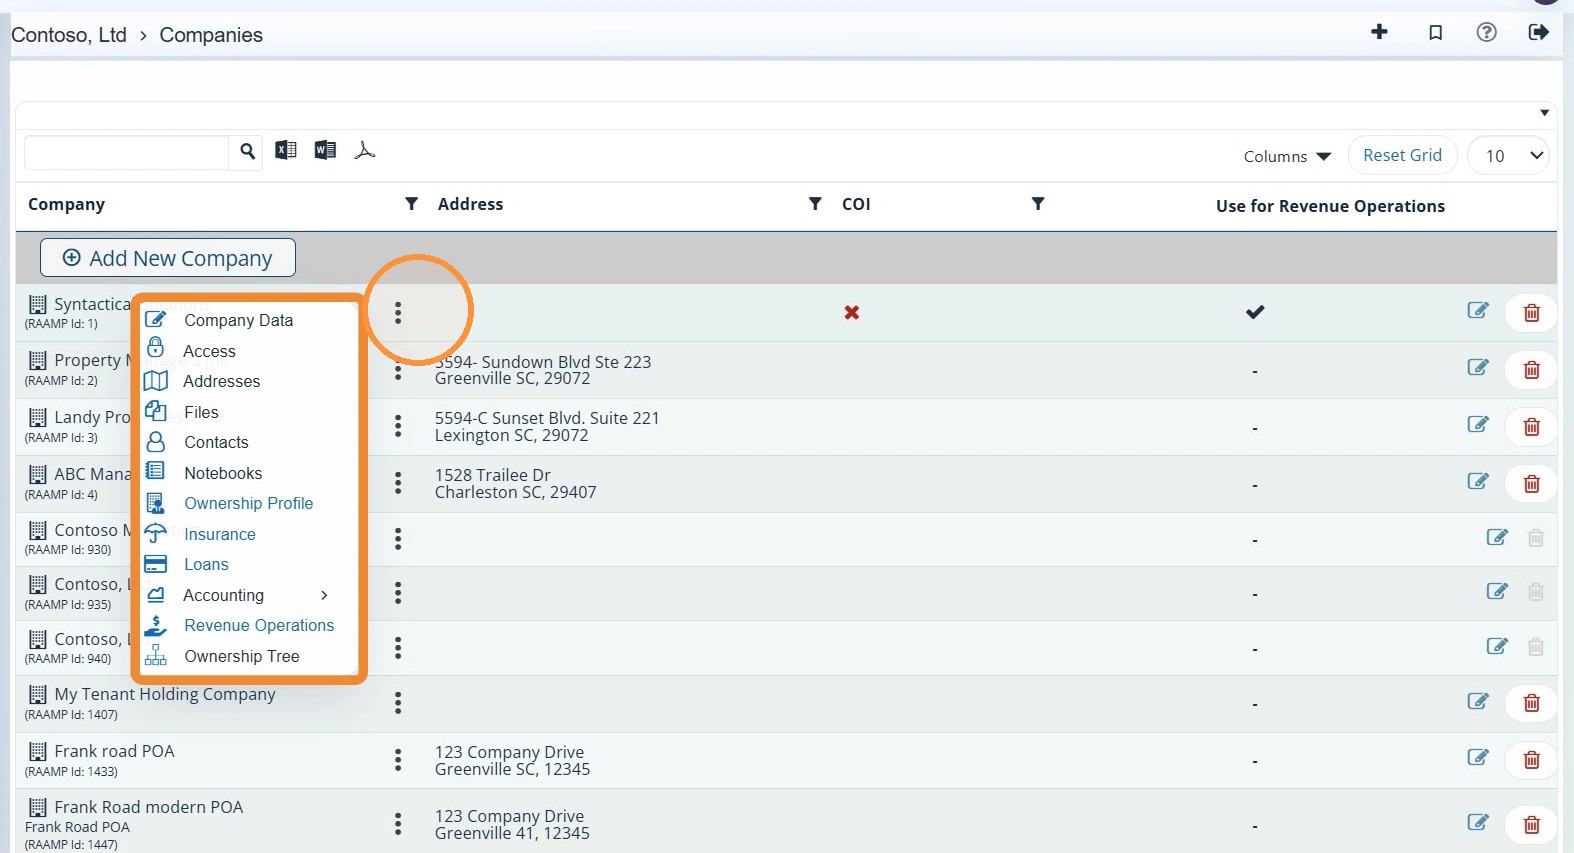
4. Select the three-dot menu to the right of the company to access the company tabs.
5. Alternatively, you can select the Edit icon.
6. The Company tabs will be available across the top.
Use the tabs to navigate to specific information for the selected company.

Company Data Tab
7. To edit the company's data information and logo, select the Company Data tab.
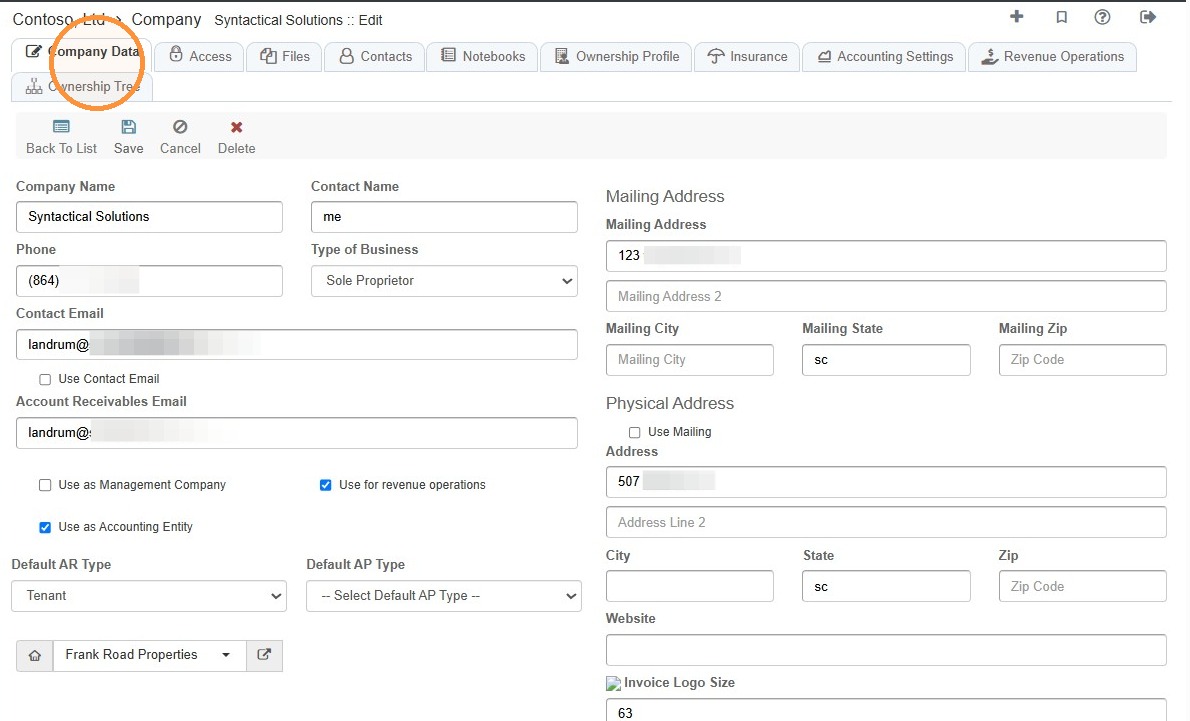
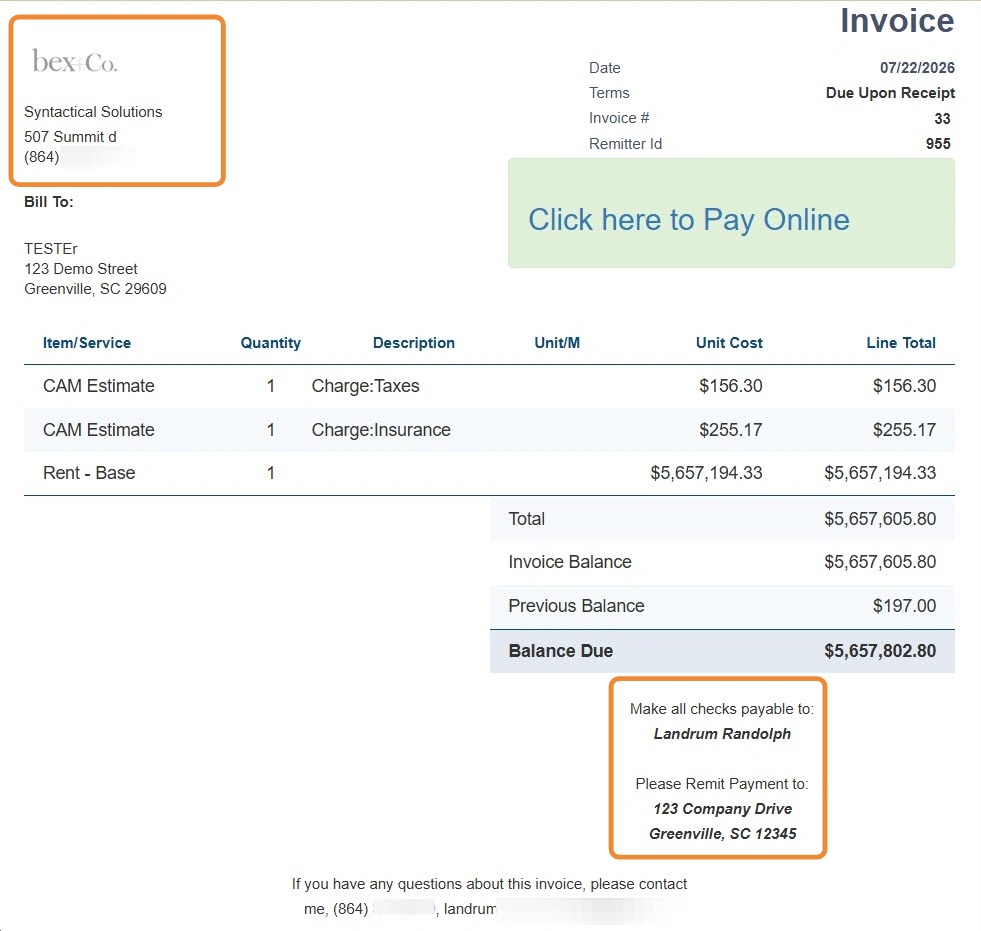
8. The company information will appear on tenant invoices.
Tip: Related Tutorial(s):
How to Add a Company\ How to Edit Company Information & Logo
Access Tab
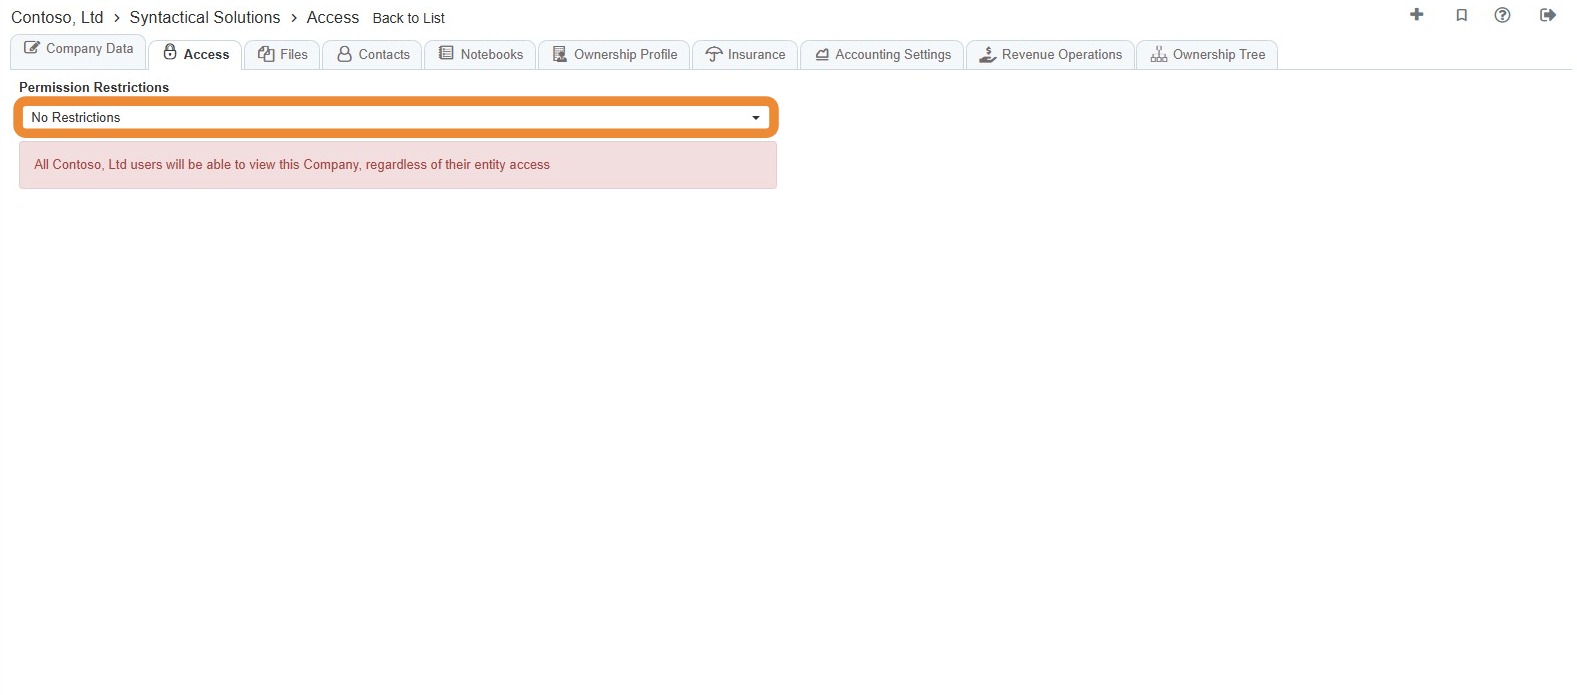
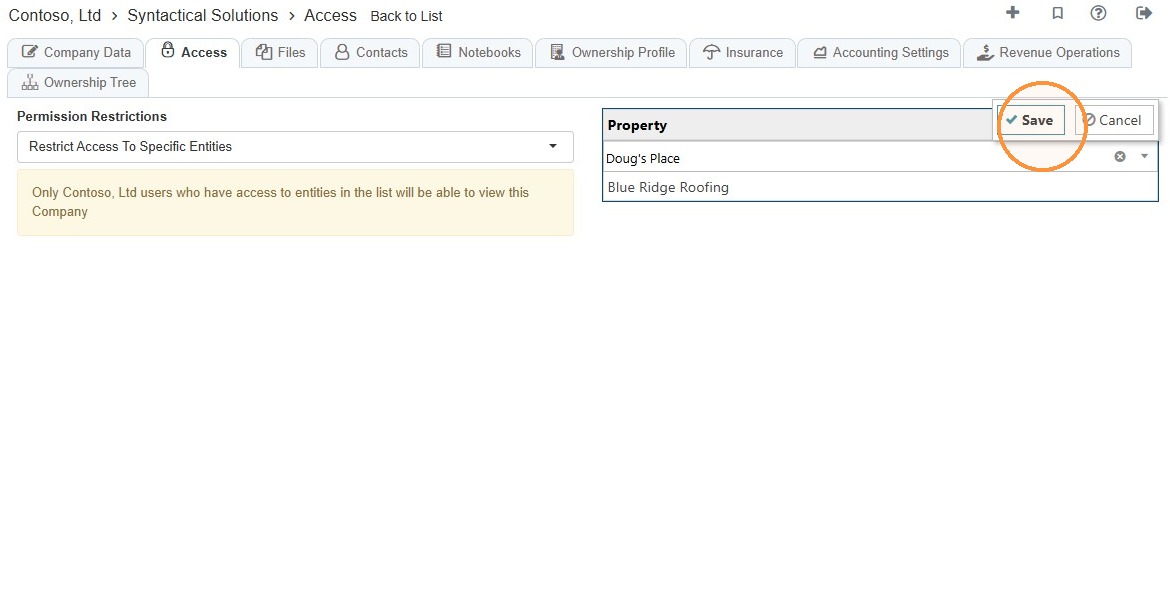
9. To set permission restrictions, select the Access tab > Select the Permission Restrictions dropdown menu > Select the appropriate access option.
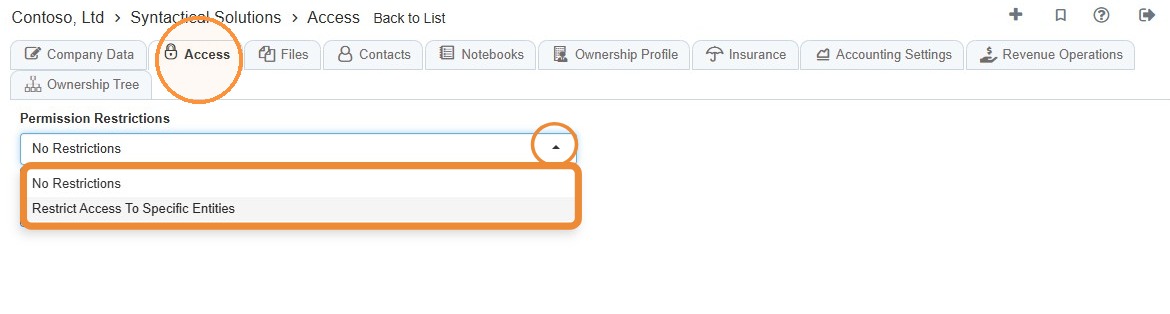
10. No Restrictions: All users will be able to view the Company, regardless of their entity access.
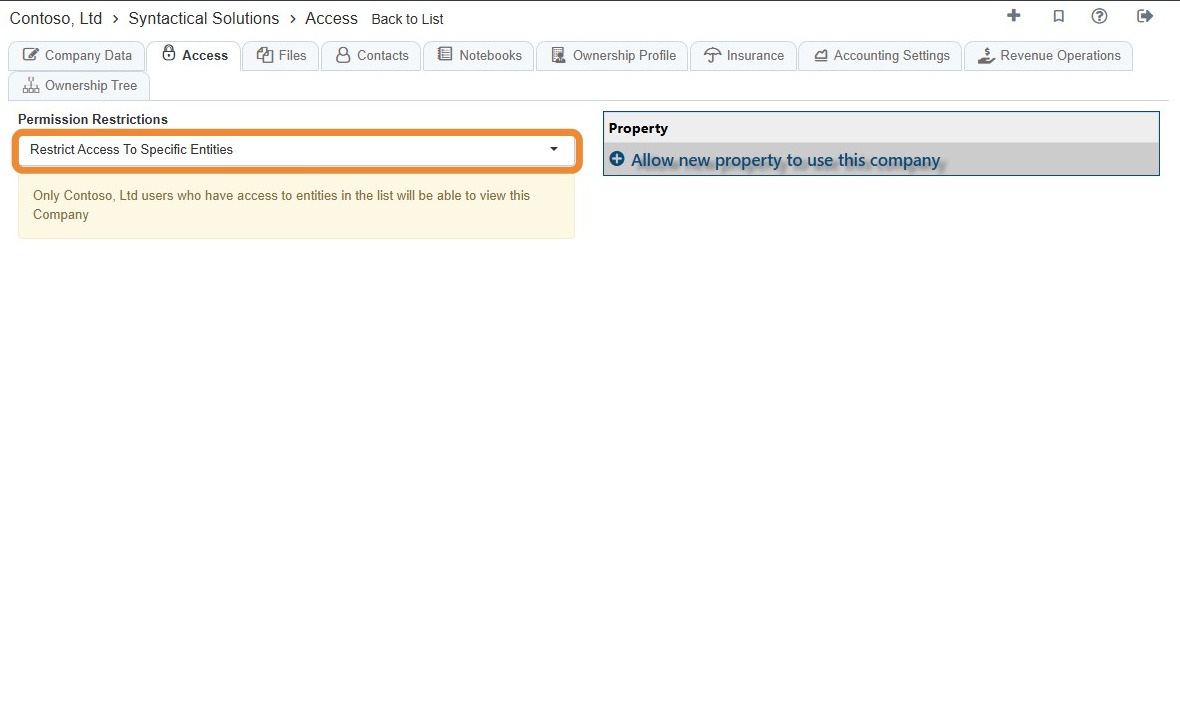
11. Restrict Access to Specific Entities: Only users who have access to entities in the property list will be able to view the Company.
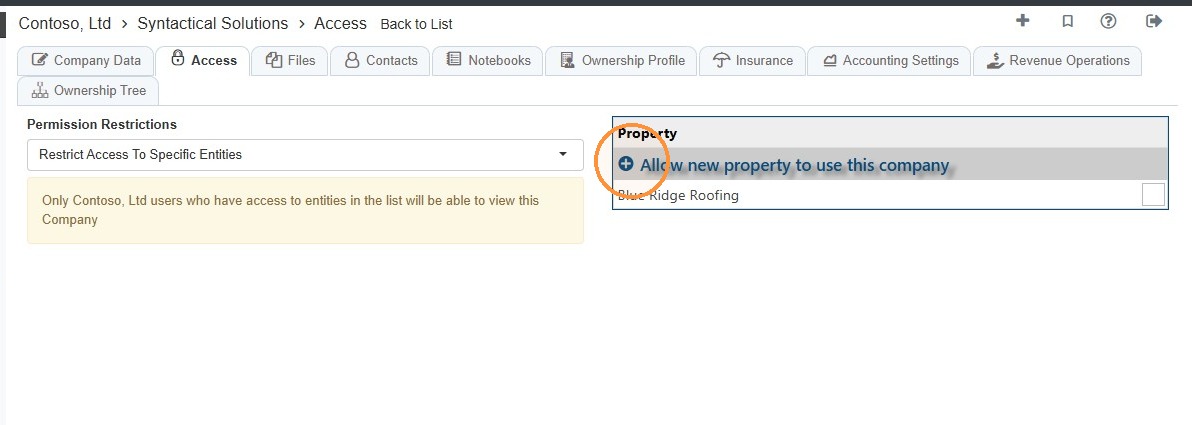
12. To add property access select Allow new property to use this company.
13. Select the Property dropdown menu or enter the property name.
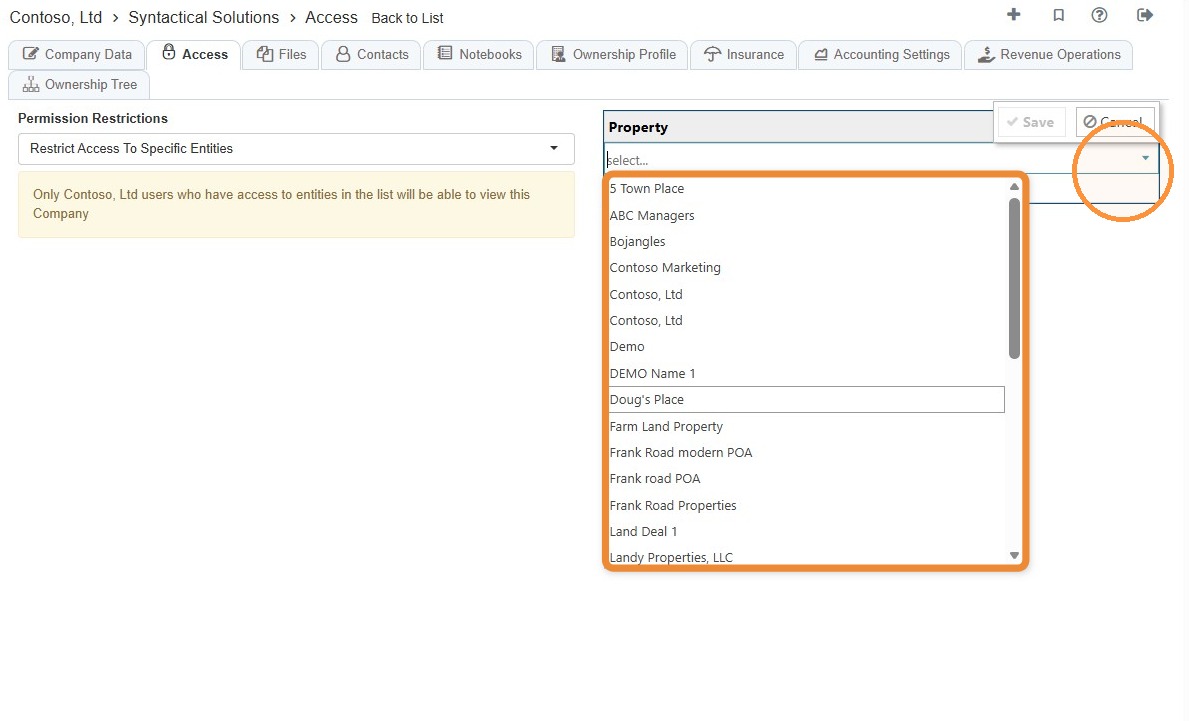
14. Select Save.
Addresses Tab
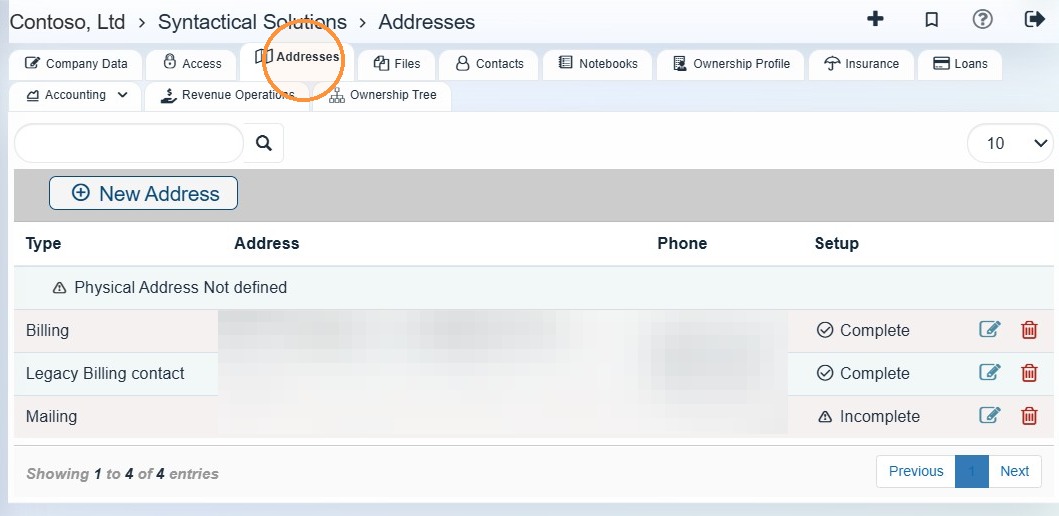
15. Select Addresses to view locations and location-specific phone numbers.
This tab stores physical or mailing locations associated with the company, such as:
- Billing address
- Mailing address
- Physical address
Each address can include its own phone number. For example, the billing phone number shown on the Addresses tab is the phone number associated with that billing location.
Files Tab
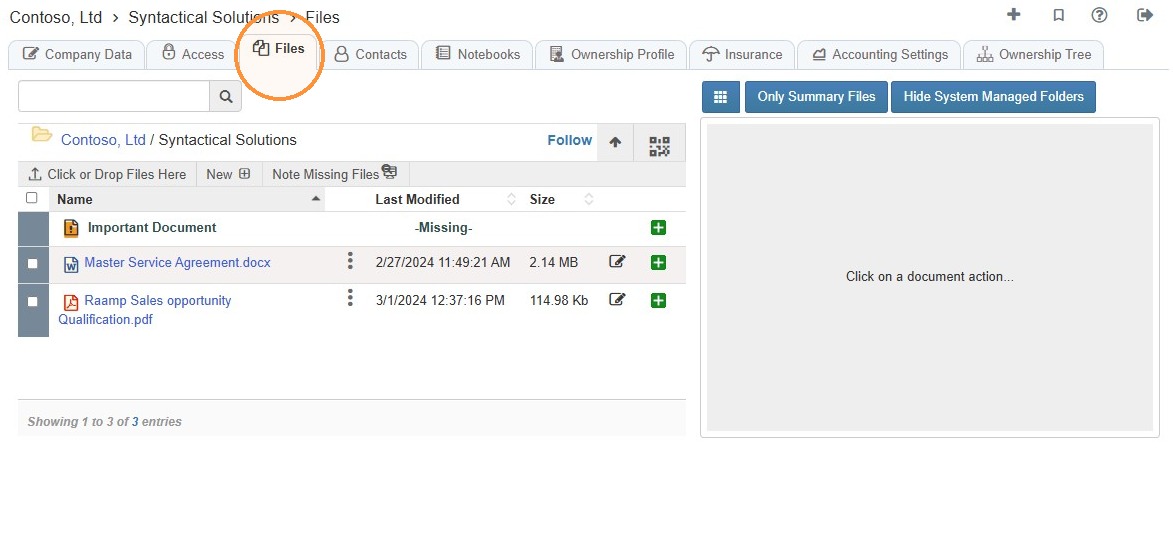
16. Select the Files tab to view all files for the company.
17. Files Overview
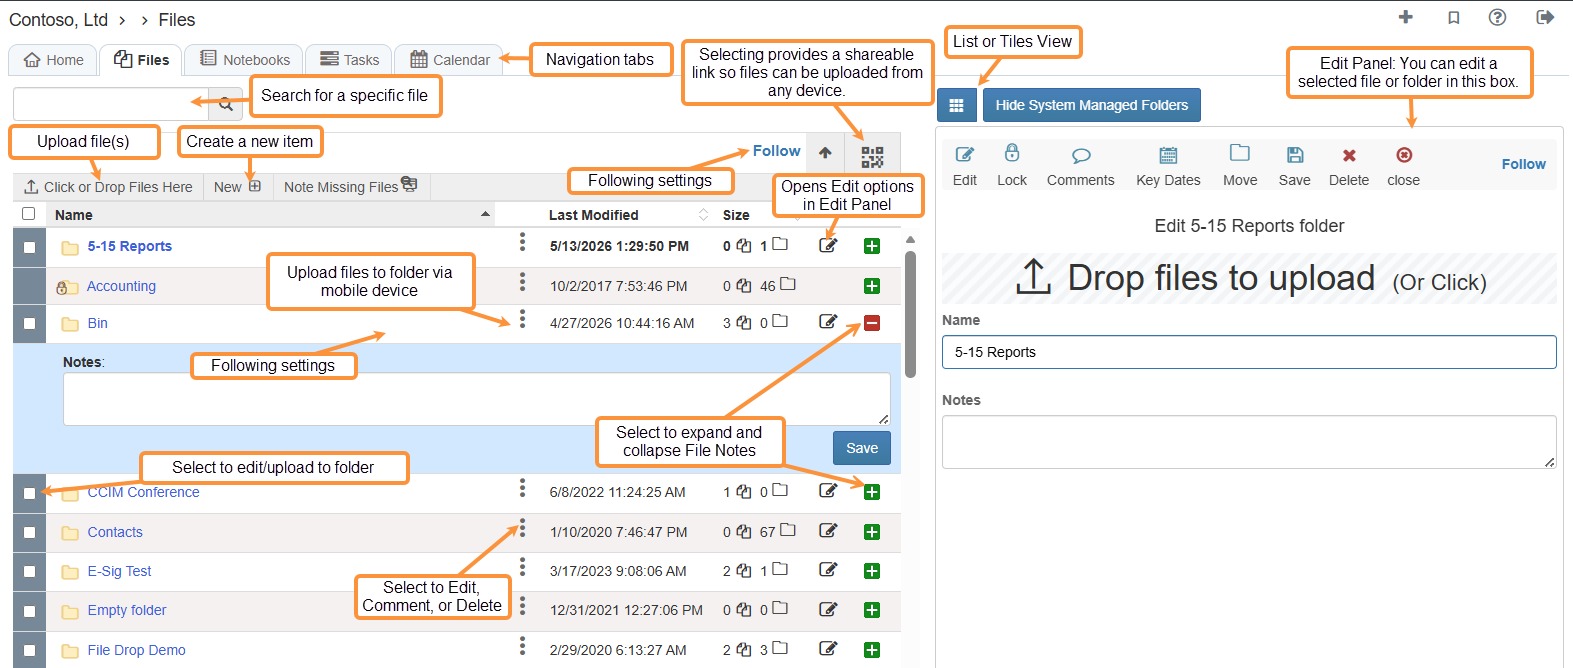
Tip: Remember to upload files by affiliation - tied to its specific company, property, tenant, or contact so it stays connected.
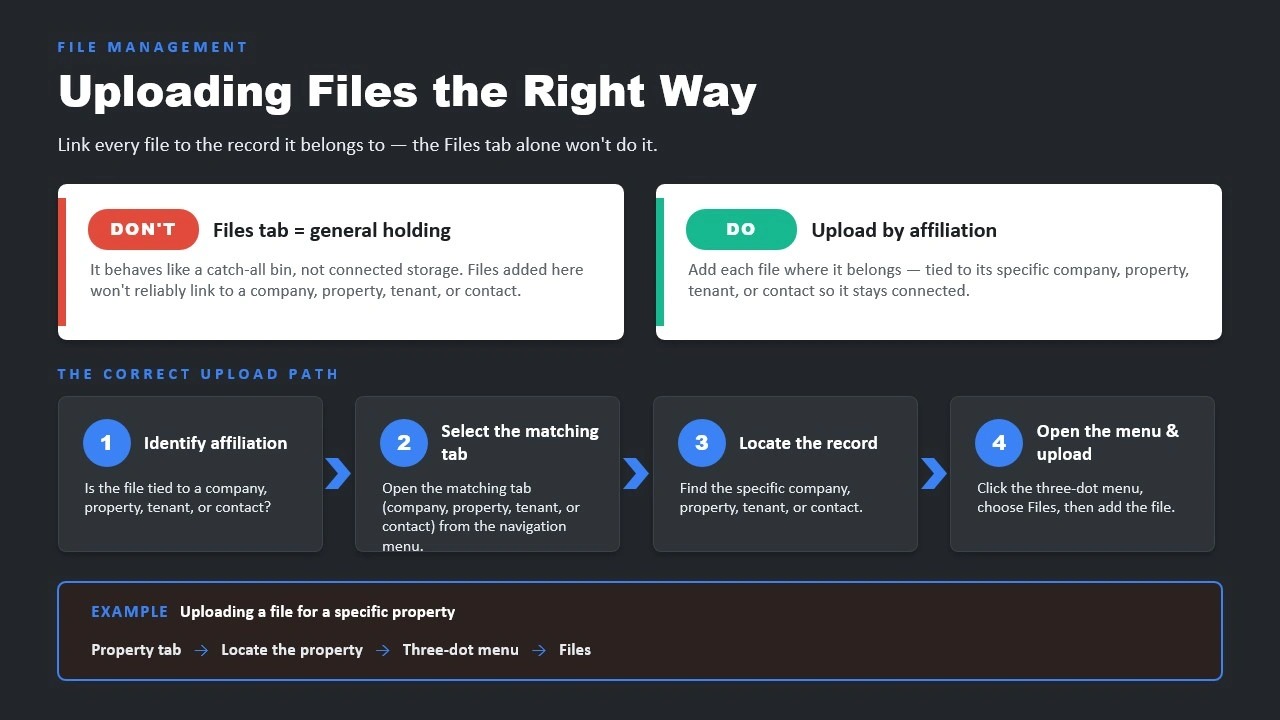
18. To upload a new file for the tenant, select Click or Drop Files Here.
NOTE: You can also drag and drop a file from your computer to the files interface.
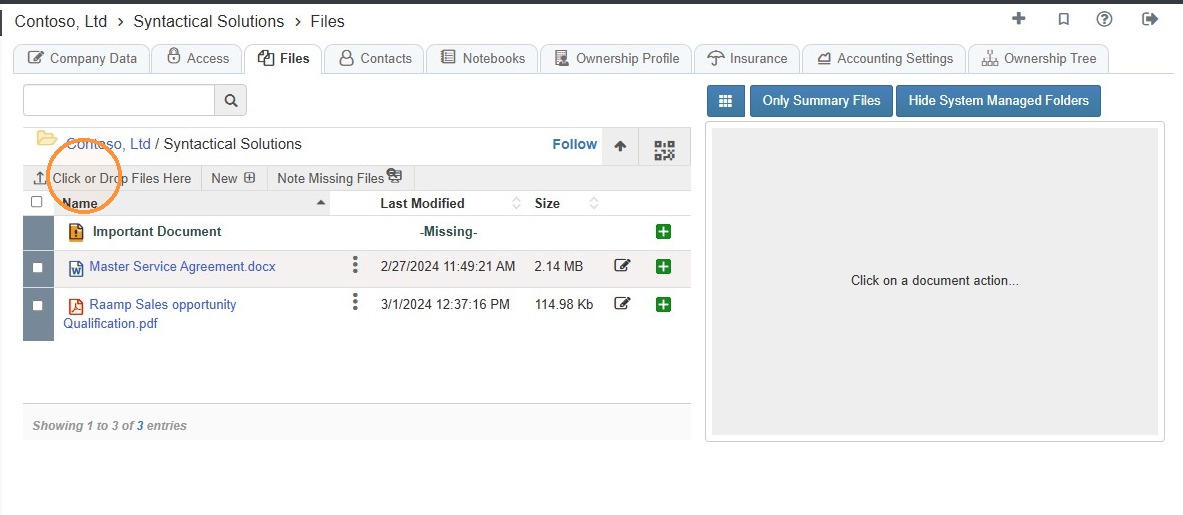
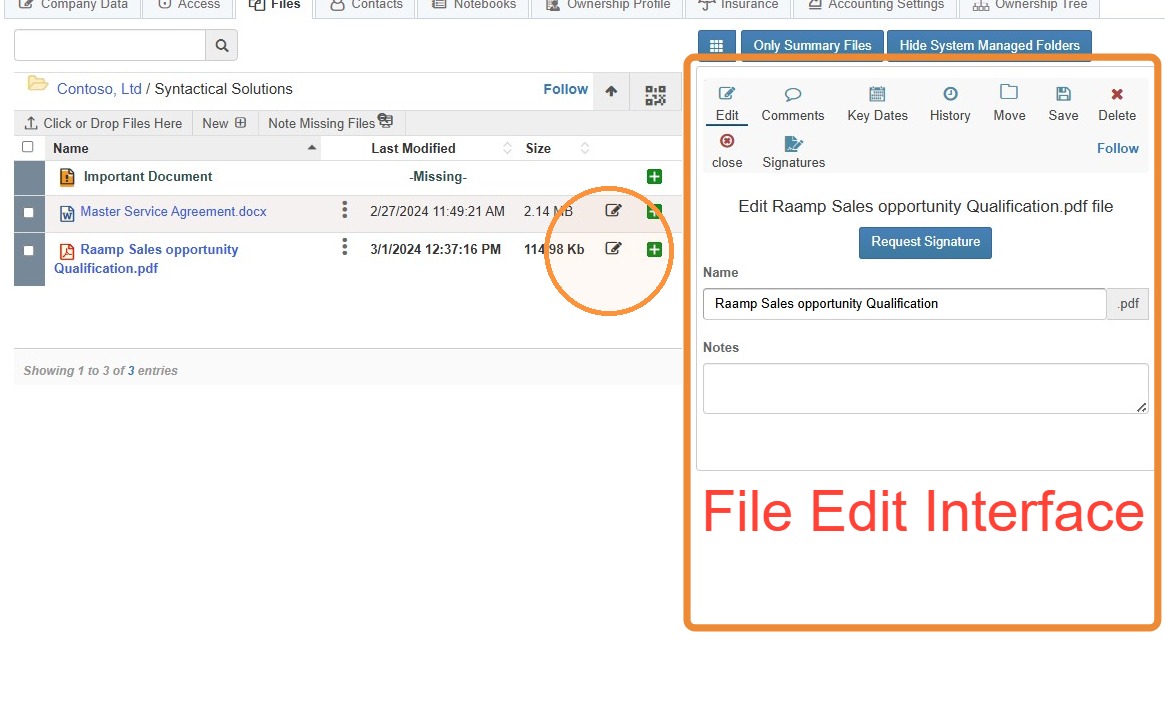
19. To edit a file, select the file or the edit icon.
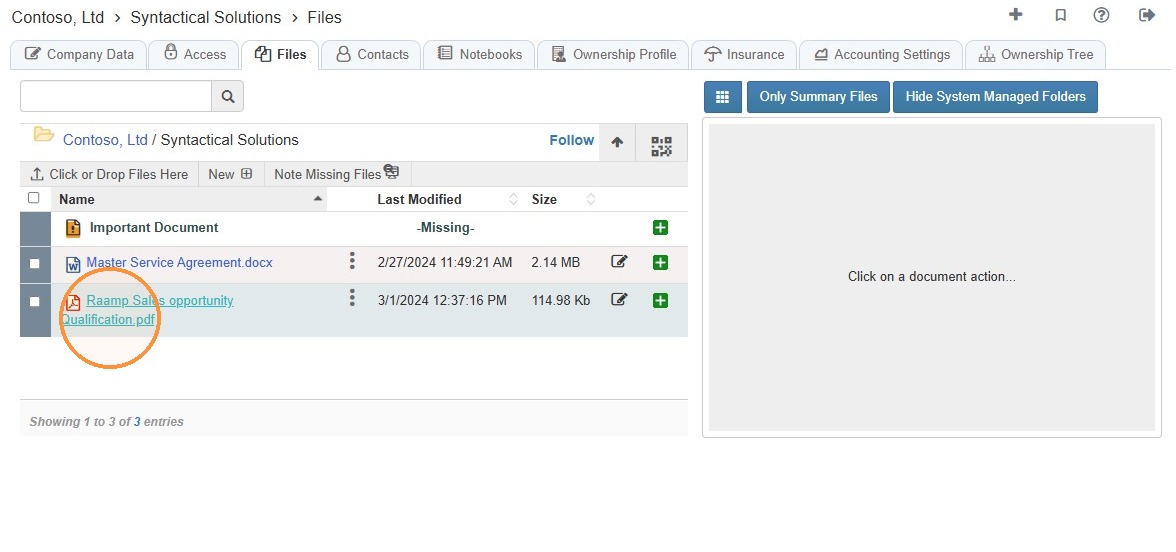
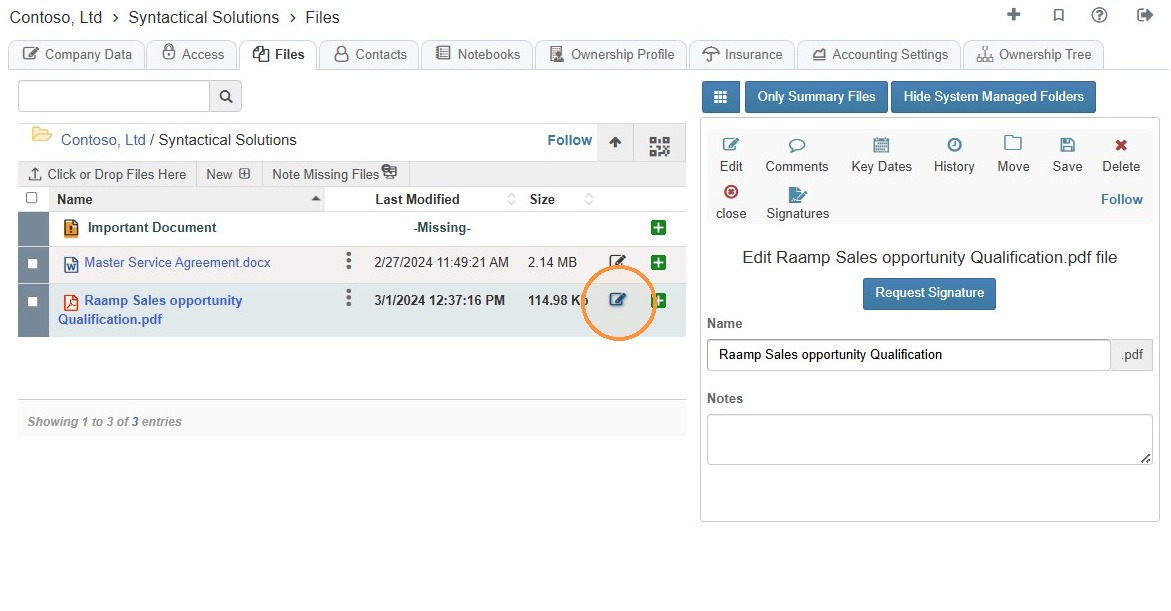
20. Once a file is selected, the file's edit interface will open.
From here, you can complete various tasks like requesting a signature, adding notes, reviewing the file history, etc.
Tip: Related Tutorial(s):
How to Add, Delete, & Manage Access Options for File Folders\ How to Follow a Folder & Receive Notifications\ How to Note Missing Files\ How to Upload Missing Files and Supporting Files\ How to Add a Key Date to a File\ How to Share Files\ How to Upload Files from a Phone Camera/Photos\ How to Upload File Revisions and Preserve Prior Versions\ How to Create and Send Signature Requests\ How to Set Signing Order
Contacts Tab
21. To view or add company contacts, select the Contacts tab.
This tab stores individual people connected to the company, such as:
- Billing contact
- Primary contact
- Legal contact
- Emergency contact
- Other contacts
Each person can have their own name, phone number, email address, title, and other personal details. For example, a billing contact might be Wendy Sailor, with her direct phone number and email address.
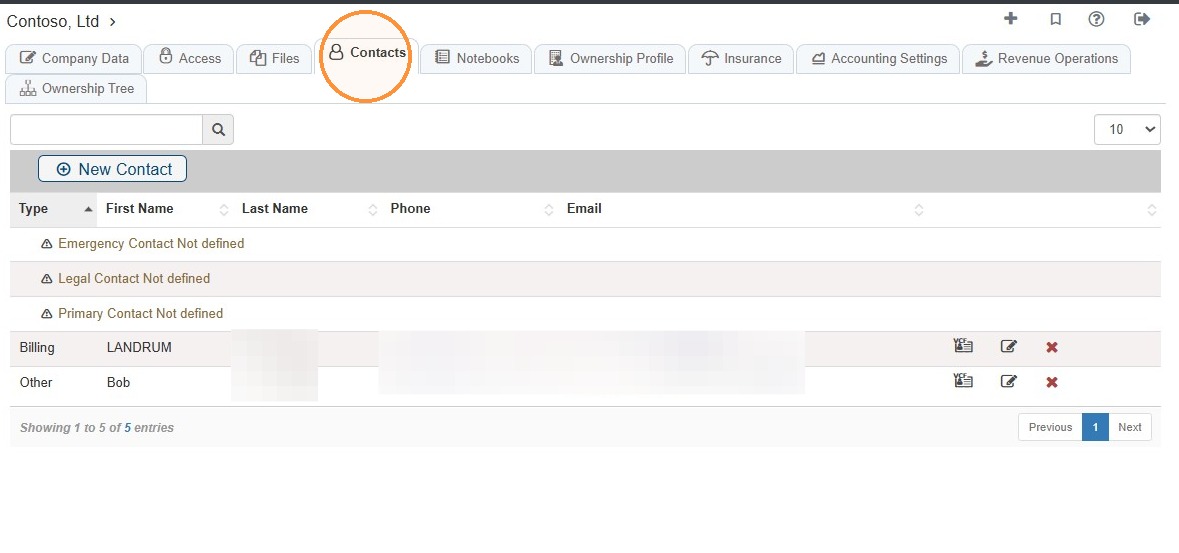
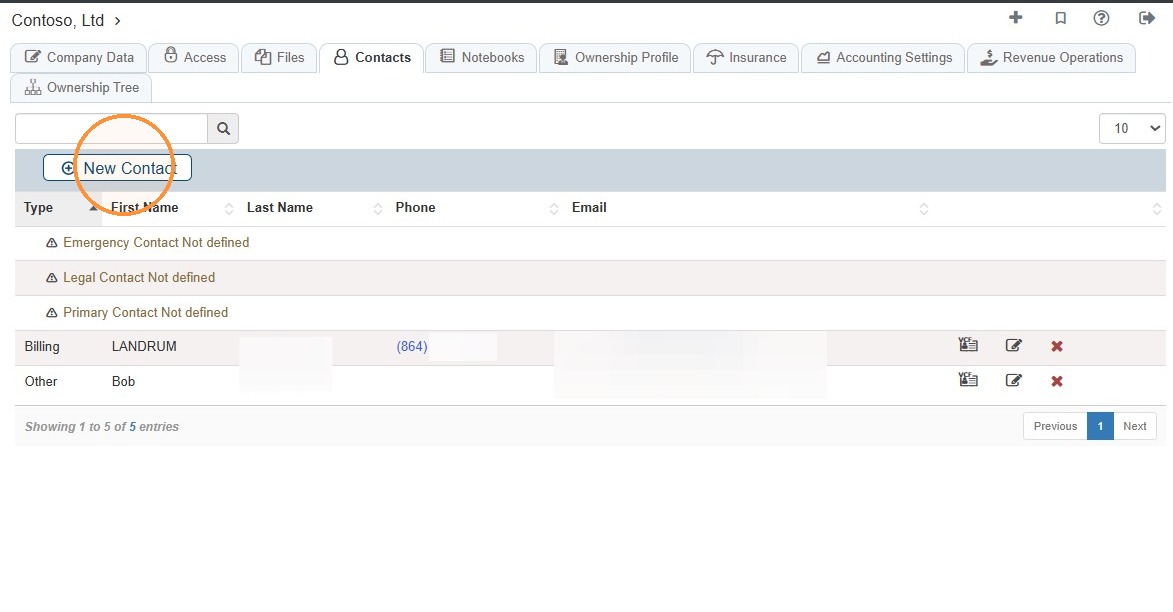
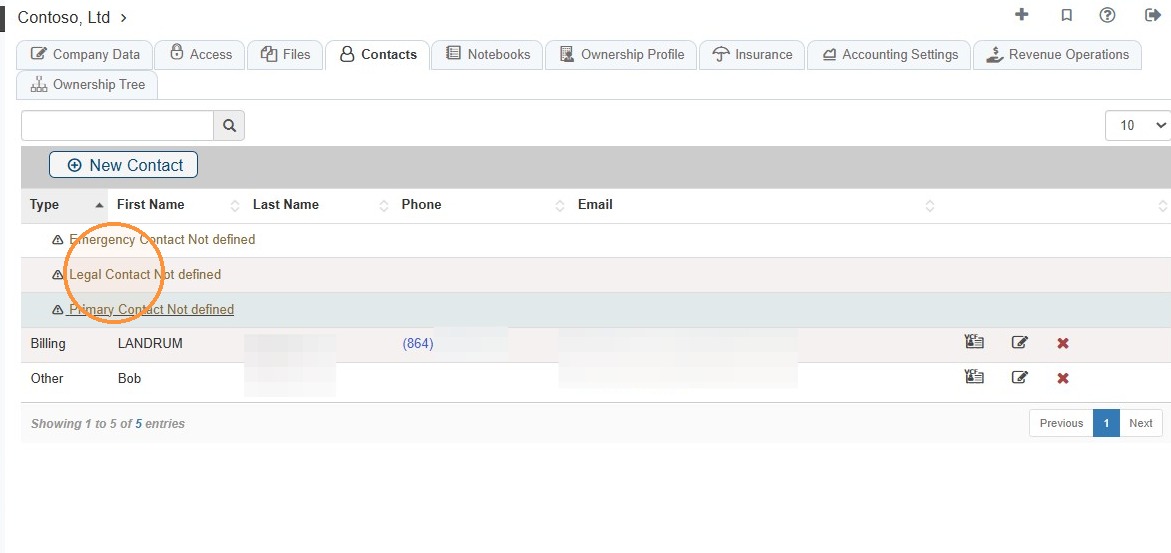
22. You can add a contact two ways:
Select New Contact or select the type of contact you want to add.
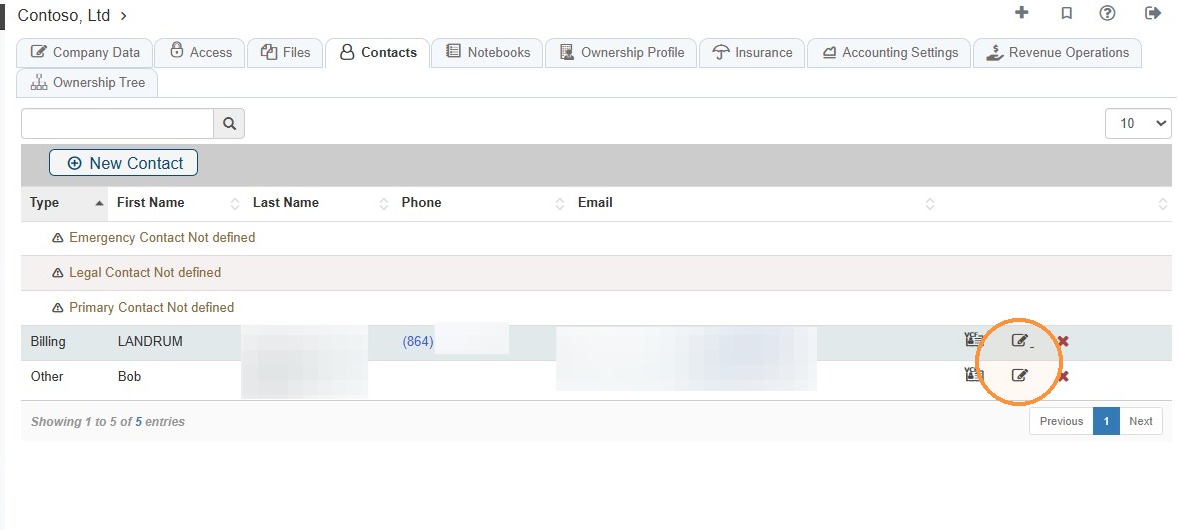
23. To edit a contact's information, select the contact's edit icon.
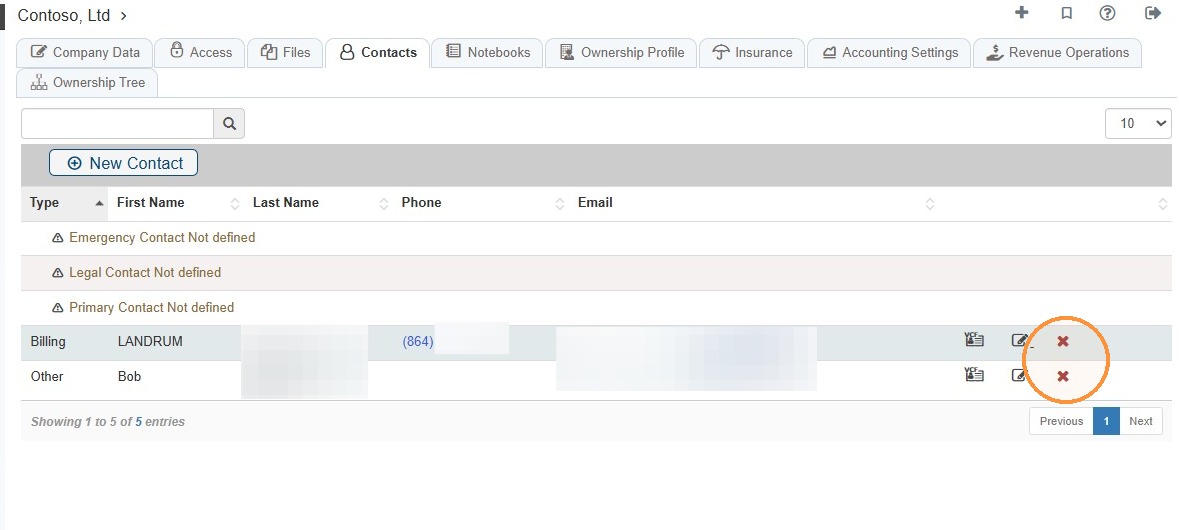
24. To delete a contact's information, select the contact's red x.
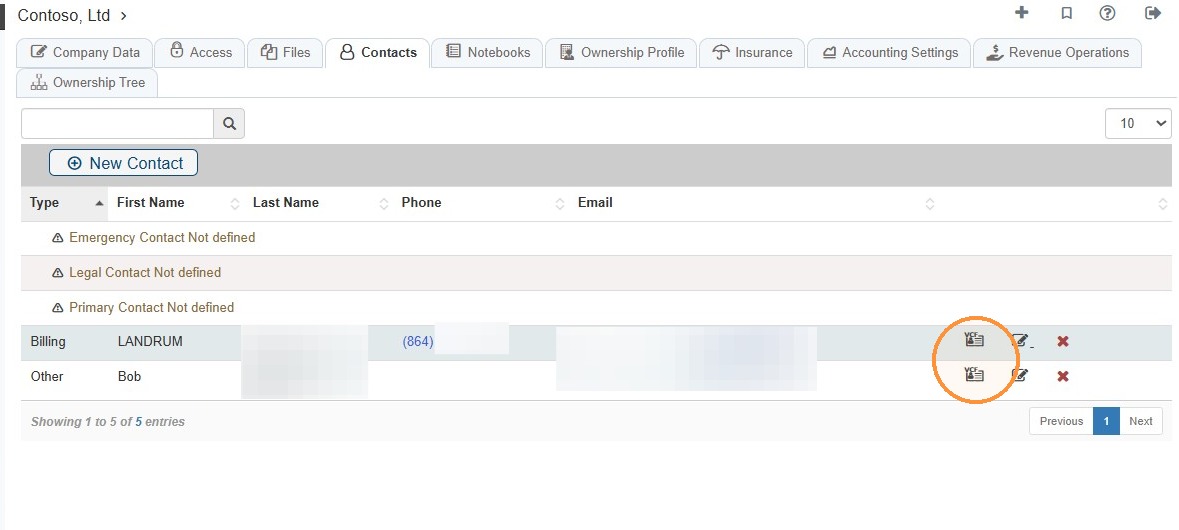
25. To download the contact's information, select the vCard icon.
Tip: Related Tutorial(s):
How to Download a Contacts vCard and Add to Outlook
Notebooks Tab
26. Select the Notebooks tab.
The Notebooks tab allows you to schedule important dates, tasks, and notifications specific to the company.
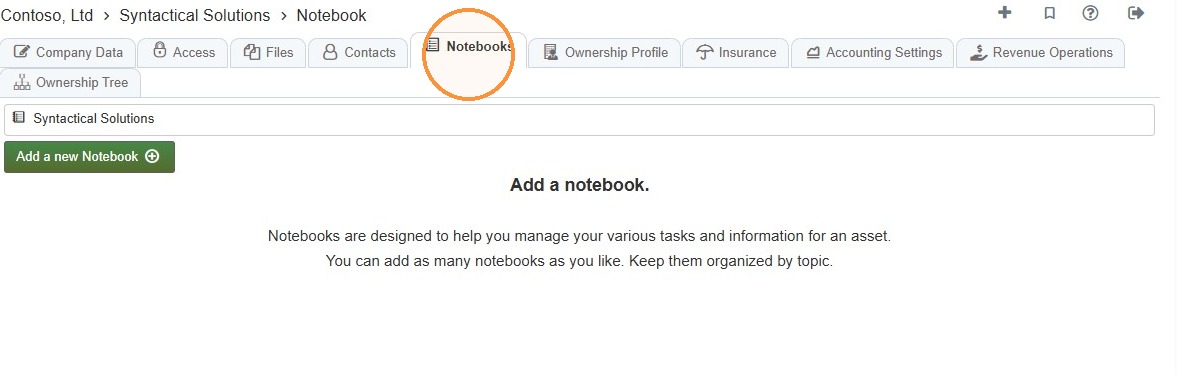
27. Notebook Overview
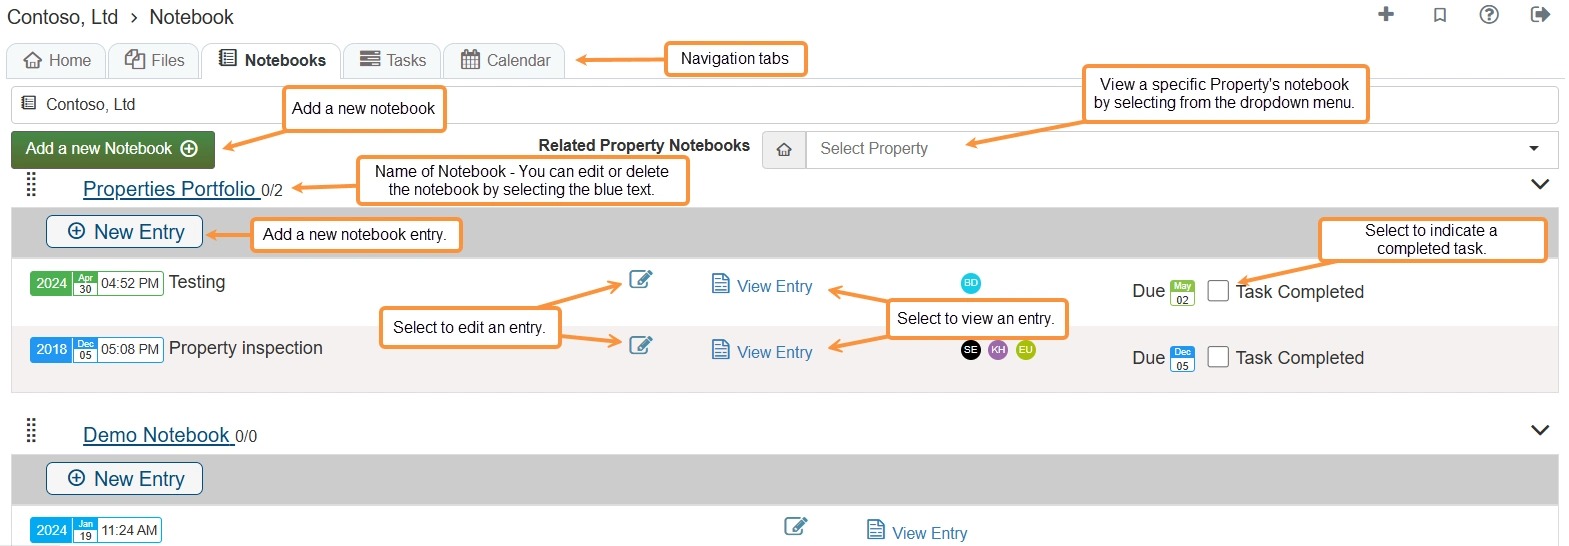
Tip: To learn more about creating Notebooks and Tasks, see How to Create a Notebook, Entry, and Task and How to Create Dependent/Linked Tasks.
Ownership Profile Tab
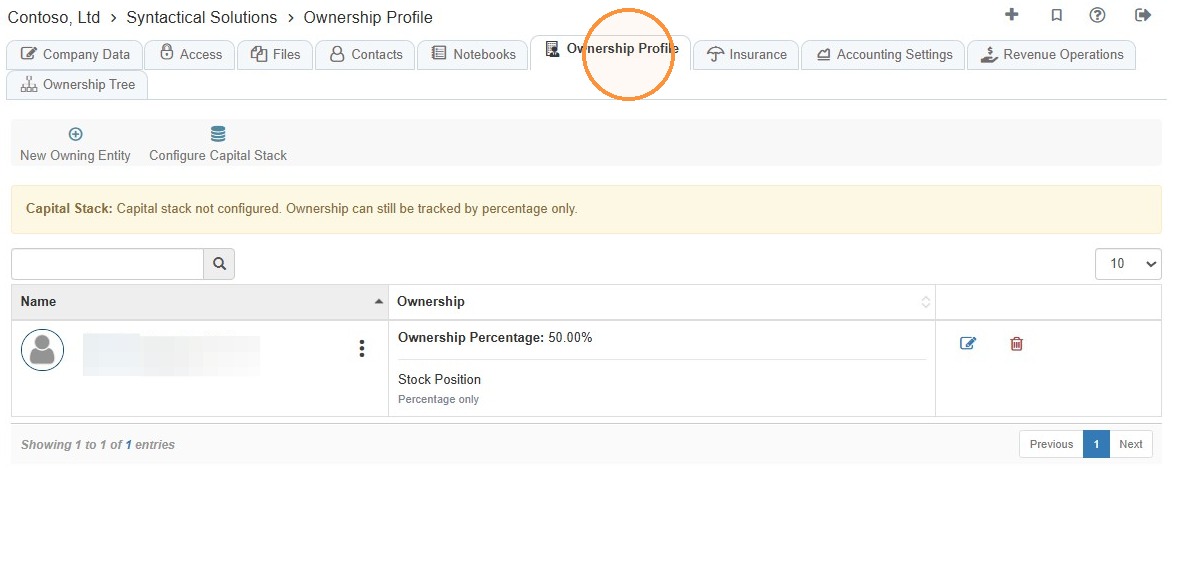
28. Select the Ownership Profile tab.
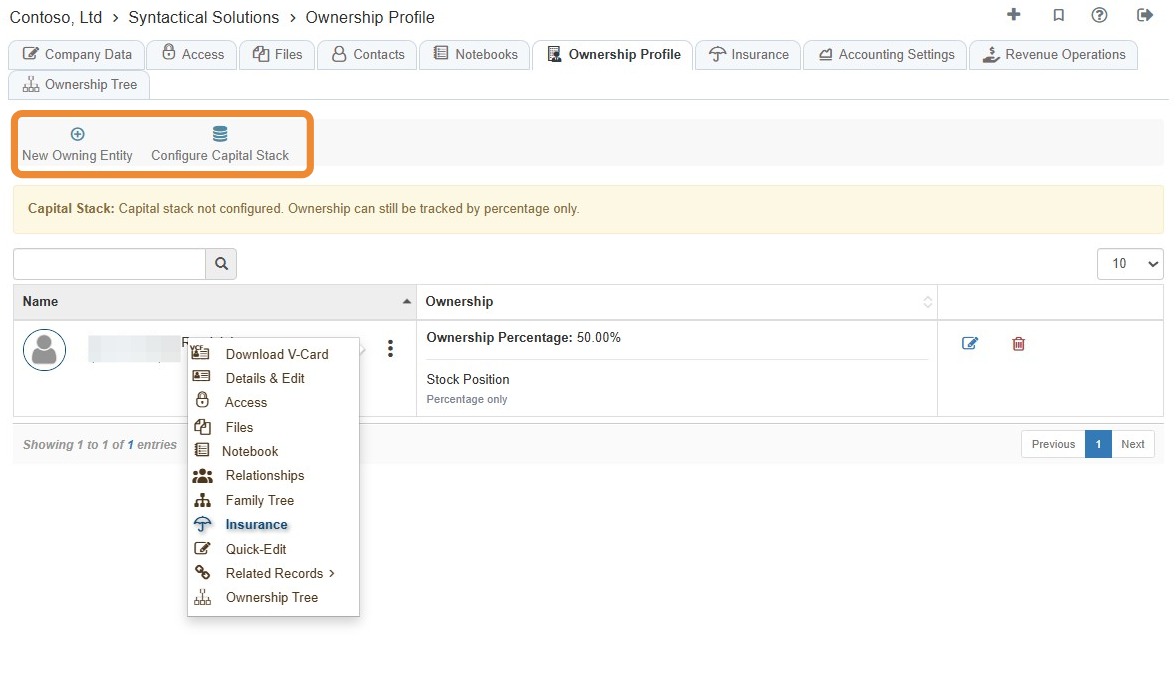
This tab provides a summary/snapshot of the ownership status, and you can configure the company's capital stack.
29. Select New Owning Entity to add an owning entity.
Select Configure Capital Stack to configure capital stack.
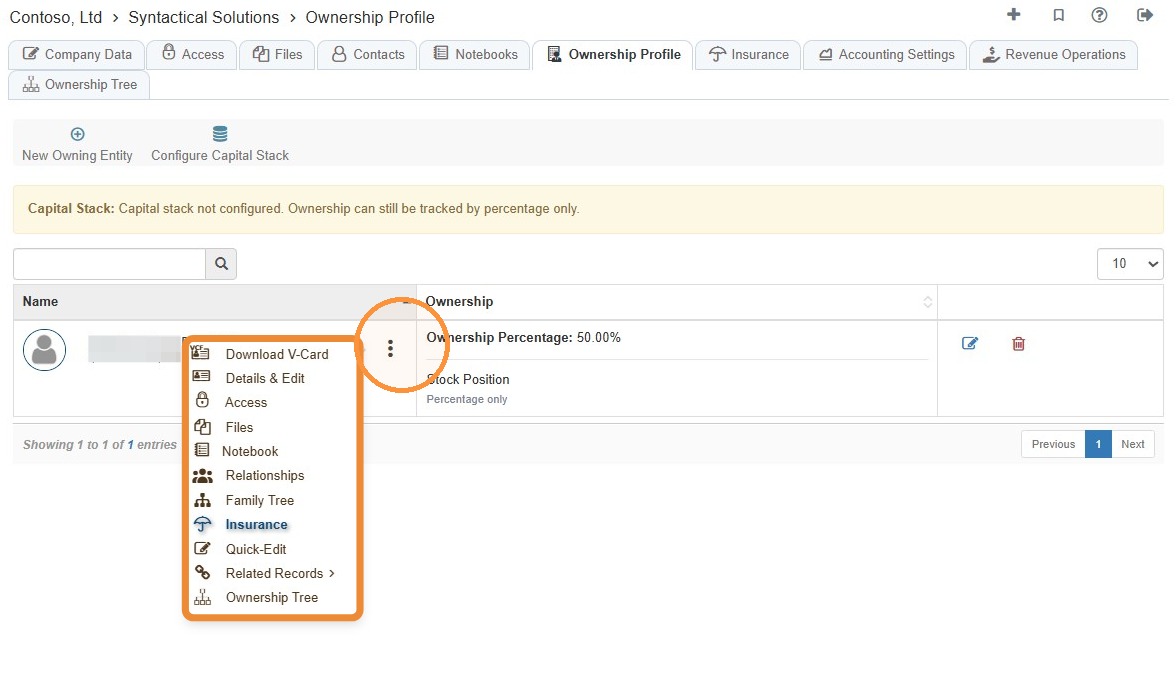
30. Select the three-dot menu to view options.
Tip: Related Tutorial(s):
How to Enter Ownership Profile Data to Create Ownership Tree - Start at How to Input Ownership Profile Data section.
Insurance Tab
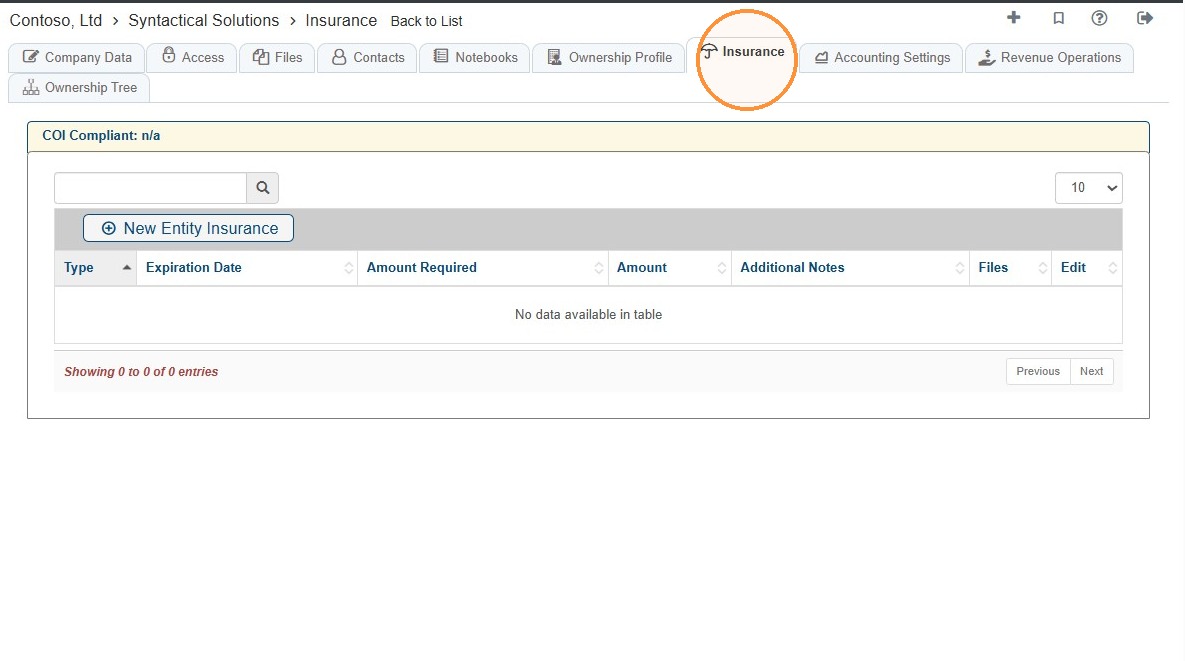
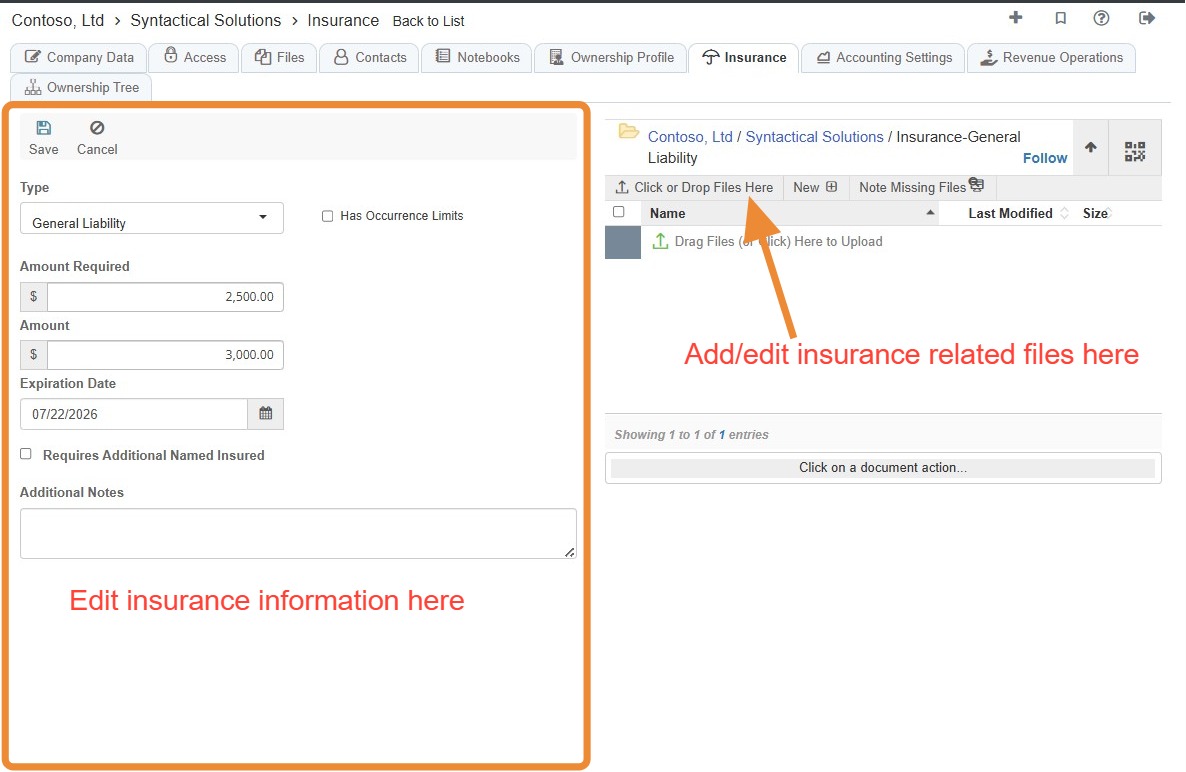
31. To view a list of the company's insurance, select the Insurance tab.
You can also add new entity insurance here.
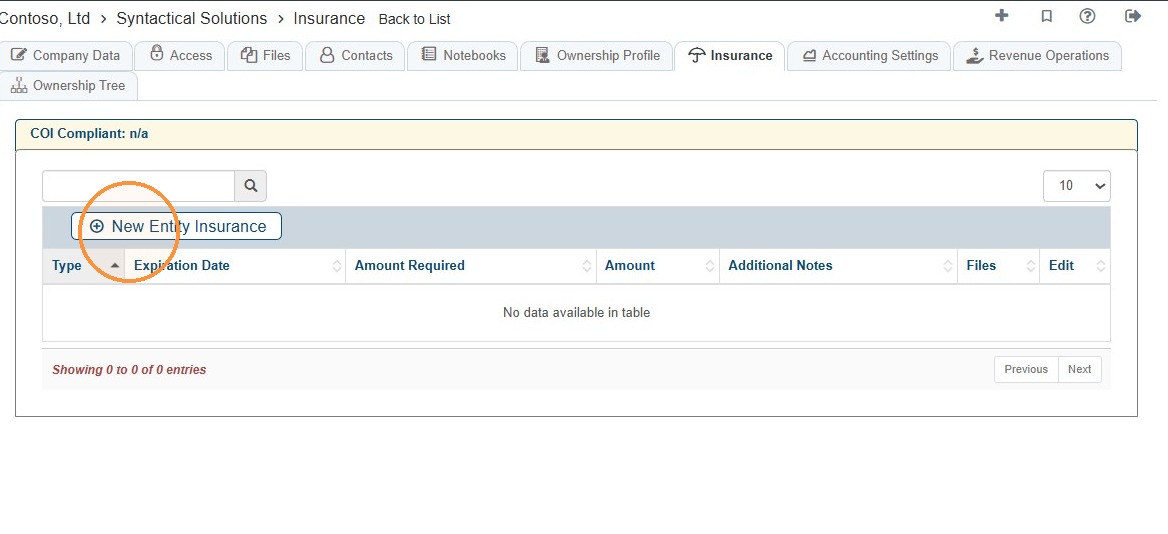
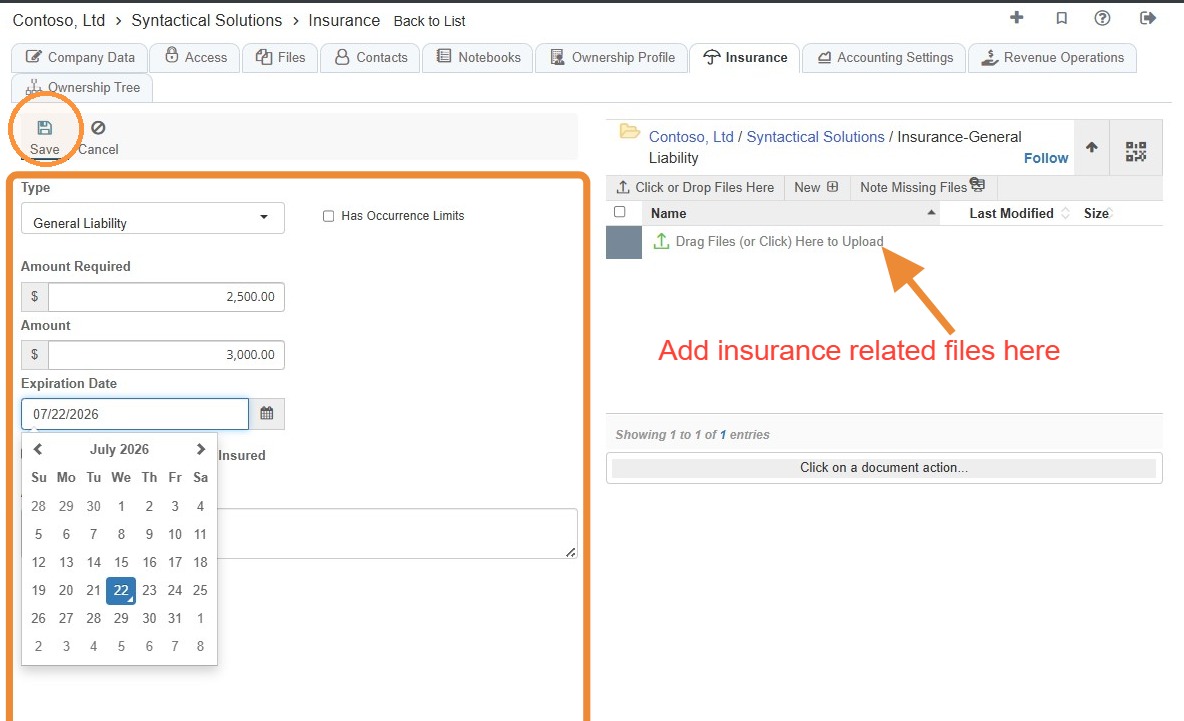
32. To add property insurance, select the New Entity Insurance tab > Enter the required information and/or upload related files > Select Save.
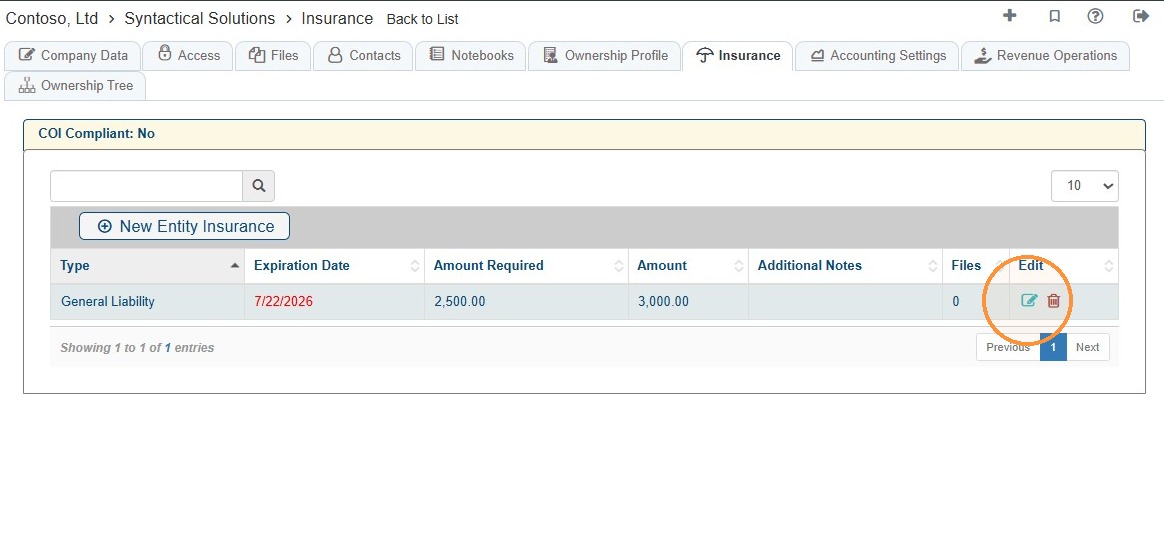
33. Select the Edit icon to update the insurance information and/or to upload files related to the insurance.
Accounting Settings Tab
Tip: The Use as Accounting Entity checkbox must be selected on the Company Data tab for Accounting Settings to appear.
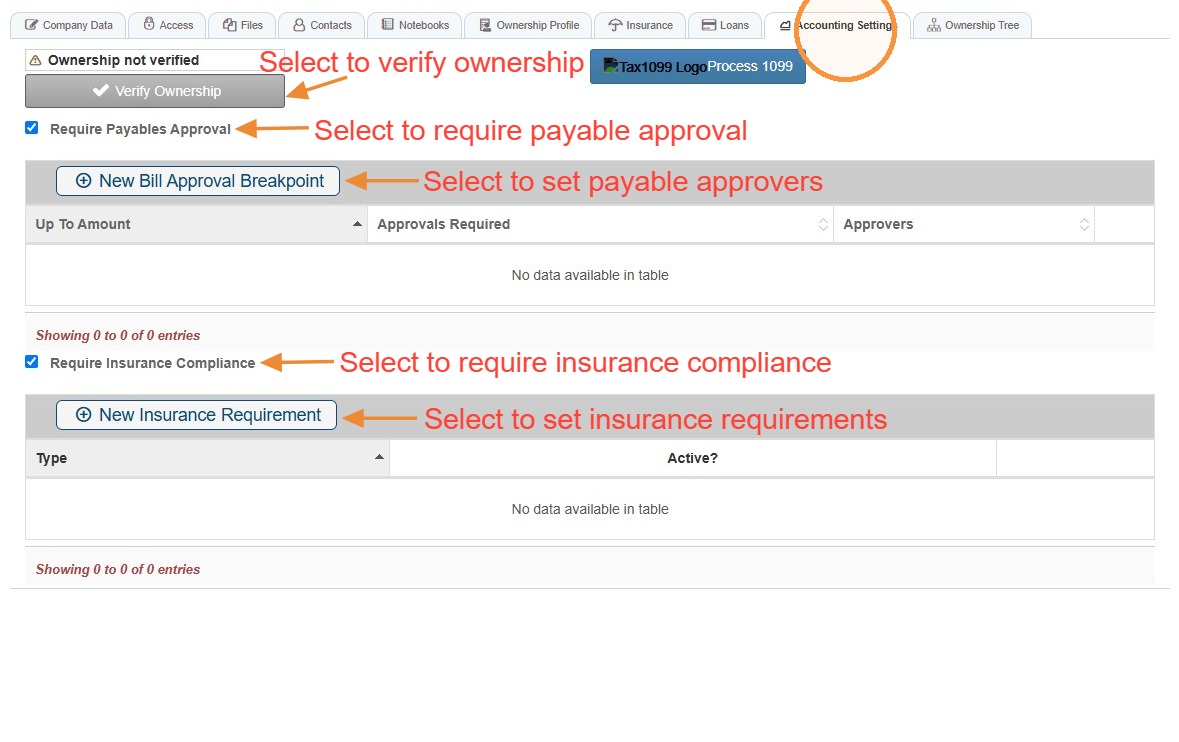
34. To verify ownership, add/edit required payables approval, and/or add/edit insurance compliance requirements, select the Accounting Settings tab.
Tip: Related Tutorial(s):
How to Verify Ownership and Agreement for Franchise Use\ How to Enable Payables Approval and Approve Payables
Revenue Operations Tab
Tip: The Use for Revenue Operations checkbox must be selected on the Company Data tab for Revenue Operations to appear.
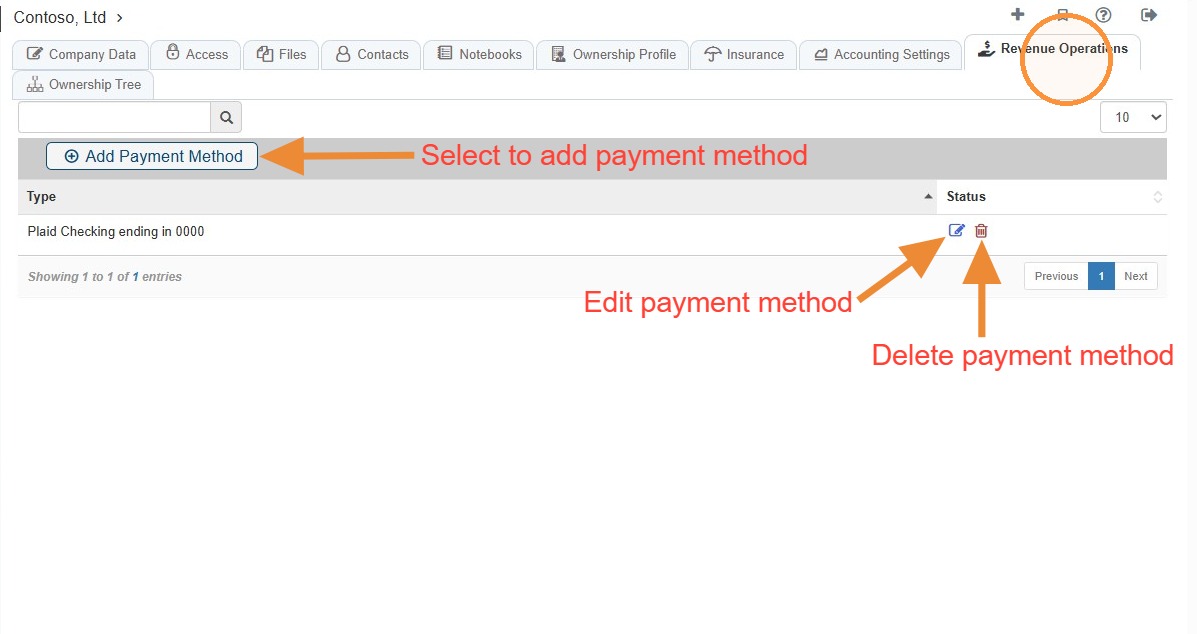
35. To add a company payment method, select the Revenue Operations tab.
Ownership Tree Tab
Tip: The Ownership Profile Tab needs to be completed for the Ownership Tree to populate.
36. Select the Ownership Tree tab.
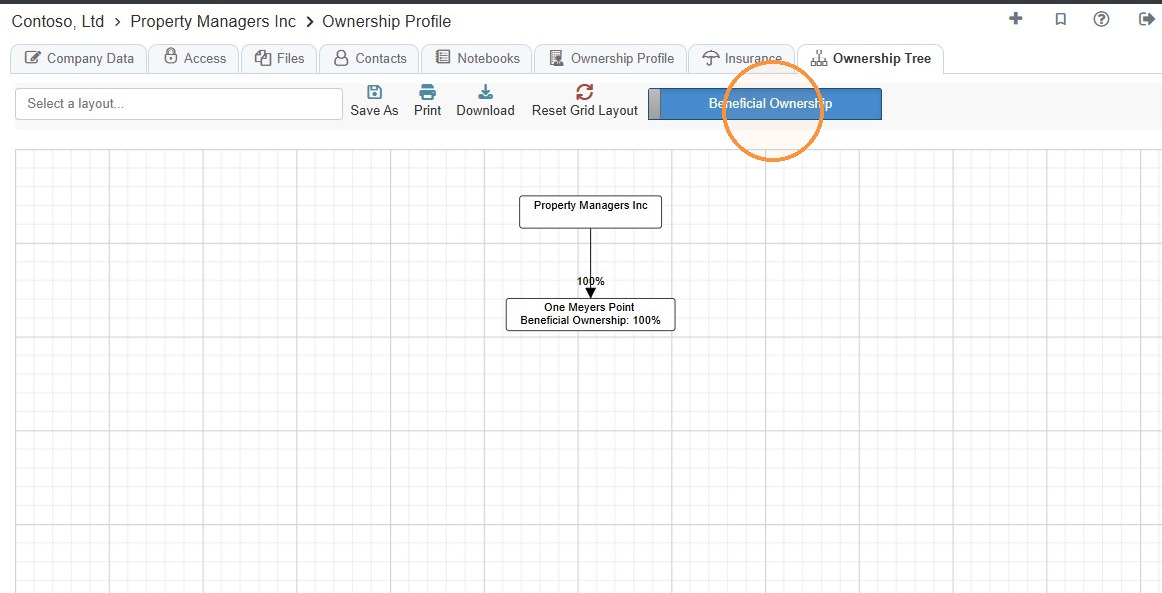
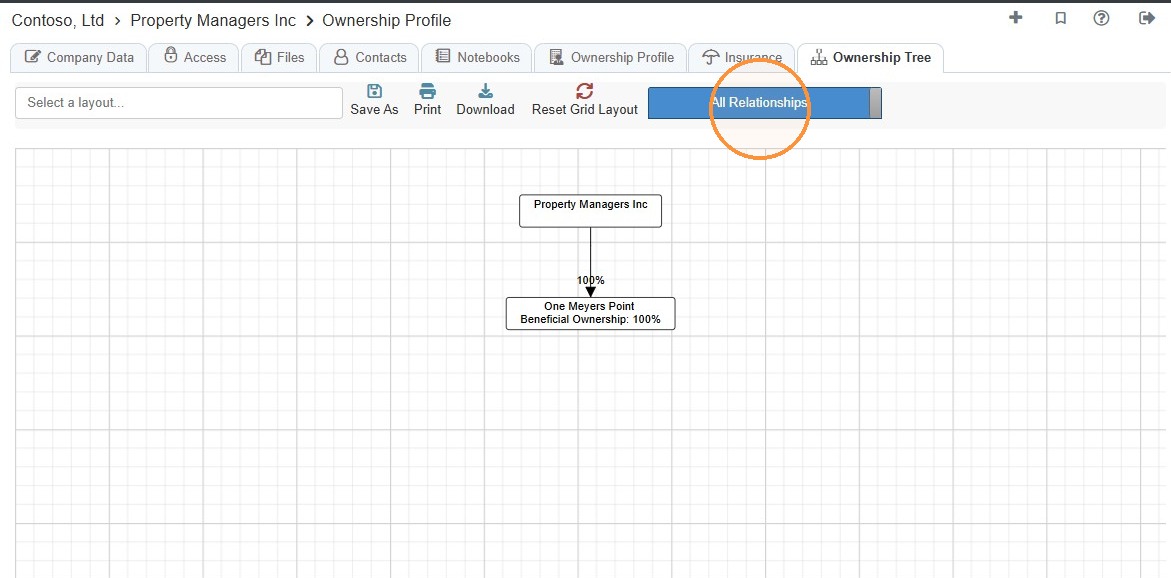
Toggle the view between Beneficial Ownership and All Relationships.
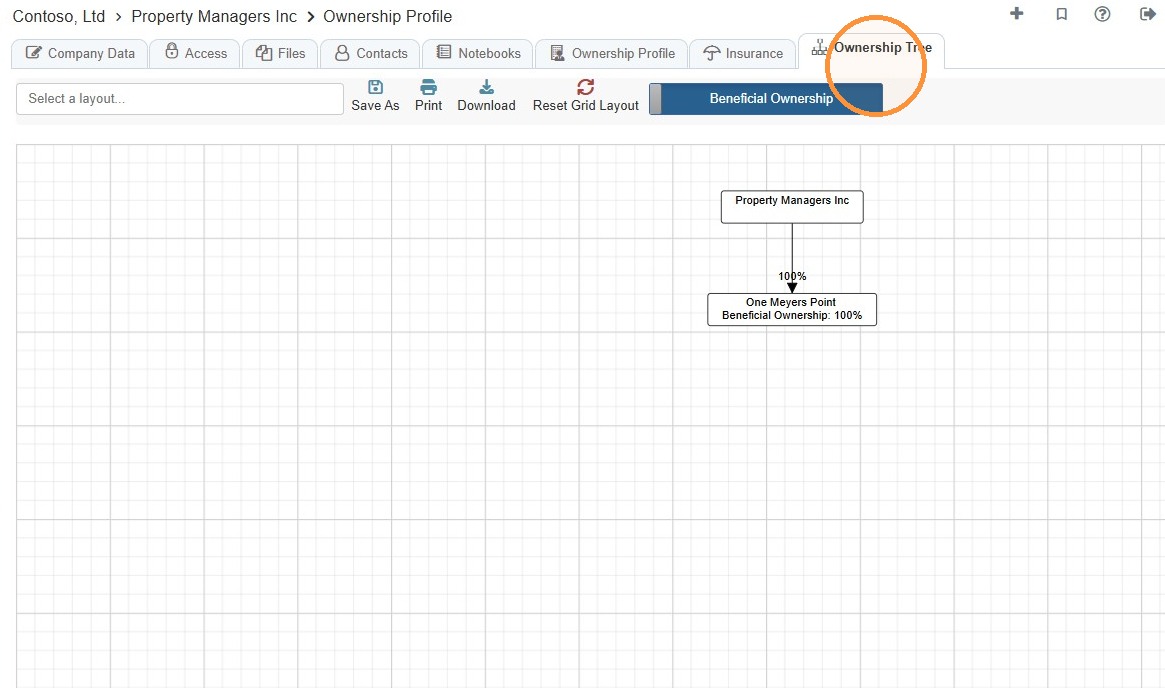
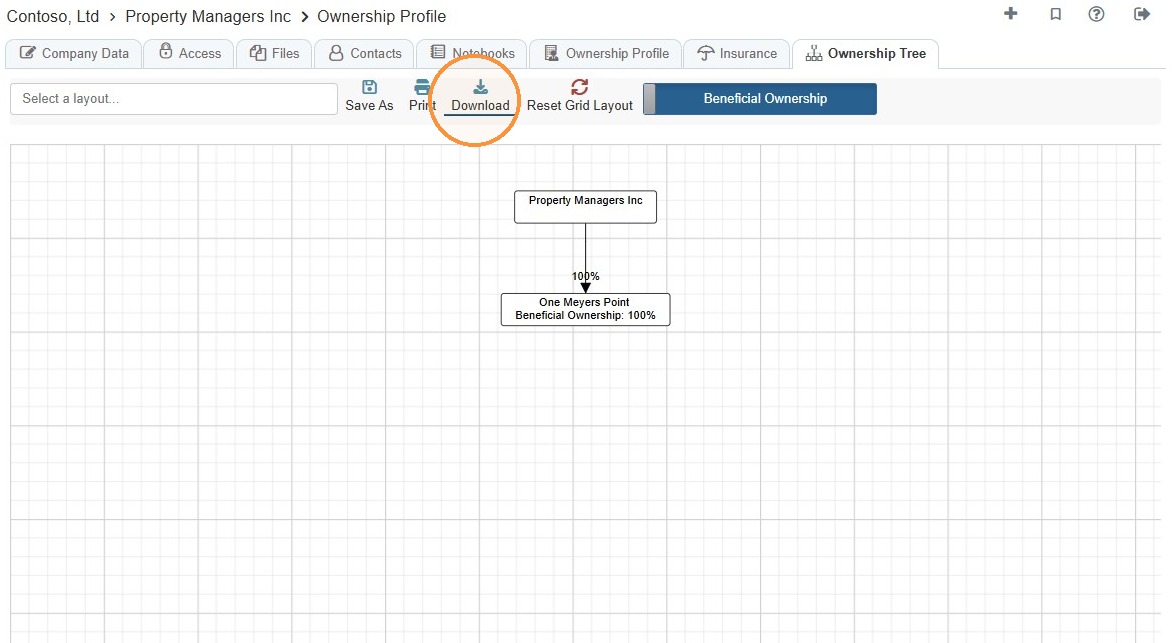
37. Select Download to export the diagram.
 Related Tutorial(s):