How to Upload Files and Extend File Access for Properties
How to Upload Files to a Property
This guide shows exactly how to upload files so they attach to the correct property record, avoiding misplaced documents and access issues. It highlights where to find the property Files tab, how to open it from the property's menu, and the simple click-or-drag upload method. Linked tutorials cover folder management, notifications, OCR, mobile uploads, sharing, and related file tasks.
How to Navigate to Property Files
Tip: Company Entity Name = Property / Landlord
Alert: The Companies, Properties, Tenants, and Contacts tabs have a Files tab that links to the specific company, property, tenant, and contact.
BEFORE YOU START, BE SURE TO NAVIGATE TO THE CORRECT FILES TAB SO THE FILE(S)/FOLDER(S) LINK TO THE CORRECT COMPANY, PROPERTY, TENANT, OR CONTACT.
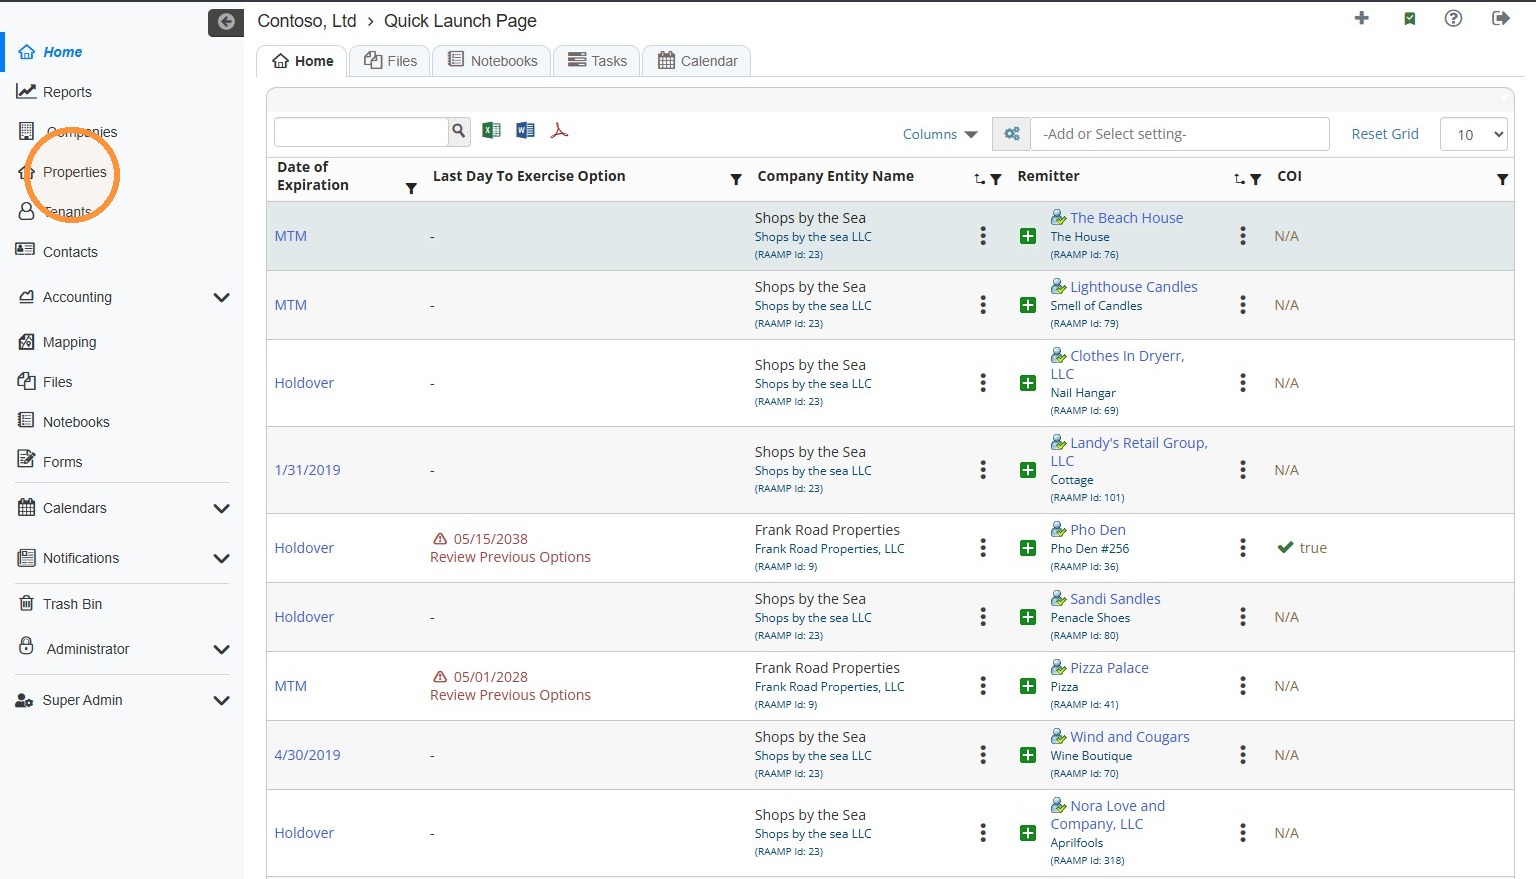
1. From the navigation menu, select Properties
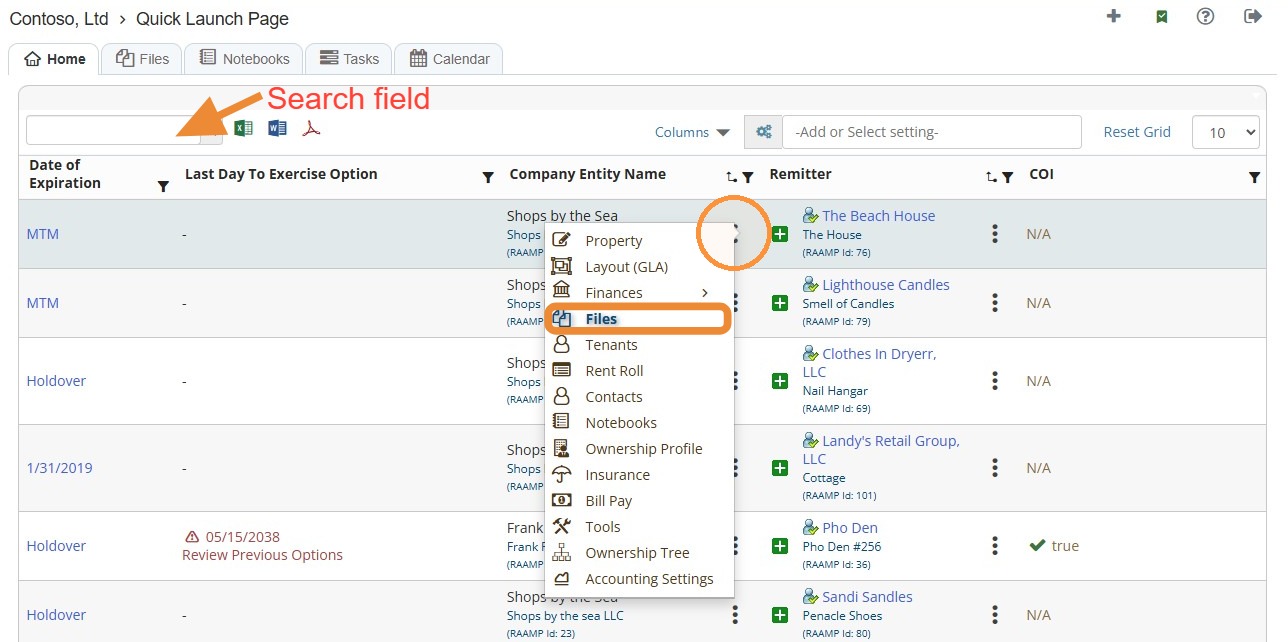
2. Locate the property > Select the property's three-dot menu > Select Files.
How to Upload Files from Properties
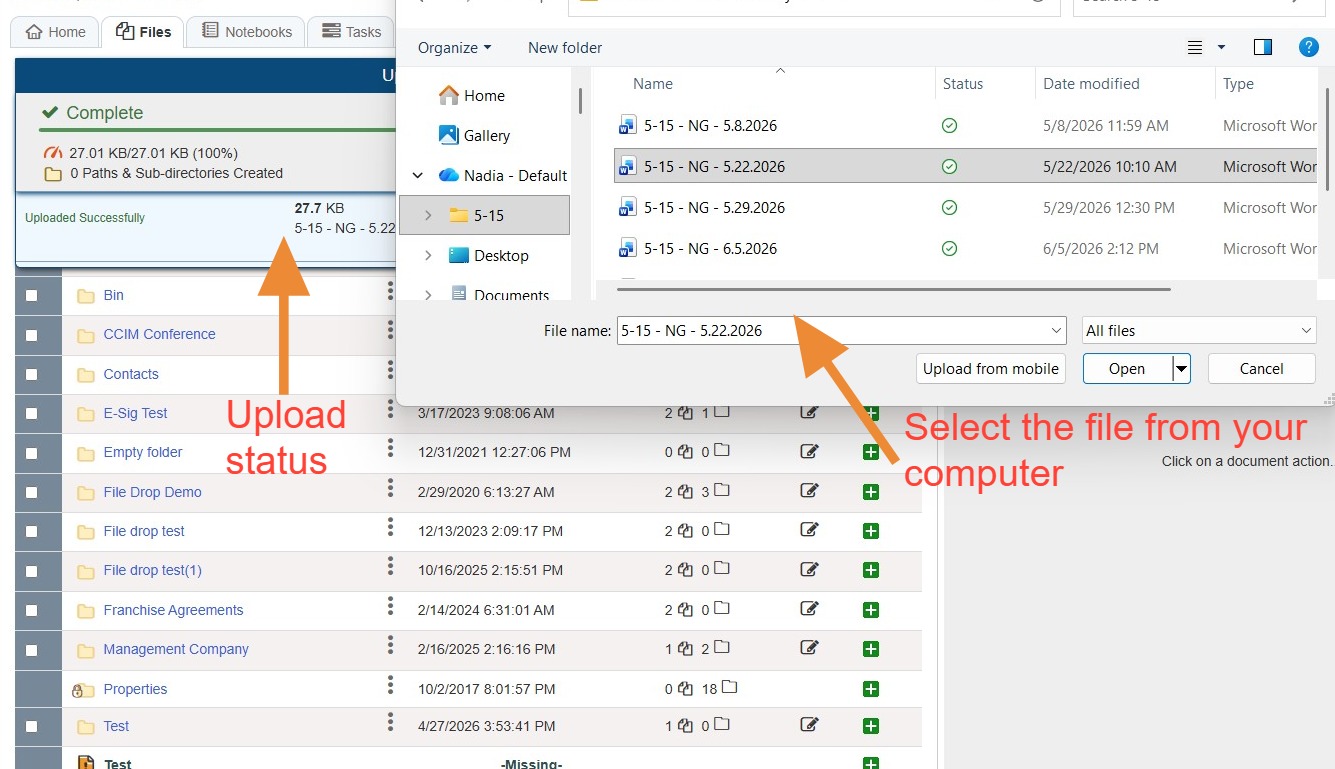
3. Select Click or Drop Files Here.
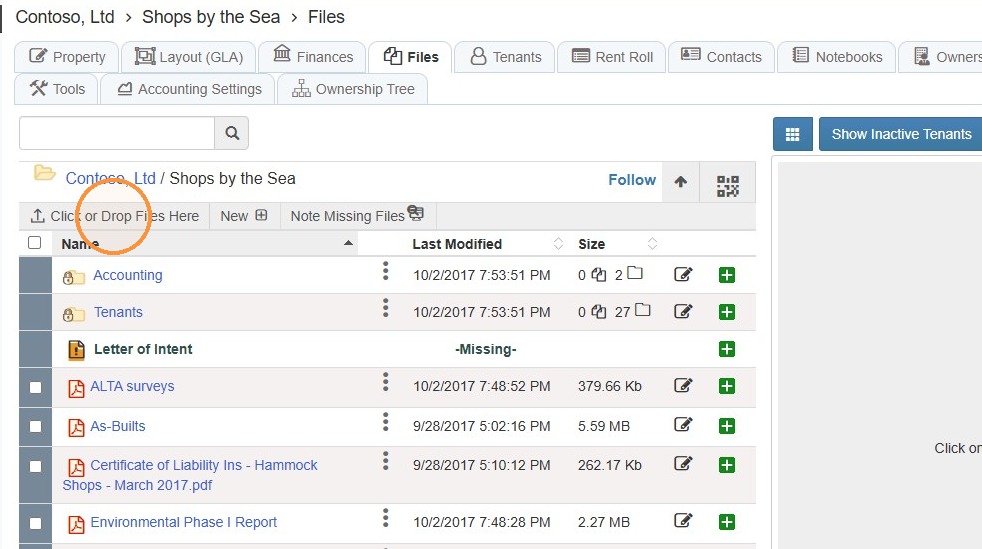
4. Locate the file on your computer > Double click the file or drag and drop the file to the files list or to a folder in the files list.
Tip: Related Tutorial(s):
How to Access, Upload, and Download Files\ How to Add, Delete, and Manage Access to File Folders\ How to Follow a Folder and Receive Notifications\ How to Note Missing Files\ How to Upload Missing Files and Supporting Files\ How to Add a Key Date to a File\ How to Share Files\ How to OCR a PDF File\ How to Upload Files from a Phone Camera/Photos